Install Affirm on SFCC
Provide your customers with flexible payment options by enabling Affirm for your Salesforce Commerce Cloud (SFCC) store.
Country Availability
 USA
USA
 Canada
Prerequisites
- Review Salesforce Commerce Cloud (SFCC).
Step 1: Import the Affirm cartridge
Note: These steps work in any IDE, though we use Cursor for this guide.
-
Install Prophet Debugger in Cursor:
- Open Cursor.
- Click the Extensions icon in the left sidebar.
- Locate the Prophet Debugger and click Install.
-
Open the cartridge folder in Cursor:
-
In GitHub, download the Affirm cartridge.
-
Unzip the file.
-
In Cursor, click File > Open Folder.
-
Select the Cartridges directory and click Open.

-
-
Create dw.json (sandbox connection config):
- In the root of the folder you opened, create a file titled
dw.jsonand include the following:{ "hostname": "your-sandbox-hostname.demandware.net", "username": "your-bm-username", "password": "your-bm-password", "code-version": "YOUR_CODE_BASE_NAME" }- Hostname: Your SFCC sandbox URL (without https://).
- Username: Your Business Manager login.
- Password: Your Business Manager login.
- Code-version: The code version name that you created or activated in Business Manager.
- Then, save the file to automatically activate the Prophet Debugger.
Add
dw.jsonto your.gitignorebecause it contains credentials. - In the root of the folder you opened, create a file titled
-
Upload/sync the cartridge:
-
In Cursor, click View > Command Palette.
-
Enter “Prophet” and select Prophet: Enable Upload. Prophet uploads your cartridge files to the sandbox.

-
(Optional) You can monitor progress in the Output panel by selecting View > Output > Prophet Debugger.
To do a full clean upload of the cartridge in your IDE’s project at any time, you can select Prophet: Clean Project/Upload All in the Command Palette.
-
-
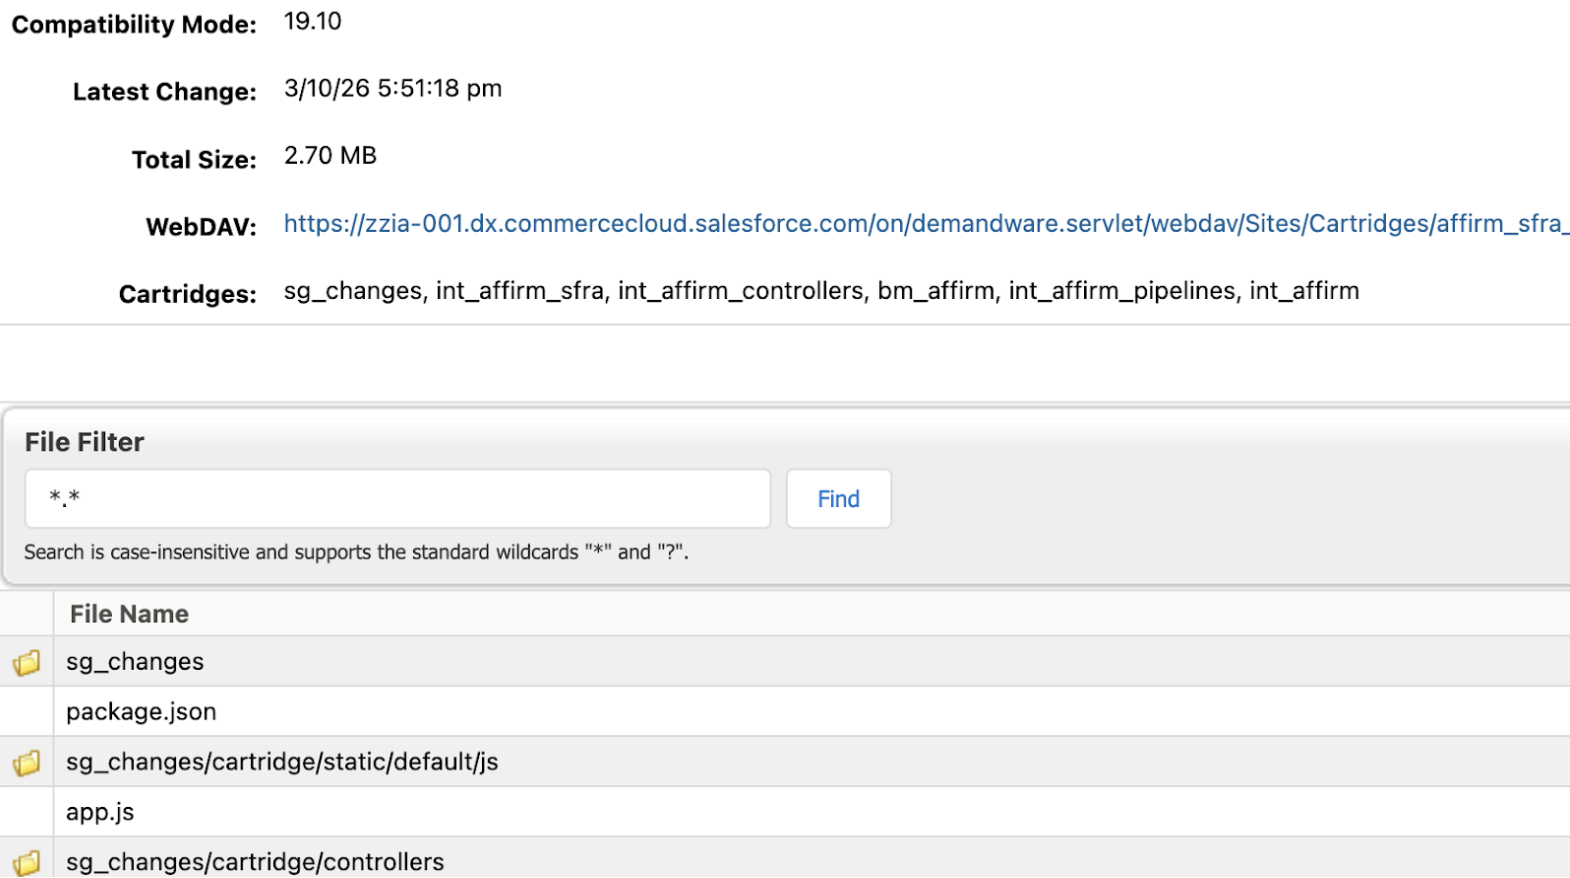
Verify cartridge is on the server:
- Log in to Business Manager.
- Go to Administration > Site Development > Code Deployment.
- Find your code version and confirm the cartridge files appear under it.
Step 2: Import the XML files
Next, you must import the XML files from the Metadata directory of the downloaded cartridge:
- In the Business Manager, go to Administration > Site Development > Site Import & Export.
- In the Import section, click Choose File and select
affirm.zipfrom the metadata folder.

- Click Upload.
- After the upload completes, select
instance/affirm.zipfrom the archive list. - Click Import.

NoteConfigure your library ID in the library.xml file in the metadata folder. Currently, 'RefArchSharedLibrary' is the default.
- For Pipelines and Controllers, put 'SiteGenesisSharedLibrary'
- For SFRA, put 'RefArchSharedLibrary'
- In Business Manager, go to Merchant Tools > Site Preferences > Custom Preferences.
- Verify that the Site Preferences group was created with:
- ID =
AFFIRM_PAYMENT - Name =
Affirm
- ID =
- Verify that the Payment Method was created with an ID of
Affirmand a name ofAffirm. Then, enable the Affirm payment method. - (Optional) To add an image or text for your payment method, you can update the content asset
affirm-payment-method.

NoteSFCC has required AppExchange partners to remove any dynamically loaded Javascript files from content delivery networks (CDNs). As such,
Affirm.js, which is a browser-side Javascript library served via CDN, is replaced by a static copy. To preventAffirm.jsfrom going out-of-date and to ensure thatAffirm.jsreceives critical updates, we recommend using the CDN route to embed the script into the storefront pages.
Step 3: Enable the Affirm payment processor
-
In the Business Manager, go to Merchant Tools > Ordering > Payment Processors.
-
Click NEW.
-
Verify that the Site Preferences group was created with:
- ID =
AFFIRM_PAYMENT - Name =
Affirm
- ID =
-
Verify that the Site Preferences Group exists with:
- ID =
AFFIRM_PAYMENT - Name =
Affirm
- ID =
-
Go to Merchant Tools > Ordering > Payment Methods to verify a payment method exists with:
- ID =
Affirm - Name =
Affirm
- ID =
-
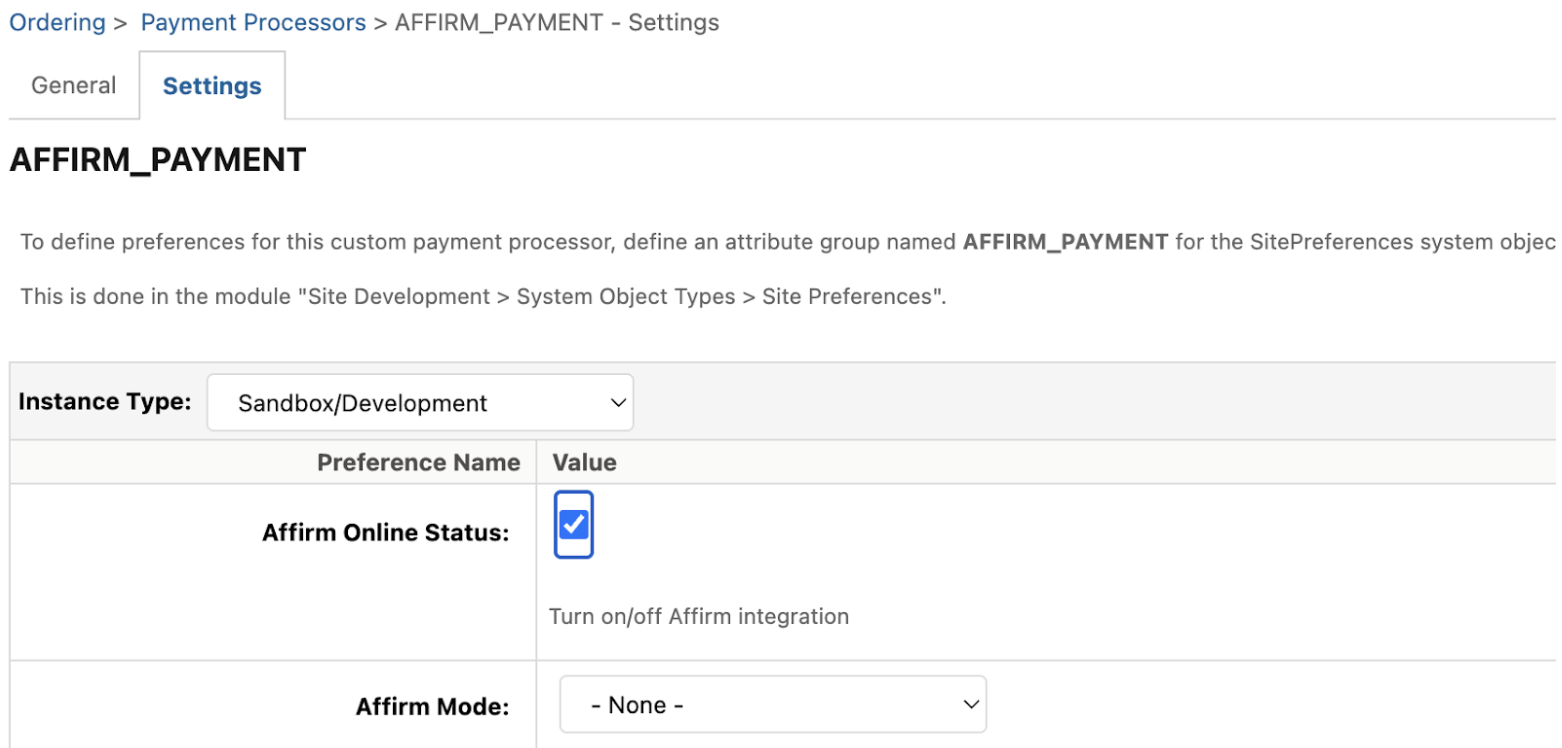
Click the new
AFFIRM_PAYMENTprocessor > Settings. -
Select the Affirm Online Status checkbox to enable it.
-
(Optional) You can add an image or text for the payment method by updating the asset
affirm-payment-method.
Step 4: Custom code
You must update your site's template files to add promotional messaging and optimize checkout functionalities. We've included detailed instructions for these custom enhancements:
Additionally, click Credit/Debit Cards to verify that Visa is enabled.
Step 5: Configure the Virtual Card for processing
- Sign in to Business Manager and go to Merchant Tools > Site Preferences > Custom Site Preferences > Affirm.
- Set the Affirm Virtual Card Integration to Enabled.
- Add the VCN payment instrument with last part of hook name (e.g.,
BASIC_CREDIT).

(Optional) Integrate with other payment processers
Our virtual card integration assumes you're processing a debit card using your payment processors. By default, it uses the BASIC_CREDIT processor. If you need to integrate Affirm with other payment processors, you can follow these steps:
- Set site preference attribute VCN Payment Instrument with the last part of hook name (e.g.,
CYBERSOURCE_CREDIT_CARD). - Register the new hook handler for extension point
dw.int_affirm.payment_instrument.%PI%, where %PI% is payment instrument value you've set in the previous step. (e.g.,dw.int_affirm.payment_instrument.CYBERSOURCE_CREDIT_CARD). By default it isdw.int_affirm.payment_instrument.BASIC_CREDITdefined inside/cartridge/scripts/hooks.json. - Implement a method "add" of this hook handler, which takes basket as the parameter.
- The method returns a newly created payment instrument.
- Credit card information can be extracted from
HttpParametersMapand a reference implementation can be found incartridge/scripts/payment/instrument/BASIC_CREDIT.js). - Lastly, check
Credit/Debit Cardsto verify that Visa Card is enabled.
What’s next?
Updated 4 months ago