Install and configure Affirm
This guide walks you through configuring Affirm at checkout in Miva.
Install Affirm on Miva
Download the latest version of the Affirm module from the Miva app store.
Install the module
1. Unzip the Affirm module file.
2. Sign in to the Miva Merchant Admin page.
3. On the left-side menu, click Modules.
4. Click the large (+) button on the right.
5. Click Upload and Choose File.
6. Select affirm.mvc from the unzipped module files and click Upload.
7. In the Add Module window, click the + Add button.
8. On the main Miva Merchant Admin screen, choose Payment.
9. In the Payment Settings window, click the Add/Remove Modules tab.
10. Verify that the Available Modules group displays Affirm module (Buy with Affirm).
11. In the Affirm module (Buy with Affirm) window, click Install.
To use the Affirm as a payment method, you must use an OPAY screen with the Global Head item included and assigned to the checkout page, which is the default setup. The snippet, mvt:item name="affirm" />, is automatically inserted into the Global Head template. To use Affirm banners and promotional messaging, include the Global Head item and assign it to the BASK, PROD and SFNT pages, which is the default setup.
Configure Affirm
1. Sign in to your Miva Merchant admin page.
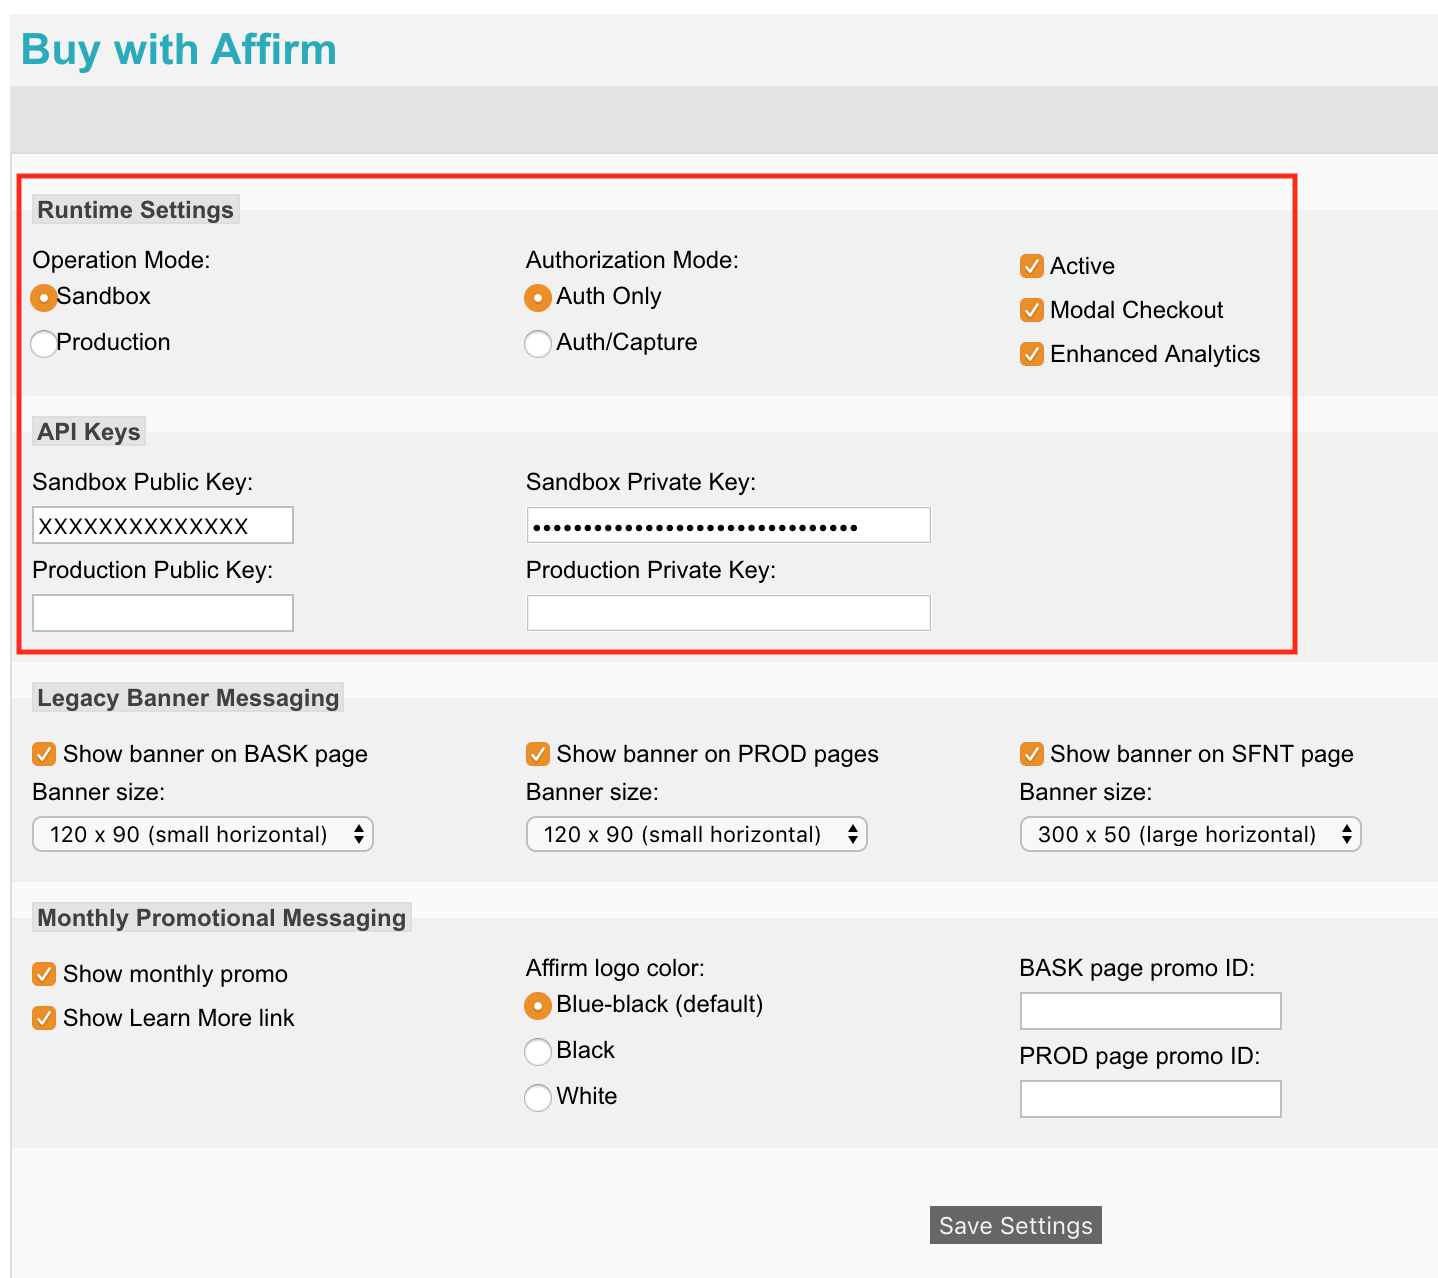
2. Go to Menu > Payment and click on the Buy with Affirm tab.
3. In the Runtime Settings section, set Operation Mode to Sandbox.
4. If your checkout process automatically captures the charge, set Authorization Mode to Auth/Capture. If you would like to Manually Capture, select Auth Only.
5. Verify that Active checkbox is checked.
6. Check Modal Checkout if you would like your customers to go through the Affirm loan application flow in a modal while remaining on your site. Leave unchecked for to redirect them to Affirm during the application flow.
7. See Step 4 (Enable Affirm Enhanced Analytics) for details on the Enhanced Analytics checkbox.
8. Enter the Sandbox Public Key and Sandbox Private Key you retrieved from the Affirm sandbox Merchant Portal.
9. Click Save Settings

Saving your settingsOnce you have configured your settings, select the "Save Settings" button first, followed by the "Update" button to ensure that your selections have been saved accordingly.
Updated 17 days ago