New integrations
1. Install and configure the Affirm WooCommerce extension
- Download the latest package release zip file.
- Visit WooCommerce for instructions on how to install and configure Affirm
When configuring Affirm, ensure that Affirm Sandbox is checked for development and testing. Return here to complete the integration.
2. Update product attribute to be leasable or non leasable
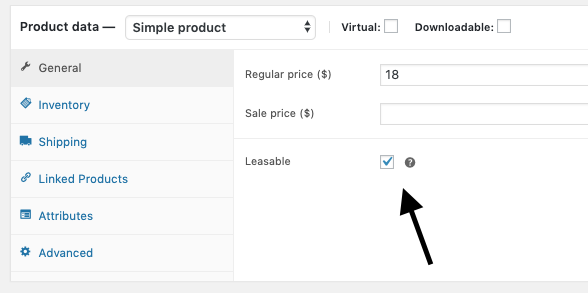
Each product will have an additional attribute to identify if the product is leasable, by default if leasable is not checked product will be non leasable.
To mark a product as leasable navigate to WordPress Admin -> Product -> All Products -> select product -> General and select the Leasable checkbox.
For a bulk update:
1. Go to WordPress Admin -> Product -> All Products
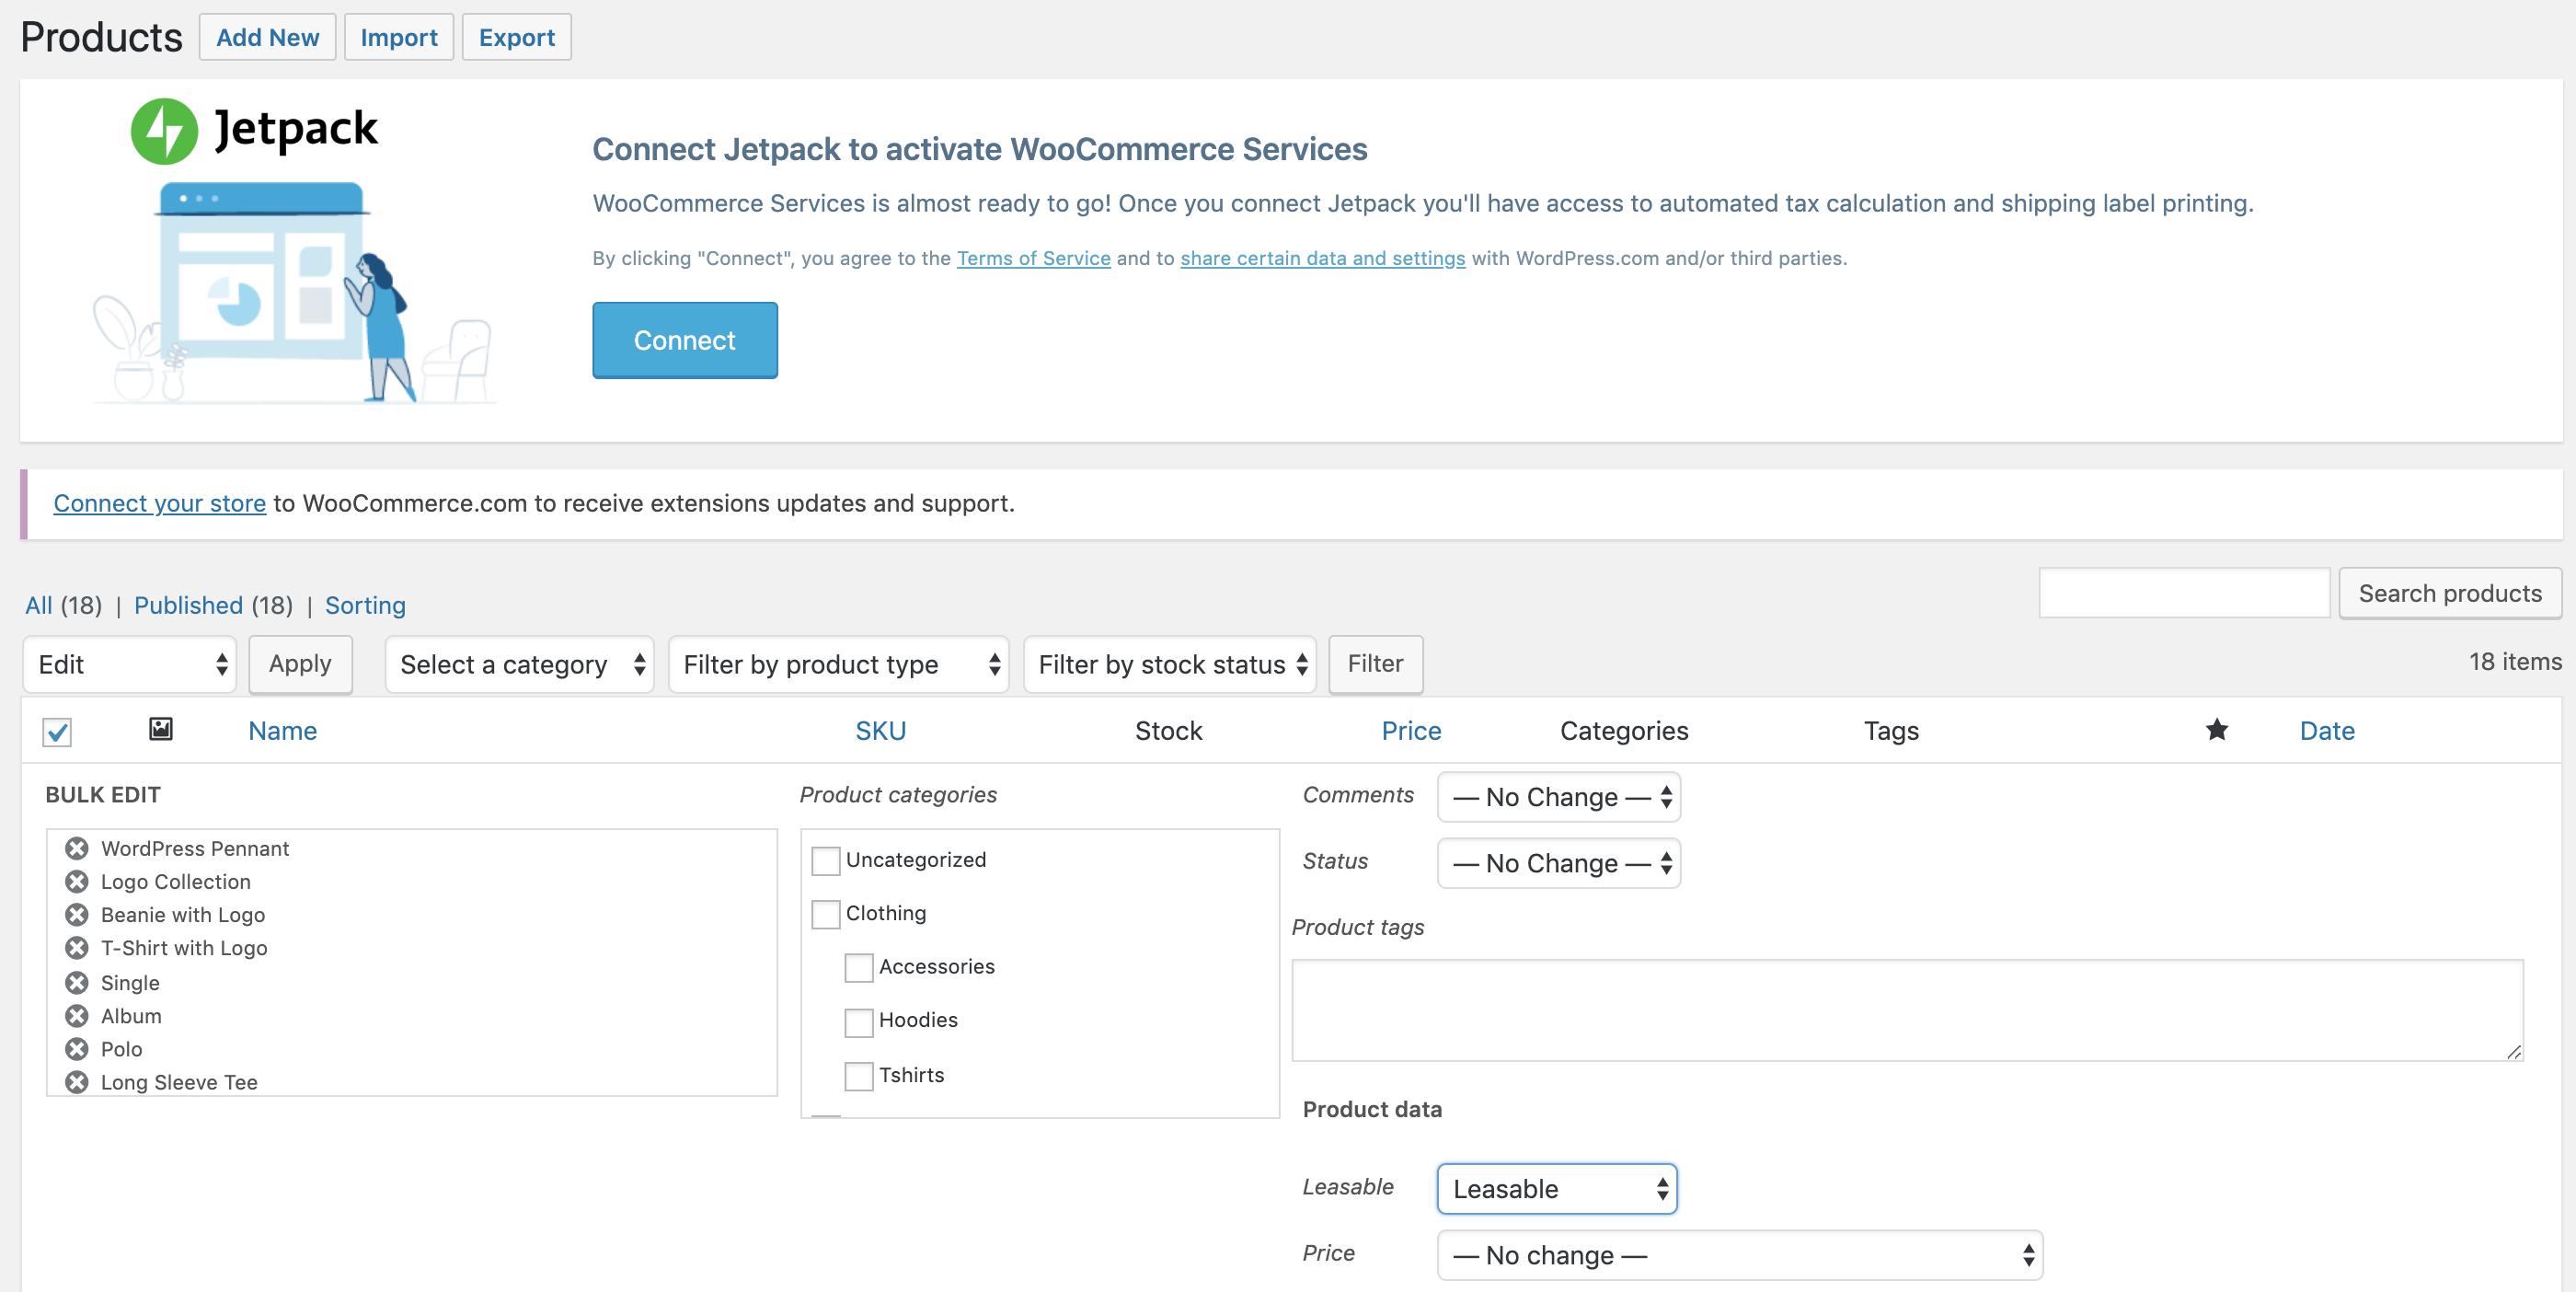
2. Check all of the items you want to be leasable
3. Select edit
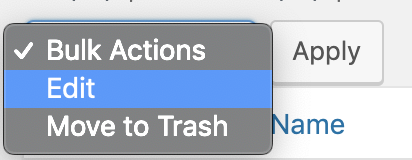
4. Click Apply.
5. Select Leasable from the Leasable field.
6. Click Update.
3. Review your order management functions
Processing orders (authorize, void, refund, and partial refund) in WooCommerce updates the order status in the Affirm dashboard. While you can process orders in the dashboard, we strongly recommend using WooCommerce to keep order status synced with Affirm. For more information on processing orders in WooCommerce, refer to their documentation.
Under WooCommerce > Orders, every order paid with Affirm Connect will show payment via Affirm if loan was issued by Affirm or a lease to own partner if loan was not issued by Affirm. Payments made with Affirm will have a transaction number with link to the Affirm merchant portal at the top. Payments made with lease to own partners will have a transaction number for reference ONLY. You can also prompt Affirm to issue refunds from the order view.

Katapult payment details

Snap payment details
4. Test your integration
After completing your integration, do a thorough testing of both your front-end and order management functions in our sandbox to ensure that everything works as expected.
Updated 7 days ago
