Miva - Add Affirm promotional messaging
Bring awareness to Affirm's flexible payment options at every phase in the shopping journey—increasing conversion and average order value for your business.
Software updatesMiva Merchant software updates may replace page templates, including BASK, PROD and SFNT templates. You'll need to manually copy the Affirm MVT items to their proper locations in each of the affected templates or Affirm promotional messaging won't display.
Configure Affirm promotional messaging
1. Add monthly payment messaging by inserting <mvt:item name="affirm" param="showmonthly" /> near the price display in the BASK/Basket Contents template and PROD/Product Display Layout template.
Messaging tagsMonthly payment messaging tags have the class
affirm-as-low-asfor styling with CSS.
2. On the Miva Merchant admin main page, go to Menu > Payment. and click on the Buy with Affirm tab.
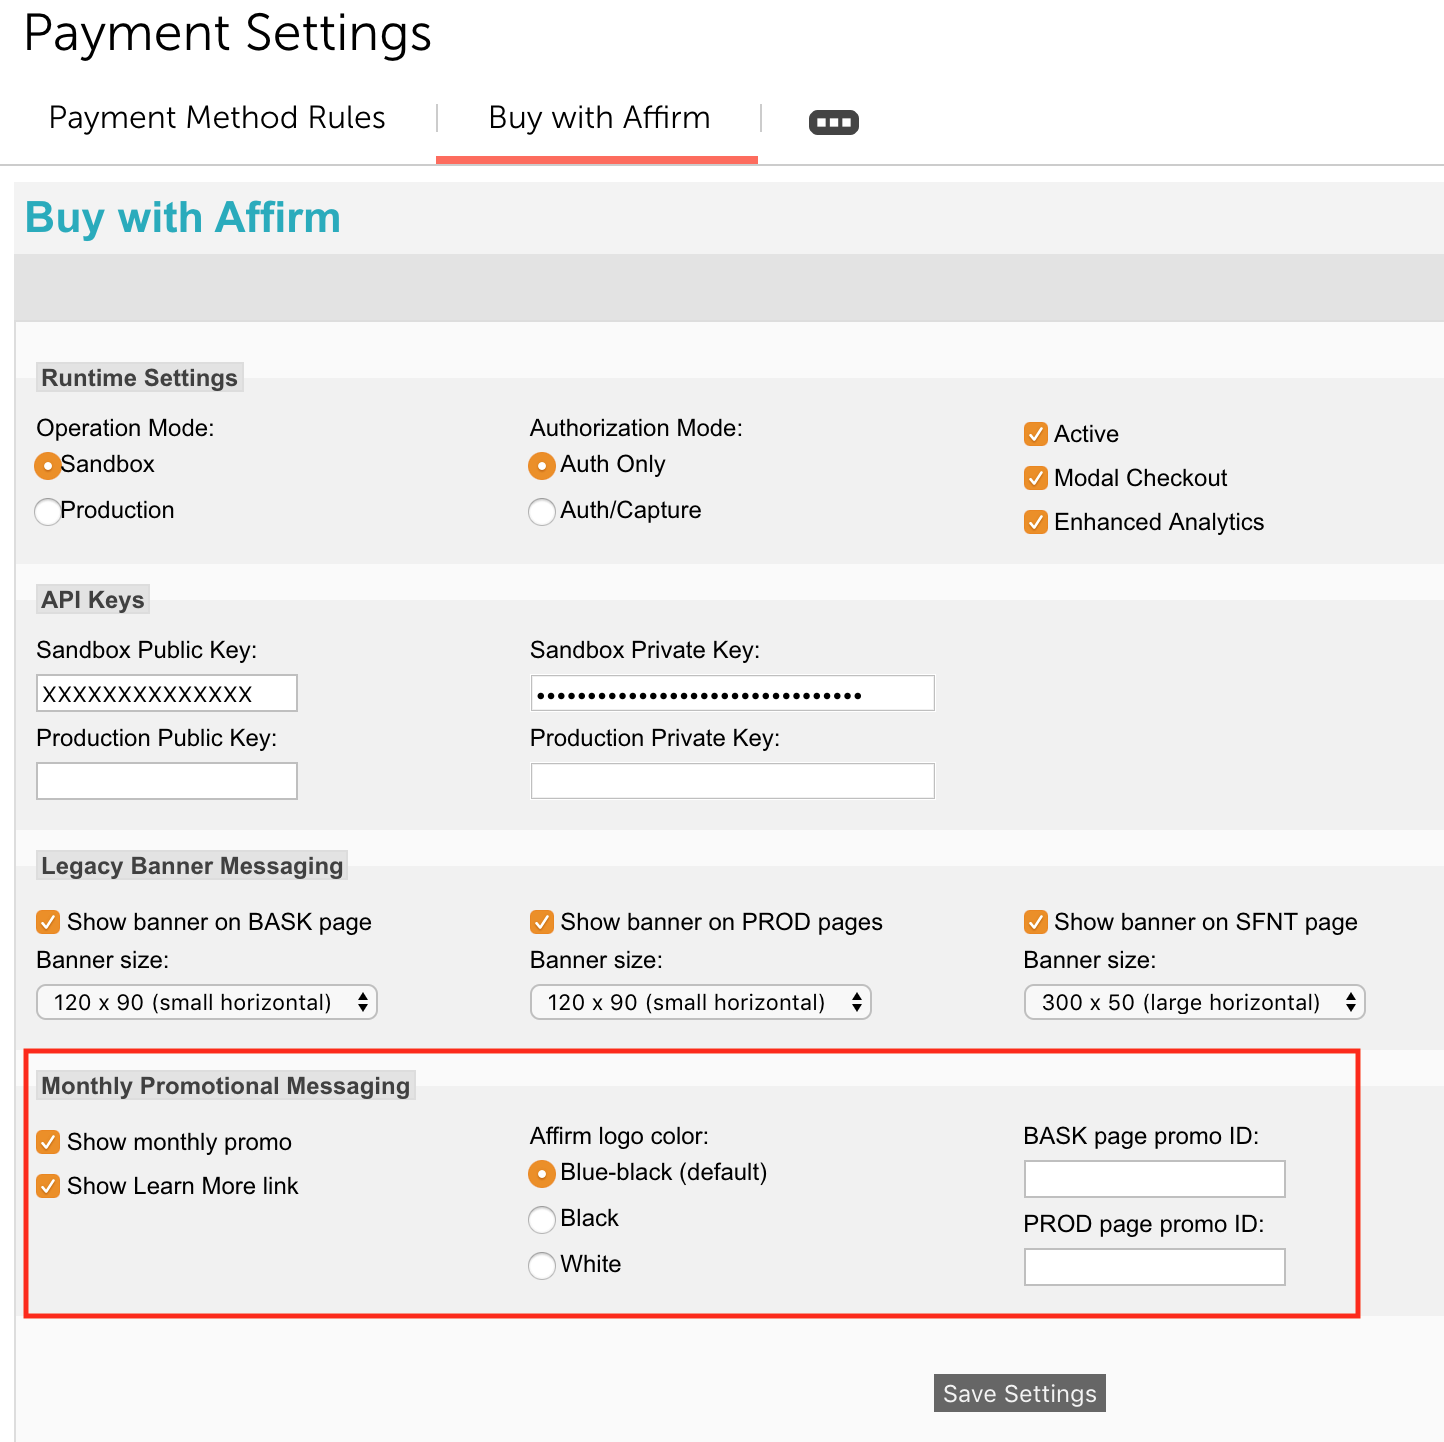
3. In the Monthly Promotional Messaging section, check the Show monthly promo checkbox.
4. Uncheck the Show Learn More Link checkbox to remove the Learn More link from messaging.
5. Select Blue-black (default) for the default Affirm logo, Black for an all black Affirm logo or White for an all-white logo.
6. Leave BASK page promo ID and a PROD page promo ID blank unless instructed to by Affirm during your setup.
7. Click Save Settings.

Optional: Add promotional banners
Use promotional banners on your site or in your app to bring awareness to Affirm's payment options while your customers browse. Use the following steps to add promotional banners:
1. In admin panel, go to Menu > Payment and click on the Buy with Affirm tab.
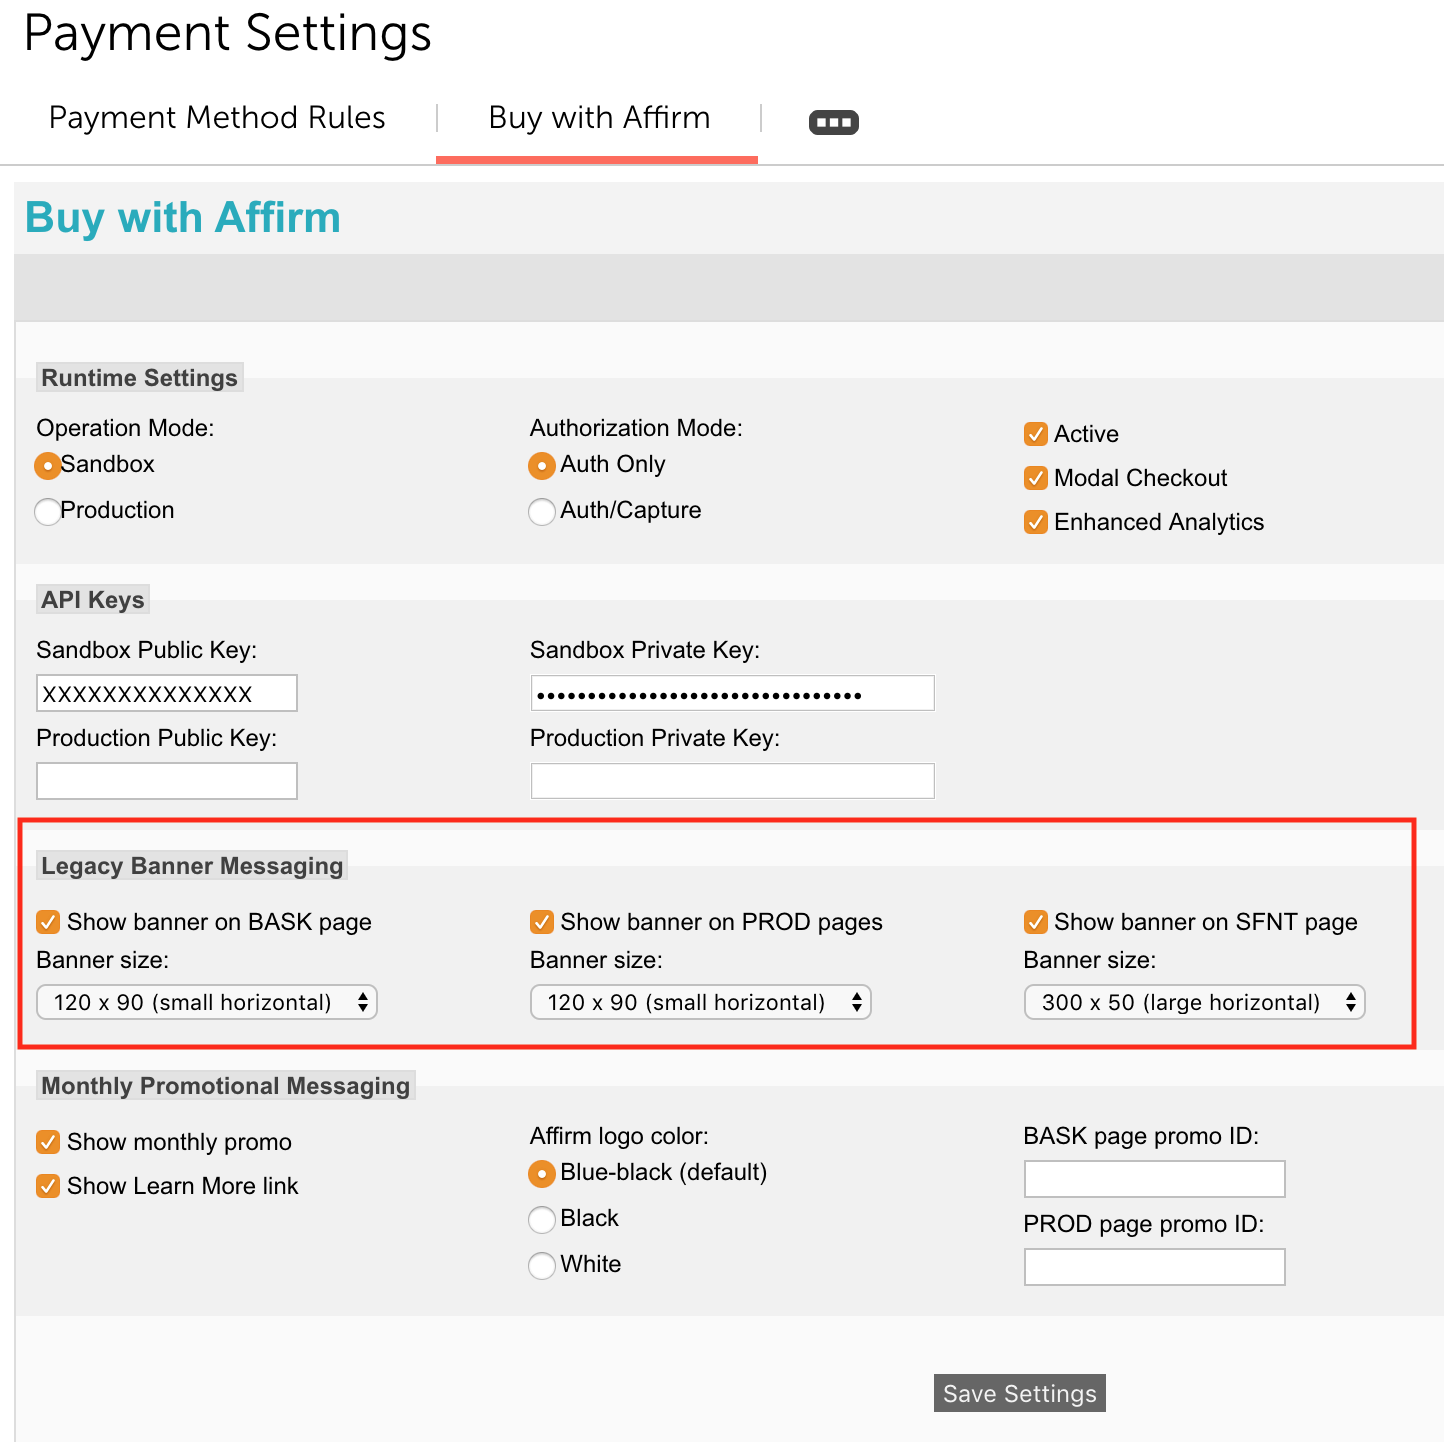
2. In the Banner Messaging section, check Show banner on BASK page (cart page), Show banner on PROD pages (product pages), and Show banner on SFNT page (home page) to show promotional banners on those pages.
3. For each page where you want a banner displayed, select the desired Banner size.
4. Insert <mvt:item name="affirm" param="showpromo" /> on the BASK/Basket Contents template, PROD/Product Display Layout template, SFNT/Home Page template as needed.
5. Click Save Settings.

Optional: Enable Affirm Enhanced Analytics
Affirm's Enhanced Analytics can help you gain new insights into your customers' shopping journeys and preferences. Enhanced Analytics also allows you to easily A/B test new promotional messaging and financing programs to ensure that their sites are fully optimized for both cost and conversion rates. Use the following steps to enable Enhanced Analytics:
1. From the admin panel, go to Menu > Payment and click the Buy with Affirm tab.
2. Confirm the Enhanced Analytics checkbox is checked.
3. Insert <mvt:item name="affirm" param="confirm" /> into the INVC (Invoice) page template.
Updated 10 days ago