Magento 1 Connect
Overview
This guide describes how to integrate Affirm Connect into your Magento eCommerce platform so you can provide Affirm as a payment option to your customers. After integrating Affirm, your Magento site will:
- Offer Affirm as payment option on the checkout page
- Process Affirm charges in your order management system
- Display Affirm promotional messaging
Before you begin
Before beginning integration, you should review:
- Magento release notes
- The transaction flow when buying with Affirm
- Your current checkout process to understand how Affirm will affect operations and customer experience
- Settlement reports to know how to reconcile transactions with the deposits into your bank account
Sandbox development
You should have received an email inviting you to create an Affirm account. Click here for information about accessing your account.
Develop and test the Affirm integration in your development environment connected to our sandbox. To use our sandbox, retrieve your sandbox API keys at https://sandbox.affirm.com/dashboard/#/apikeys for use during integration.
After development and testing, you'll need to update your integration to use your live API keys, which you can find at https://affirm.com/dashboard/#/apikeys.
- Install the Magento extension
Important
- Install the extension in your sandbox or staging environment before pushing it live
- Keep a copy of your Magento store and database to ensure you can revert to the version before the installing the app
- You may need to re-index all the produce and category tables after extension upgrade
Install using Magento Connect Manager
1. In your Magento admin panel, go to System > Magento Connect > Magento Connect Manager.
2. Under Manage Existing Extensions, select Uninstall under Actions for Affirm_Affirm package name.
3. Click Commit Changes.
4. Download the latest package release zip file.
5. In your Magento admin panel, go to System > Magento Connect > Magento Connect Manager.
6. Click Choose File and select the downloaded package release file.
7. Click Upload
### Upgrade using Magento Connect Manager
1. In your Magento admin panel, go to System > Magento Connect > Magento Connect Manager.
2. Under Manage Existing Extensions, select Uninstall under Actions for Affirm_Affirm package name.
3. Click Commit Changes.
4. Download the latest package release from GitHub
*Please contact your Affirm representative for access.
5. In your Magento admin panel, go to System > Magento Connect > Magento Connect Manager.
6. Click Choose File and select the downloaded package release file.
7. Click Upload.
Known installation issues
You may encounter Column not found SQL errors during installation. Ensure that you have the correct permissions to update the core Magento database tables. Because the installation process updates many of the database tables, you'll need to re-index the flat category table to resolve any SQL errors that occur during installation by doing the following:
1. Go to System > Configuration > Catalog pane > Frontend.
2. Set Use Flat Catalog Category to Yes.
3. Click Save Config.
4. Go to System > Configuration > Index Management.
5. Click Reindex Data for Category Flat Data.
You may need to run the re-index command via shell:
php indexer.php --reindexall- Configure Affirm as a payment method
After installing the extension, enable Affirm as a payment method by updating Magento's configurations:
1. Sign in to your Magento admin portal.
2. Go to System > Configuration > Sales > Payment Methods > Affirm.
3. Set Enabled to Yes.
4. Keep Mode set to Sandbox (for development and testing)
5. Enter the Public API Key and Secret Key (private key) you retrieved from the Affirm sandbox merchant dashboard.
6. If your checkout process automatically captures the charge, set Payment Action to Authorize and Capture.
7. Enter the dollar amount values for Minimum Order Total and Maximum Order Total that displays Affirm as a payment option to your customers when checking out (optional).
8. If you want to change the order of displaying Affirm as a payment option during checkout, enter a Sort Order value greater than 0.
9. If you want to disable Affirm when a backordered item is in the cart, set Disable for backordered items to Yes.
10. If you want to display Affirm as text instead of a logo during checkout, set Plain Text Appearance to Yes.
11. If you want to customize the default Affirm logo and subtext (Affirm must approve), you can add in-line HTML to Affirm Payment Method HTML (requires Plan Text Appearance set to No)
12. Set Enabled Checkout Button to Yes to display the Affirm button on the cart page (you can update the Affirm button URL in the Checkout Button Code).
13. Keep Checkout Flow Type set to Checkout flow using Redirect to send customers to an affirm.com page for checkout. Set Checkout Flow Type to Checkout flow using Modal to use a modal for checkout.
14. Keep checkout uses xhr set to Auto Detect.
15. Keep Create orders after Affirm confirmation set to Yes (No creates orders as soon as the user begins the Affirm checkout).
16. Enter the dollar amount values for Minimum Order Total to enable connect if customer is declined from Affirm.

If these changes do not take effect immediately:
1. In the Magento admin panel, go to System > Cache Management.
2. Click Flush Magento Cache.
3. Sign out.
4. Sign back in to reset permissions.
- Add Affirm promotional messaging
Affirm promotional messaging components---monthly payment messaging and educational modals---show customers how they can use Affirm to finance their purchases. Properly placed promotional messaging helps drive increased AOV and conversion. Add Affirm promotional messaging to your product, category, and cart pages.
Add promotional banners
To add Affirm banner images to various pages on your site:
1. In the Magento admin panel, go to System > Configuration > Affirm Promos
2. In General Settings, enter the Affirm Promo Key
3. Set Enabled to Yes
4. For each page where you want a banner displayed, set Display to Yes and Promo Size and Promo Position to the values of your choice

Add promotional messaging
1. In the Magento admin panel, go to System > Configuration > Affirm Promos
2. In the As Low As Functionality settings, set the following to Yes to display promotional messaging on those pages:
- Enable for Product PDP (product pages)
- Enable For Category PLP (category pages)
- Enable for Shopping Cart (cart page)
3. Enter an MPP min amount value to set the minimum threshold dollar amount that will display monthly payment messaging (e.g., setting the MPP min amount to 100 will only display monthly payment messaging for purchases above $100)
4. You can optionally enter a Promo ID value in Data Promo ID (contact the Affirm Client Success team for more information about Promo ID's)

Use Multiple Financing Programs
Multiple Financing Programs (MFPs) allow you to offer custom financing programs to your customers based on rules you define in Magento. To use MFPs in Magento, you must be running version 3.3.0 or higher of the extension. To learn more about MFPs and how to set them up in Magento, contact your Client Success Manager.
- Add the Confirmation Page function
Confirmation Page Analytics is available in version 3.5.6 and up of the Magento extension. To enable confirmation page analytics:
1. Go to System > Configuration > Affirm Promos.
2. In the Enhanced Analytics section, set Enable Affirm pixel to Yes .
3. Set Yes to page options listed under Enable Affirm pixel for following pages to enable pixels. on respective pages.

- Review your order management functions
Processing orders (authorize, void, invoice, or credit memo) in Magento updates the order status in the Affirm dashboard. While you can process orders in the dashboard, we strongly recommend using Magento to keep order status synced with Affirm. Click here for more information.
For orders with loans originating through Affirm Connect partners (ie loans not issued by Affirm) payment information will be updated to indicate who the loan was originated by.

For orders made through Affirm Connect partners orders will be updated to not include tax.

- Update Products
Each product will have an additional attribute to identify if the product is leasable, by default if leasable all products are non-leasable.
To mark a product as leasable navigate to Magento Admin -> Catalog -> Manage Product -> select product -> General and select leasable.

- Test your integration
How to test the Affirm flow
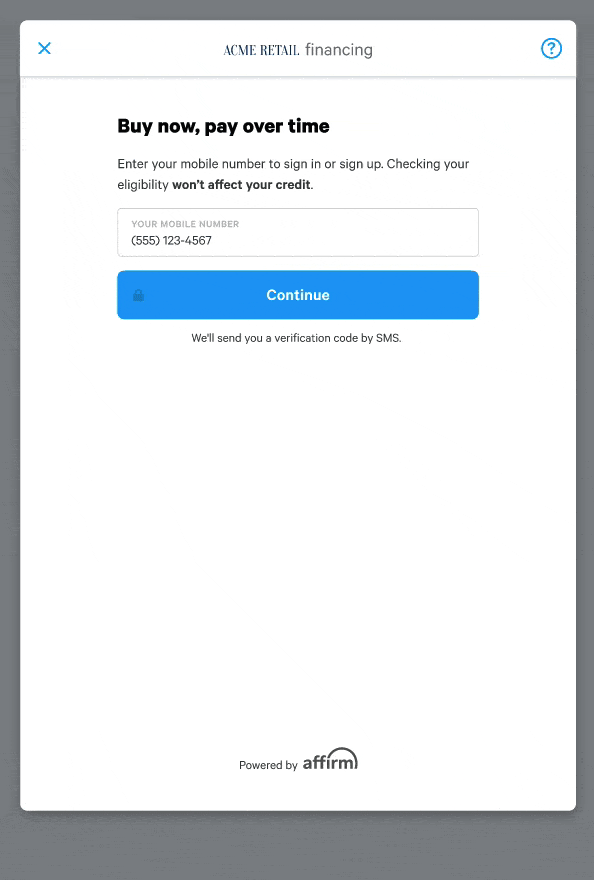
When testing the checkout process, enter 1234 as your verification code as we don't send text messages from our sandbox.
While developing and testing in our sandbox, step through the checkout process in your browser to trigger the HTTP request with the checkout token.
Follow these steps to receive the checkout token:
- Initiate checkout to access the Affirm account creation screen.
- If you have an existing account, click Sign In.
- If you don't have an existing account, create one with the following:
- Any first and last name
- An email address with a valid format
- A valid US cell phone number (you do not need access to this number) that you will use in all subsequent checkout attempts
- A birth date older than 18 years old
- Any four digits
- Enter **1234** for the verification code and click VERIFY CODE.
- Complete checkout flow and click CONFIRM LOAN.
- Click next to confirm Loan Schedule.
How to test the Katapult flow
- Initiate checkout to access the Affirm account creation screen.
- If you have an existing account, click Sign In.
- If you don't have an existing account, create one with the following:
- Any first and last name
- An email address with a valid format
- A birth date: Use the date 12/01/1981 to trigger an Affirm decline and handoff to Katapult's pre-approval. Note that another other birthdate above the age of 18 will trigger an Affirm approval.
- Social security : Any four digits
- Enter **1234** for the verification code and click VERIFY CODE.
- Select Check out with Katapult.
- Click next to confirm Loan Schedule.
- Katapult Payment information:
- Card Number: 4111 1111 1111 1111
- Expiration: future date
- CVV: 3 digit number
Important
- To successfully test Katapult flow in Affirm's sandbox environment, enter a new identity (name, phone number, address, etc.) every time you go through the checkout flow.
- If you get declined once, you may continue to get Katapult declined due to browser cookie caching. We recommend clearing your browser cookies / cache (or use Incognito browser window) before each test.
How to test the Snap flow
- Enter any valid US Number.
- Use 1234 for the PIN.
- Enter a name and email address.
- Use 07-07-1977 as the birth date.
- Enter any 4 digits for the SSN.
- Enter an income less than $100,000.
- Enter any payment dates.
- Enter any 9 digits for the routing number, except do not use 0 as the final number.
- Enter any 6-10 digits for the bank account number.
- Review the lease and proceed to the order confirmation page.

- Deploy to production
Coordinate testing with Affirm
Before deploying the Affirm integration to your production site, Affirm will need to test it in your development or staging environment connected to our live environment. Contact your Integration Consultant or [email protected] to coordinate this test.
Connect to the live Affirm environment
1. Retrieve your live API keys at https://affirm.com/dashboard/#/apikeys
2. In the Magento admin panel, go to System > Configuration > Sales > Payment Methods > Affirm
3. Set Mode to Production
4. Enter the Public API Key and Secret Key (private key) you just retrieved from the Affirm merchant dashboard
Launch to production
After you've connected to our live environment and we've tested your integration, you're ready to deploy to your production environment and offer Affirm as a payment option to your customers.
FAQs
How do I update my merchant or brand name in the Affirm checkout flow if multiple sites operate under same Affirm account?
If you have multiple sites operating under a single Affirm account, you can override the external company or brand name that the customer sees by adding a name field to the checkout object in the Magento extension payment.php file. This affects all references to your company name in the Affirm UI.
'merchant' => array(
                'public_api_key' => Mage::helper('affirm')->getApiKey(),
                'user_confirmation_url' => Mage::getUrl('affirm/payment/confirm', array('_secure' => true)),
                'user_cancel_url' => Mage::helper('checkout/url')->getCheckoutUrl(),
                'user_confirmation_url_action' => 'GET',
                'charge_declined_url' => Mage::helper('checkout/url')->getCheckoutUrl(),\
                'name' => Mage::app()->getStore()->getFrontendName()
            ),
How do I modify the monthly payment messaging placement on the product detail page?
You can use a different reference name to place monthly payment messaging on the product detail page based on the page's layout. You'll need to modify reference name in your affirm.xml layout file by replacing the product.info.extrahint reference name with any other reference name based on your layout structure. If you're looking for a way to position blocks before or after other blocks in the layout, you can modify the before and after block attributes. Some reference name examples to use instead of product.info.extrahint from the standard product page layout structure include alert.urls, product.info.social, and product.info.addtocart.
You may need to adjust the styles based on your layout structure and theme templates.
<catalog_product_view>
    <reference name="head">
        <action method="addItem">
            <type>skin_js</type>
            <name helper="affirm/promo_data/getPDPAffirmJsScript" />
        </action>
    </reference>
    <reference name="product.info.extrahint">
        <block type="affirm/promo_asLowAs_product" name="as.low.as.pdp"
               template="affirm/promo/aslowas/product.phtml" after="-" />
    </reference>
</catalog_product_view>
How do I know if my One-page Checkout extension will work?
Affirm has built-in support for many One-page checkout extensions. If you are using a One-page checkout extension please ensure proper testing in development and staging prior to production as some extensions may require additional changes to work properly with Affirm. For additional help with One-page checkout please contact us
Updated 4 months ago