New Integrations
Learn about integrating Affirm Connect into your Magento 2 platform
1. Install the Magento 2 extension
NotePlease see the additional instructions here if you are on Magento 2.3 version
1. Download the latest package release zip file.
2. If core Affirm extension is already installed at Magento2_root/app/code/Astound/Affirm/, then uninstall it first by running the following commands in Magento 2 root directory
php bin/magento module:uninstall Astound_Affirm.
3. If it does not exist, create the directory Magento2_root/app/code/Astound/Affirm/.
4. Unzip the extension and move all the files to Magento2_root/app/code/Astound/Affirm/.
5. In the Magento 2 root directory, run the following command to verify that Astound_Affirm exists. in List of disabled modules:
php bin/magento module:status .
6. In the Magento 2 root directory, run the following commands:
php bin/magento module: enable Astound_Affirmphp bin/magento setup:upgrade
7.. Clear the Magento 2 cache to use the default Magento 2 Affirm configuration.
2. Configure Affirm as a payment method
After installing the extension, enable Affirm as a payment method by updating Magento 2's configurations:
1. Sign in to your Magento admin portal.
2. Go to System > Configuration > Sales > Payment Methods > Affirm.
3. Set Enabled to Yes.
4. Keep Mode set to Sandbox (for development and testing)
5. Enter the Public API Key and Secret Key (private key) you retrieved from the Affirm sandbox merchant dashboard.
6. If your checkout process automatically captures the charge, set Payment Action to Authorize and Capture. Please consult with your Affirm support contact if you have this set to Authorize Only.
7. Enter the dollar amount values for Minimum Order Total and Maximum Order Total that displays Affirm as a payment option to your customers when checking out (optional).
8. If you want to change the order of displaying Affirm as a payment option during checkout, enter a Sort Order value greater than 0.
9. If you want to disable Affirm when a backordered item is in the cart, set Disable for backordered items to Yes.
10. If you want to customize the default Affirm logo, add the URL for the desired logo in Icon (requires Plan Text Appearance set to No).
11. If you want to customize the default subtext, you can add in-line HTML to Affirm Payment Method HTML (requires Plan Text Appearance set to No).
12. Set Enabled Checkout Button to Yes to display the Affirm button on the cart page (you can update the Affirm button URL in the Checkout Button Code).
13. Keep Checkout Flow Type set to Redirect to send customers to an affirm.com page for checkout. Set Checkout Flow Type to Modal to use a modal for checkout.
14. In the Affirm Connect section set Enable Affirm Connect in Checkout to Yes.
15. If you want to set a minimum order total for Affirm Connect to use the connected provider set the amount in Affirm Connect Minimum Order Total.


If these changes do not take effect immediately:
1. In the Magento admin panel, go to System > Cache Management.
2. Click Flush Magento Cache.
3. Sign out.
4. Sign back in to reset permissions.
3. Enable leasable products
1. Go to Magento Admin > Catalog > Products
2. Filter items to be changed to leasable, then choose Update attributes from the dropdown

3. In the Update Attributes menu scroll to find Affirm Leasable, check the change box and change the dropdown to Yes.

4. Add Affirm Leasable to the columns to easily see which items are enabled as Affirm Leasable

You can also change the status on an item level, in the main configuration find Affirm Leasable and slide the toggle to yes

If these changes do not take effect immediately:
1. In the Magento admin panel, go to System > Cache Management.
2. Click Flush Magento Cache.
3. Sign out.
4. Sign back in to reset permissions.
4. Add Affirm promotional messaging
Add Affirm promotional messaging which includes monthly payment messaging and educational modals on your product, category, and cart pages.
1. In the Magento admin panel, go to Stores > Configuration > General > Affirm Promos
2. In the As Low As Functionality settings, set the following to Yes:
- Enable for Product PDP (product pages)
- Enable For Category PLP (category pages)
- Enable for Shopping Cart (cart page)
3. Select a color for Affirm logo
4. Enter the Minimum amount for displaying the monthly payment pricing value to set the minimum threshold dollar amount that will display monthly payment messaging (e.g., setting this value to 100 will only display monthly payment messaging for products above $100)
5. You can optionally enter a Promo ID value in Data Promo ID (contact the Affirm Client Success team for more information about Promo ID's).

Add promotional banners
To add Affirm banner images to various pages on your site:
1. In the Magento 2 admin panel, go to Stores > Configuration > General > Affirm Promos.
2. Set Enabled to Yes.
3. For each page where you want a banner displayed, set Display to Yes and Promo Size and Promo Position to the values of your choice.

Use Multiple Financing Programs
Multiple Financing Programs (MFPs) allow you to offer custom financing programs to your customers based on rules you define in Magento 2. To learn more about MFPs and how to set them up in Magento, contact your Client Success Manager.
5. Review your order management functions
Processing orders (authorize, void, refund, and partial refund) in Magento 2 updates the order status in the Affirm dashboard. While you can process orders in the dashboard, we strongly recommend using Magento 2 to keep order status synced with Affirm. Click here for more information.
If the loan was placed using an Affirm Connect provider you will see that reflected in the payment method on the order.

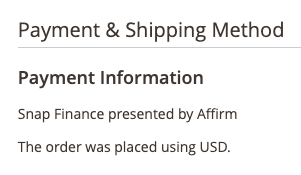
If the loan was placed using an Affirm Connect provider the leasable line items will be changed to have a $0 tax amount. The tax amounts and order totals will be changed and you will see a message reflecting the difference along with the provider that was used.

6. Add the Confirmation Page function
Confirmation Page Analytics is available in version 2.0.9 and up of the Magento 2 extension. To enable confirmation page analytics:
1. Go to Stores > Configuration > Affirm Promos.
2. In the Enhanced Analytics section, set Enable Affirm Pixel to Yes.
3. Set Yes to other options as shown below to enable pixels on respective pages.

7. Test your integration
After completing your integration, do a thorough testing of both your front-end and order management functions in our sandbox to ensure that everything works as expected.

Updated 4 months ago