Configure Affirm
Add Affirm as a payment method and configure promotional messaging on your site.
Overview
Now that you have installed the Affirm extension, you can decide how you would like to utilize Affirm on your site. This guide walks you through setting up Affirm's various features to create the best experience for your customers.
Configuration
Follow the steps below to configure your general Affirm settings.
1. Navigate to WooCommerce > Settings > Payments and select Affirm. This takes you to the Settings screen.
Payments was formerly called Checkout prior to WooCommerce 3.4.

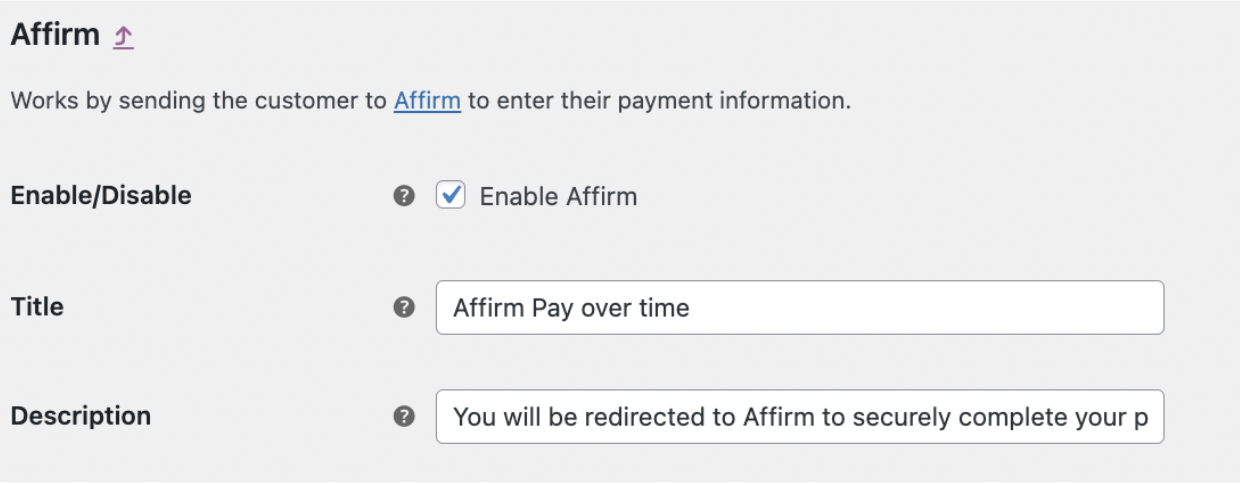
2. Enable/Disable – Enable to use. Disable to turn off.
3. If displayed, leave the default title as "Affirm Pay over time" and description as "You will be redirected to Affirm to securely complete your purchase. It's quick and easy—get a real-time decision!” unless instructed by Affirm.
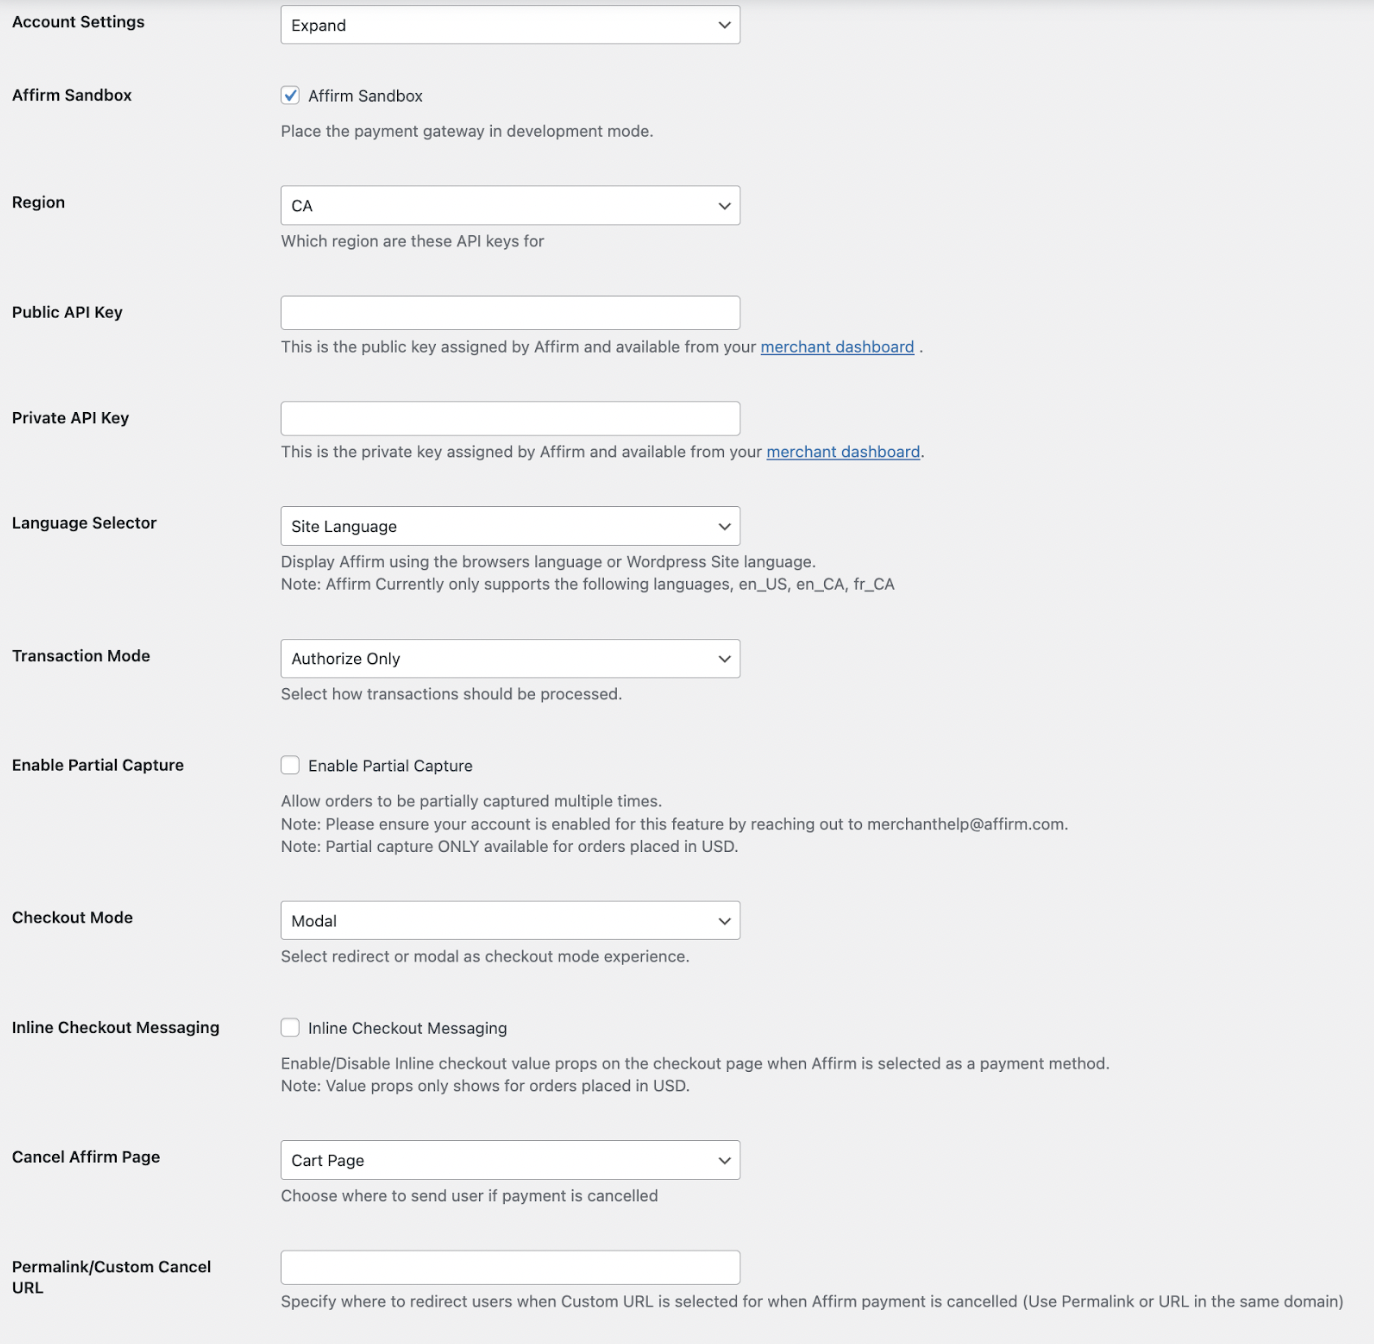
4. Select Expand to show Affirm Account Settings.
5. Enable Affirm Sandbox if developing or testing before going live. Remember to disable when done.
Affirm SandboxDisable when done.
6. Set your Region to CA for Canadian store.
7. Enter the Public Key from your Affirm dashboard. (If testing, use yourAffirm sandbox public key)
8. Enter the Private API Key from your Affirm dashboard. (If testing, use yourAffirm sandbox private key)
9. Choose whether Language Selector should be based on Site Language or Browser Language.
10. Select a Transaction Mode:
- Authorize obtains payment authorization only.
- Authorize and Capture obtains authorization and captures funds.
11. Enable Partial Capture only if instructed by Affirm support.
12. Select a Checkout Mode:
- Modal triggers a pop-up during checkout.
- Redirect takes the customer offsite to check out.
13. Leave Inline Checkout Messaging unchecked.
14. Select a Cancel Affirm Page:
- Cart Page – takes customer to cart.
- Payment Page – takes customer back to payment.
- Checkout Page - takes customer back to checkout.
- Custom URL - takes customer to custom URL.
15. Enter Permalink/Custom Cancel URL only if you selected Custom URL for Cancel Affirm page.
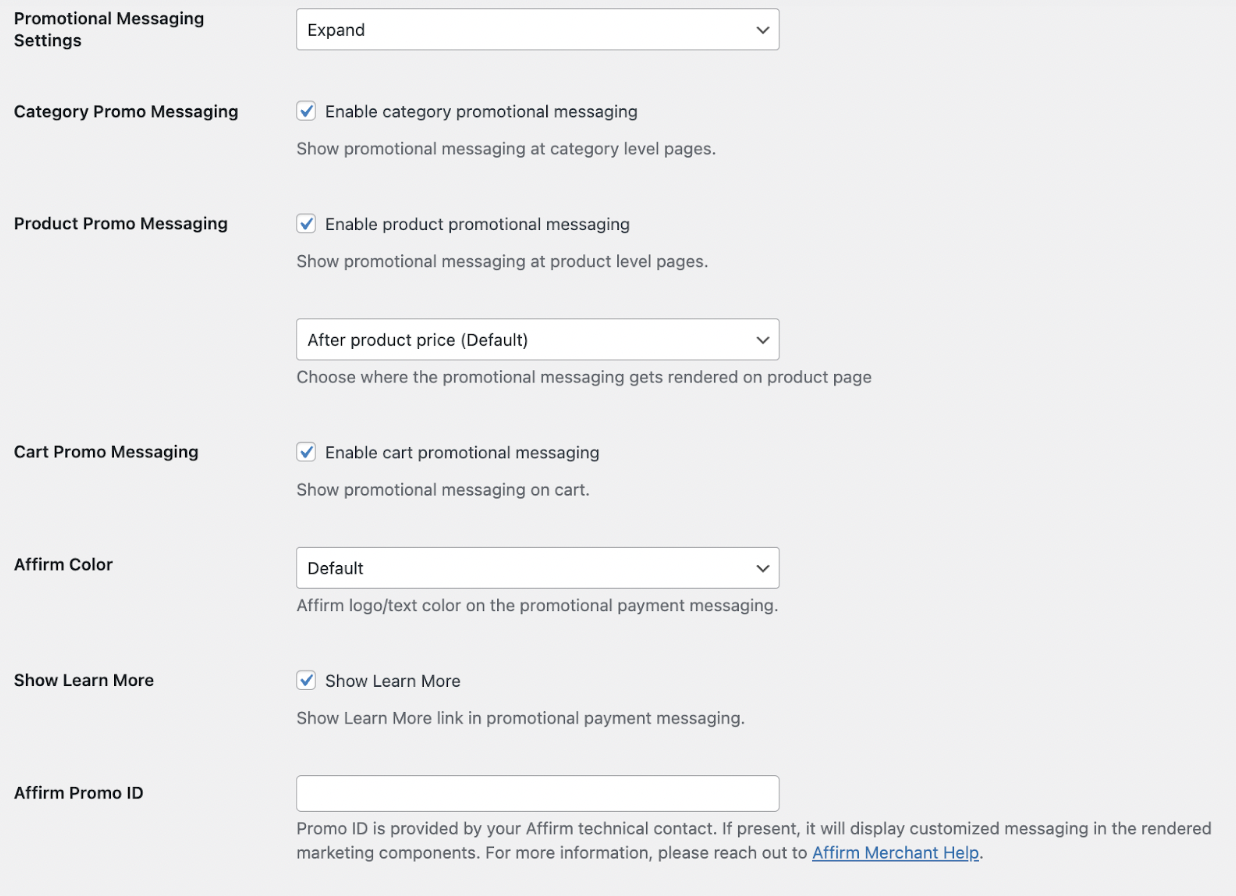
16. Select Expand next to Promotional Messaging Settings.
17. Check to Enable category promotional messaging to include promotional messaging on category level pages.
18. Check to Enable product promotional messaging to include promotional messaging on product level pages and select placement of product page messaging. (if unsure, select After Product Price)
19. Check to Enable cart promotional messaging to include promotional messaging on category level pages.
20. Select an Affirm Color – Blue, Black or White for the logo.
21. Check Show Learn More to display a link in Affirm monthly payment messaging.
22. Enter your Affirm Promo ID (optional) to display Affirm with different styling, messaging, or loan terms. Only enter a Promo ID if instructed by Affirm.
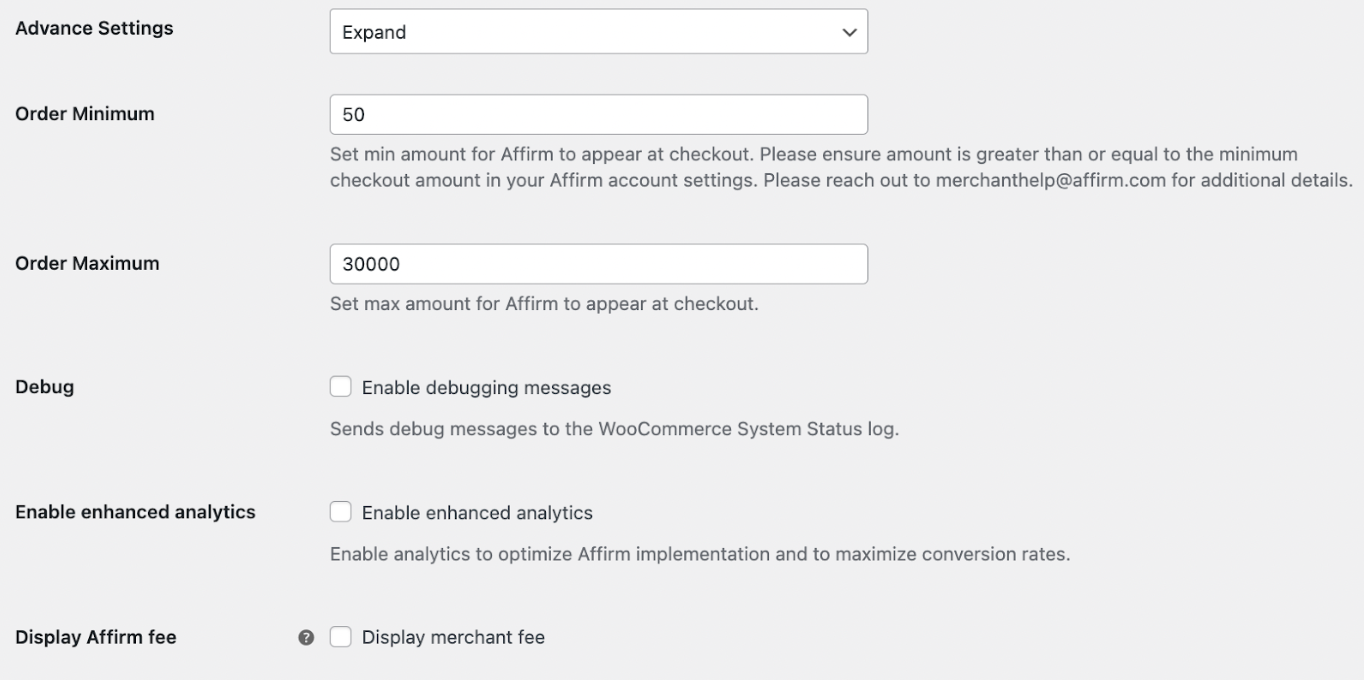
23. Select Expand next to Advanced Settings.
24. Set Order Minimum – set minimum cart total to display Affirm as a payment option. If unsure, leave the default value of $50.
25. Set Order Maximum – set maximum cart total to display Affirm as a payment option. If unsure, leave the default value of $30000.
26. Select Enable Debugging messages if troubleshooting. Otherwise, leave disabled.
27. Leave Enable Enhanced Analytics unchecked.
28. Check to Display Merchant Fee. If unsure, leave the default.
29. Click Save changes.