Customize Affirm promotional messaging in Shopify
Manually add our promotional messaging HTML components to your store's theme files.
Overview
Affirm promotional messaging components---monthly payment messaging and educational modals---show your customers how they can use Affirm to finance their purchases. Our promotional messaging allows you to:
- Dynamically display monthly payment pricing information
- Offer prequalification
- Customize messaging and design with co-branded assets
This guide will review Affirm promotional messaging and tell you how to add it to your Shopify site.
Manually editing your theme files requires making changes to the code. We recommend using an experienced front-end developer to avoid any potential errors.
Monthly payment messaging
About monthly messagingThe following messaging is availble for all of Canada excluding Quebec:
- Starting at $44/month with Affirm. Learn more
- Starting at $44/month with Affirm. Prequalify
The Credit Available with Affirm._Learn more messaging is available for Quebec.
Monthly payment messaging consists of concise copy that offers price-specific information and contains a link that triggers an educational product modal. Examples of monthly payment messaging include:

This messaging is available for use in all of Canada with the exception of Quebec.

This messaging is available for use in all of Canada with the exception of Quebec.

This messaging is available for Quebec
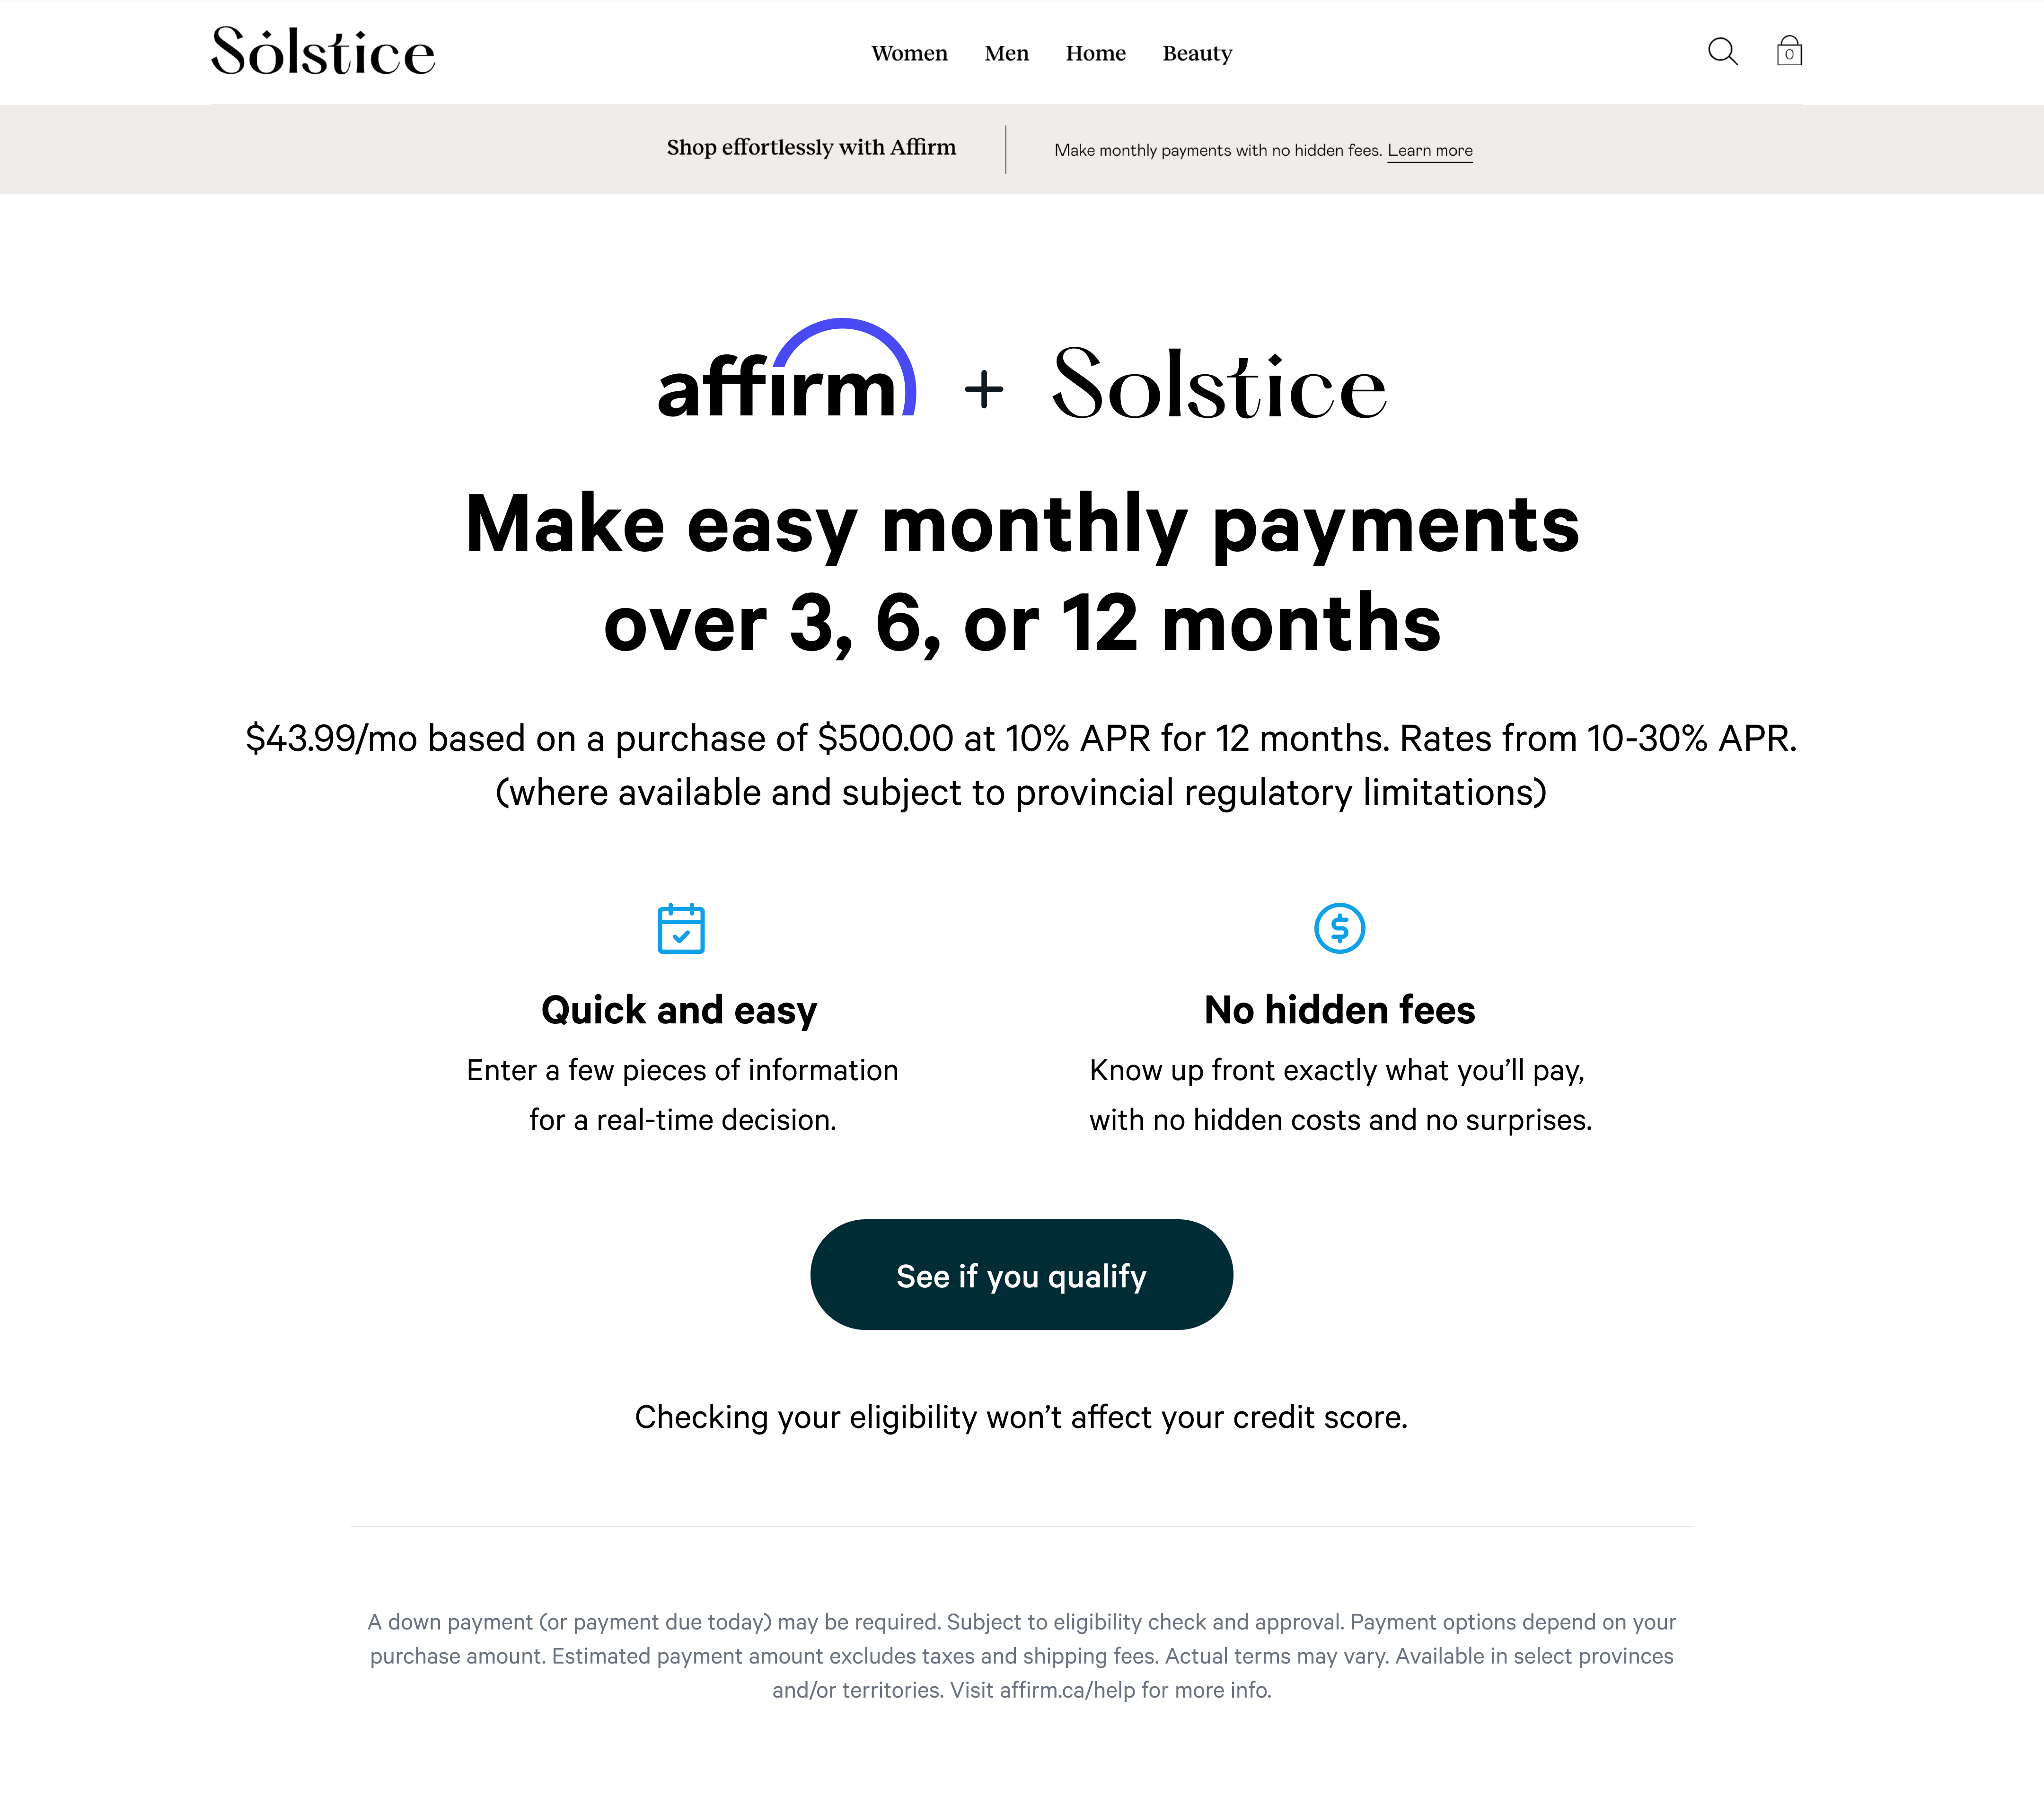
Educational modals
Educational modals are pop-up windows that offer more information about Affirm. They also provide prequalification, which allows your customers to discover how much they qualify to spend with Affirm on your site early in their shopping process. After completing the application and finishing shopping, the prequalified amount is automatically applied at checkout when they select Affirm as their payment option. There are two types of educational modals:
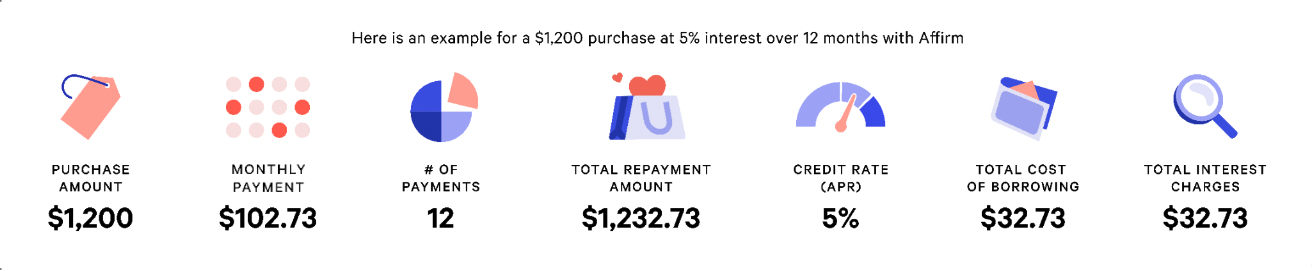
- Product modals provide price-specific information. Clicking the monthly payment message triggers the product modal.
- Site modals offer general information about Affirm and do not include pricing information. Any HTML element can trigger a site modal, though these are typically links on Affirm-related landing pages, site banners, or your home page.
Product Modal](https://files.readme.io/a3afc77-SiteModal.png)
Site Modal

Product Modal
Marketing guidelinesYou can review the following marketing guidelines for specific messaging, placement, and layout guideance:
️ Transitioning from PayBright prequalify widget to AffirmNote: If you have previously installed the PayBright prequalify widget, you will need to overwrite the PayBright code with Affirm's code referenced below.
1. Add Affirm.js
Add the Affirm.js embeded code at the top of the theme file in your Shopify store.
<script>
	_affirm_config = {
		public_api_key: "ENTER_YOUR_PUBLIC_API_KEY",
		script: "https://cdn1.affirm.com/js/v2/affirm.js",
		locale: "en_CA",
		country_code: "CAN",
	};

(function(m,g,n,d,a,e,h,c){var b=m[n]||{},k=document.createElement(e),p=document.getElementsByTagName(e)[0],l=function(a,b,c){return function(){a[b]._.push([c,arguments])}};b[d]=l(b,d,"set");var f=b[d];b[a]={};b[a]._=[];f._=[];b._=[];b[a][h]=l(b,a,h);b[c]=function(){b._.push([h,arguments])};a=0;for(c="set add save post open empty reset on off trigger ready setProduct".split(" ");a<c.length;a++)f[c[a]]=l(b,d,c[a]);a=0;for(c=["get","token","url","items"];a<c.length;a++)f[c[a]]=function(){};k.async=
  !0;k.src=g[e];p.parentNode.insertBefore(k,p);delete g[e];f(g);m[n]=b})(window,_affirm_config,"affirm","checkout","ui","script","ready","jsReady");
</script>
Locale
The locale parameter allows Affirm to identify which locale you are serving your site in for any particular user. For example, let's say that you're rendering your site in Canadian French; perhaps this occurred because the user's browser setting detected Canadian French. You can provide Affirm with the user's language setting by passing it in the locale parameter. Affirm will then read the locale and translate the pages accordingly, thus, matching the language the user had seen on your site. However, we will not attempt to read the user's locale directly.
Country_code
The country_code parameter represents the country of legal incorporation of your store, which is shown to any given user. So, if you're showing your Canadian website/store to a user and you have a legal presence in Canada, you would pass CAN into the country_code parameter. This allows us to determine which regulations to abide by and which banks to partner with for this transaction.
Supported values for locale and country_code
locale and country_codeAffirm supports the following combinations for locale and country_code:
country_code:USA
locale:en_US- (Language= Englishen- Country= United States US- for a locale that reads en_US)
country_code:CAN
locale:en_CA- (Language= Englishen- Country= Canada CA- for a locale that reads en_CA)
locale:fr_CA- (Language= Frenchfr- Country= Canada CA- for a locale that reads fr_CA)
The following will occur when a locale and/or country_code is not provided:
- When a
localeis not provided, thelocalewill default toen_US(English speaking US). - When a
country_codeis not provided, thecountry_codewill default toUSA.
1. Sign in to your Shopify admin page at yourstore.myshopify.com/admin/.
2. From the navigation menu on the left, go to Online Store > Themes.
3. On the menu to the right of the theme, click Actions.
4. Click Edit Code.
5. Search for the theme.liquid file and add the above Affirm.js embed code to it before the closing </head> tag.
6. In the embed code, replace public_api_key with your public API key found in the merchant dashboard.
7. Click Save.
2. Find your Shopify theme files
To add the HTML for Affirm promotional messaging, you'll need to edit your store's theme files. To find them:
1. Back on your main page page, go to Online Store > Themes.
2. On the menu to the right of the theme, click Actions.
3. Click Edit Code.
4. Find the file navigation menu on the left side and find the following template files:
- product.liquid
- cart.liquid
- checkout.scss.liquid (Shopify Pro only)
3. Add promotional messaging components
Add an HTML element everywhere you want to display an Affirm promotional messaging component.
To add promotional messaging to your product page:
<p class="affirm-as-low-as" data-page-type="product" data-amount="{{variant.price}}"></p>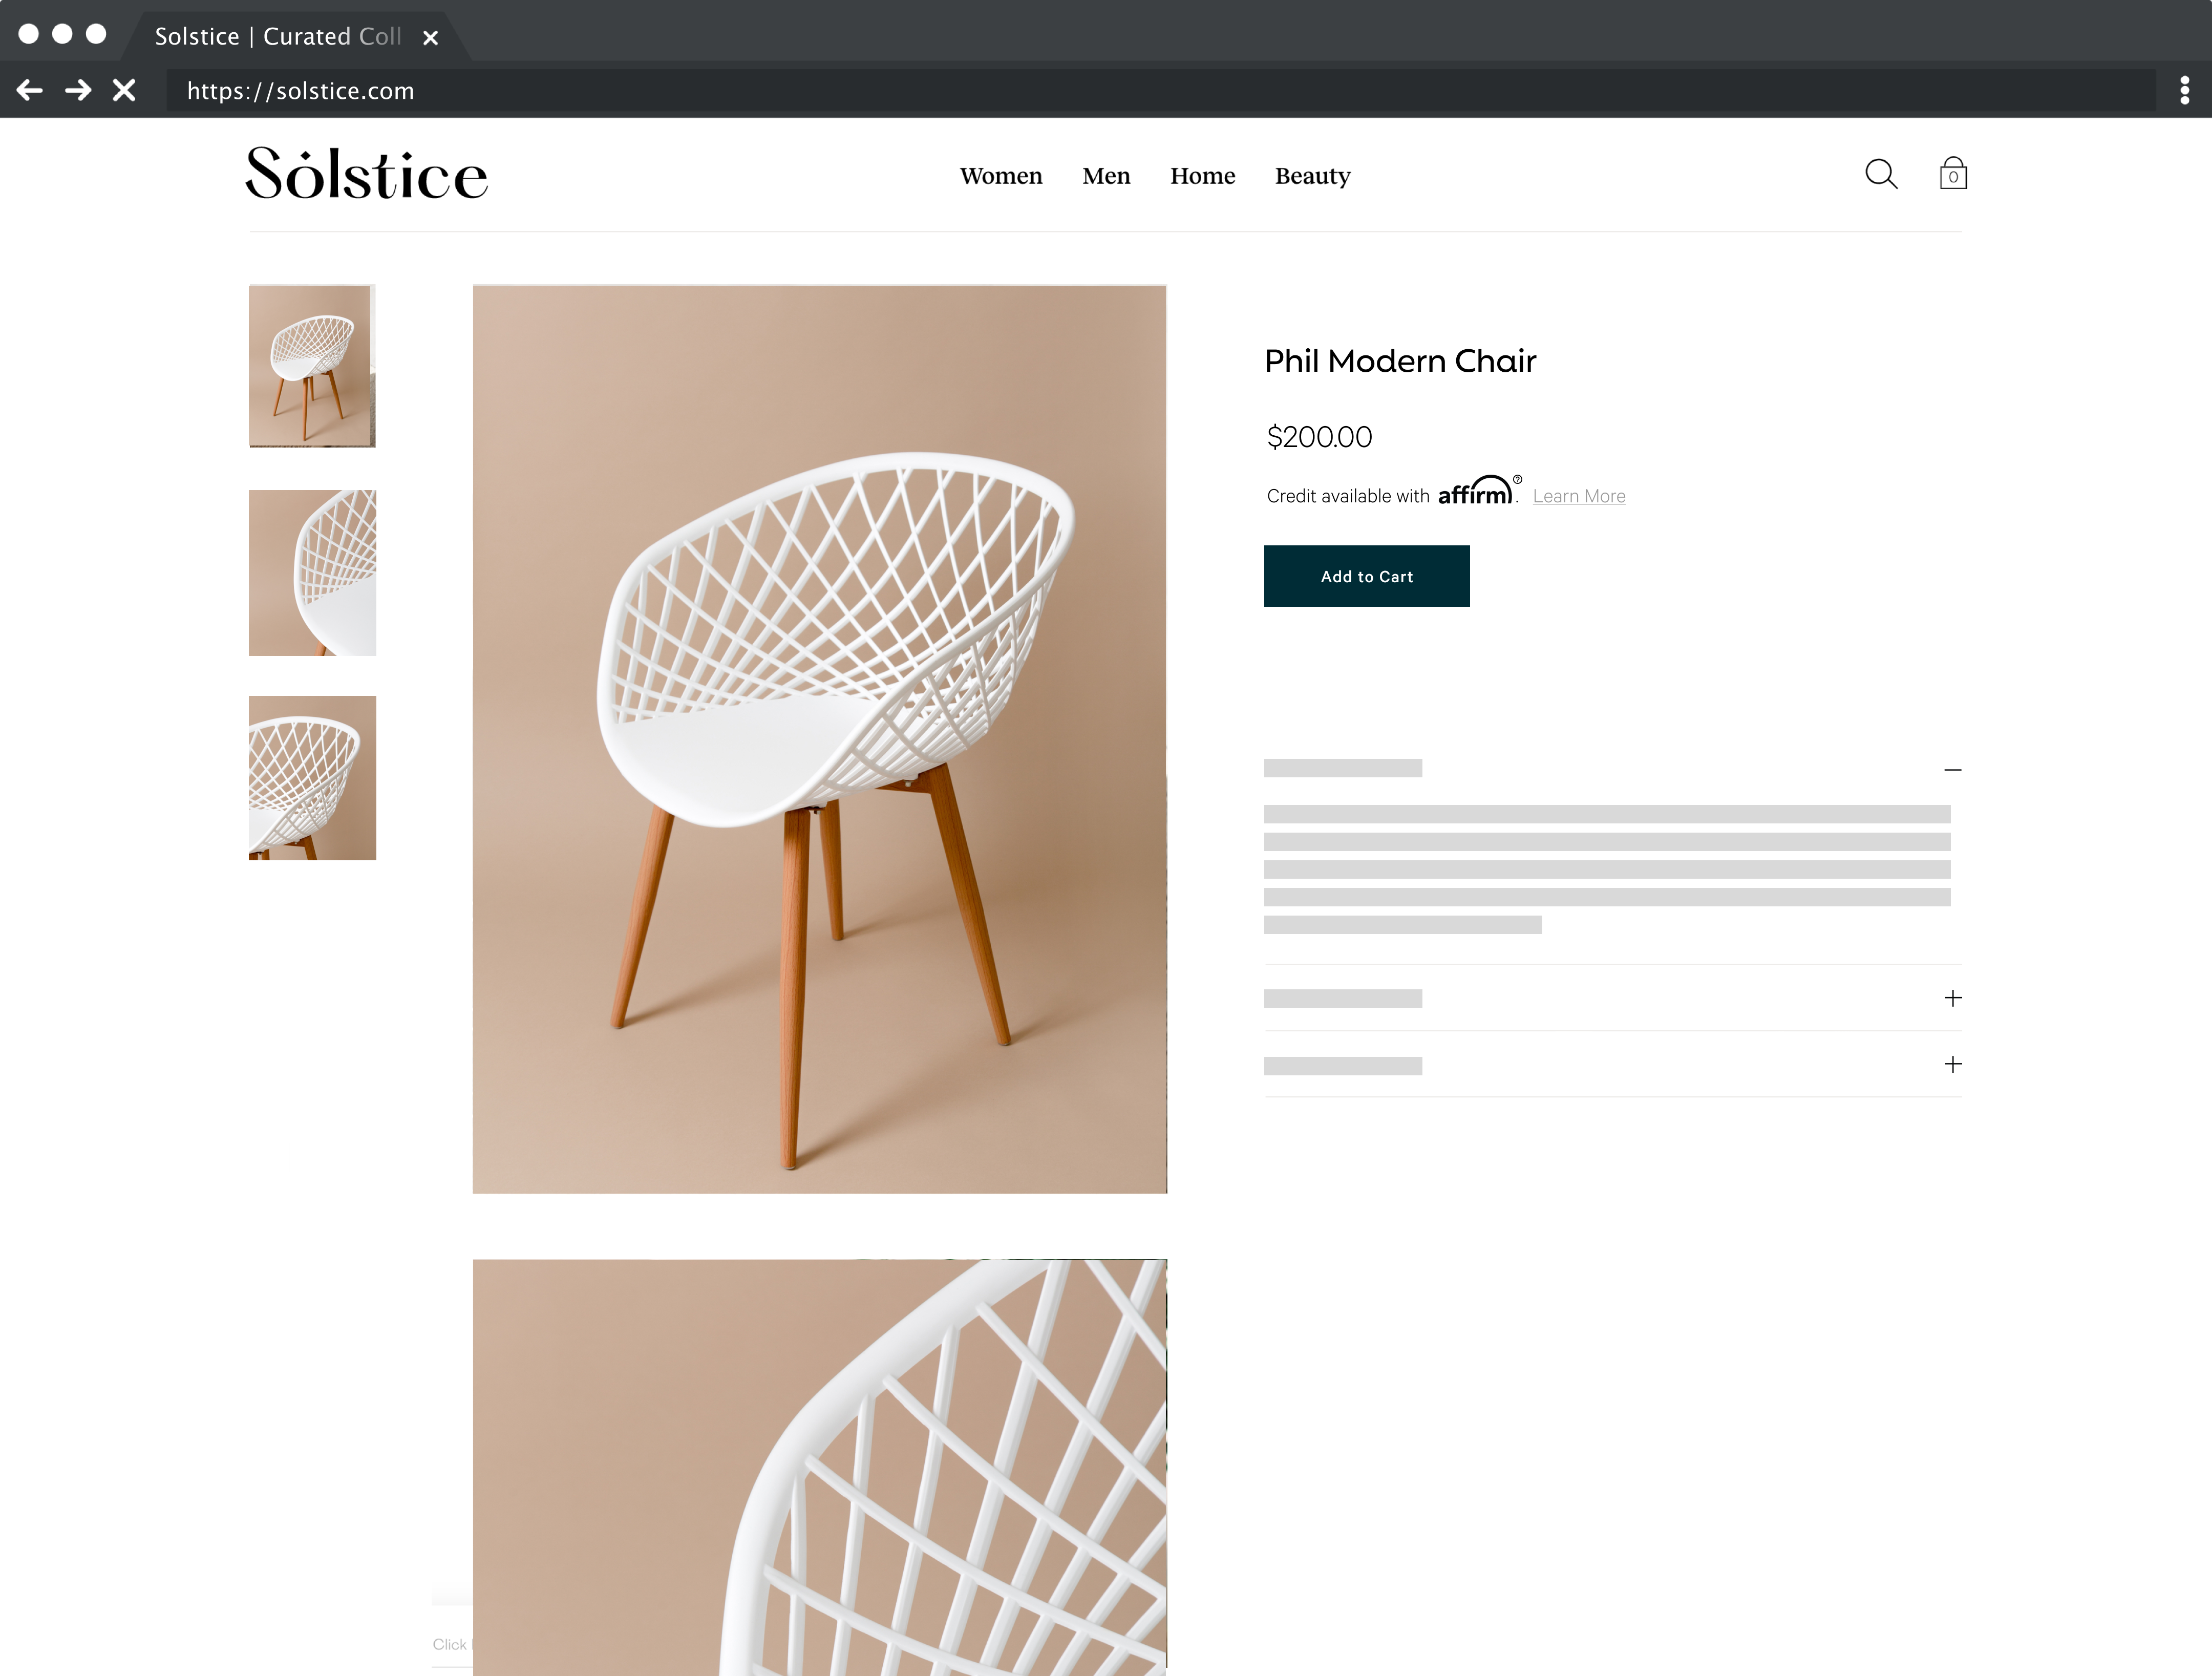
Add promotional messaging to your cart page:
<p class="affirm-as-low-as" data-page-type="cart" data-amount="{{cart.total_price}}"></p>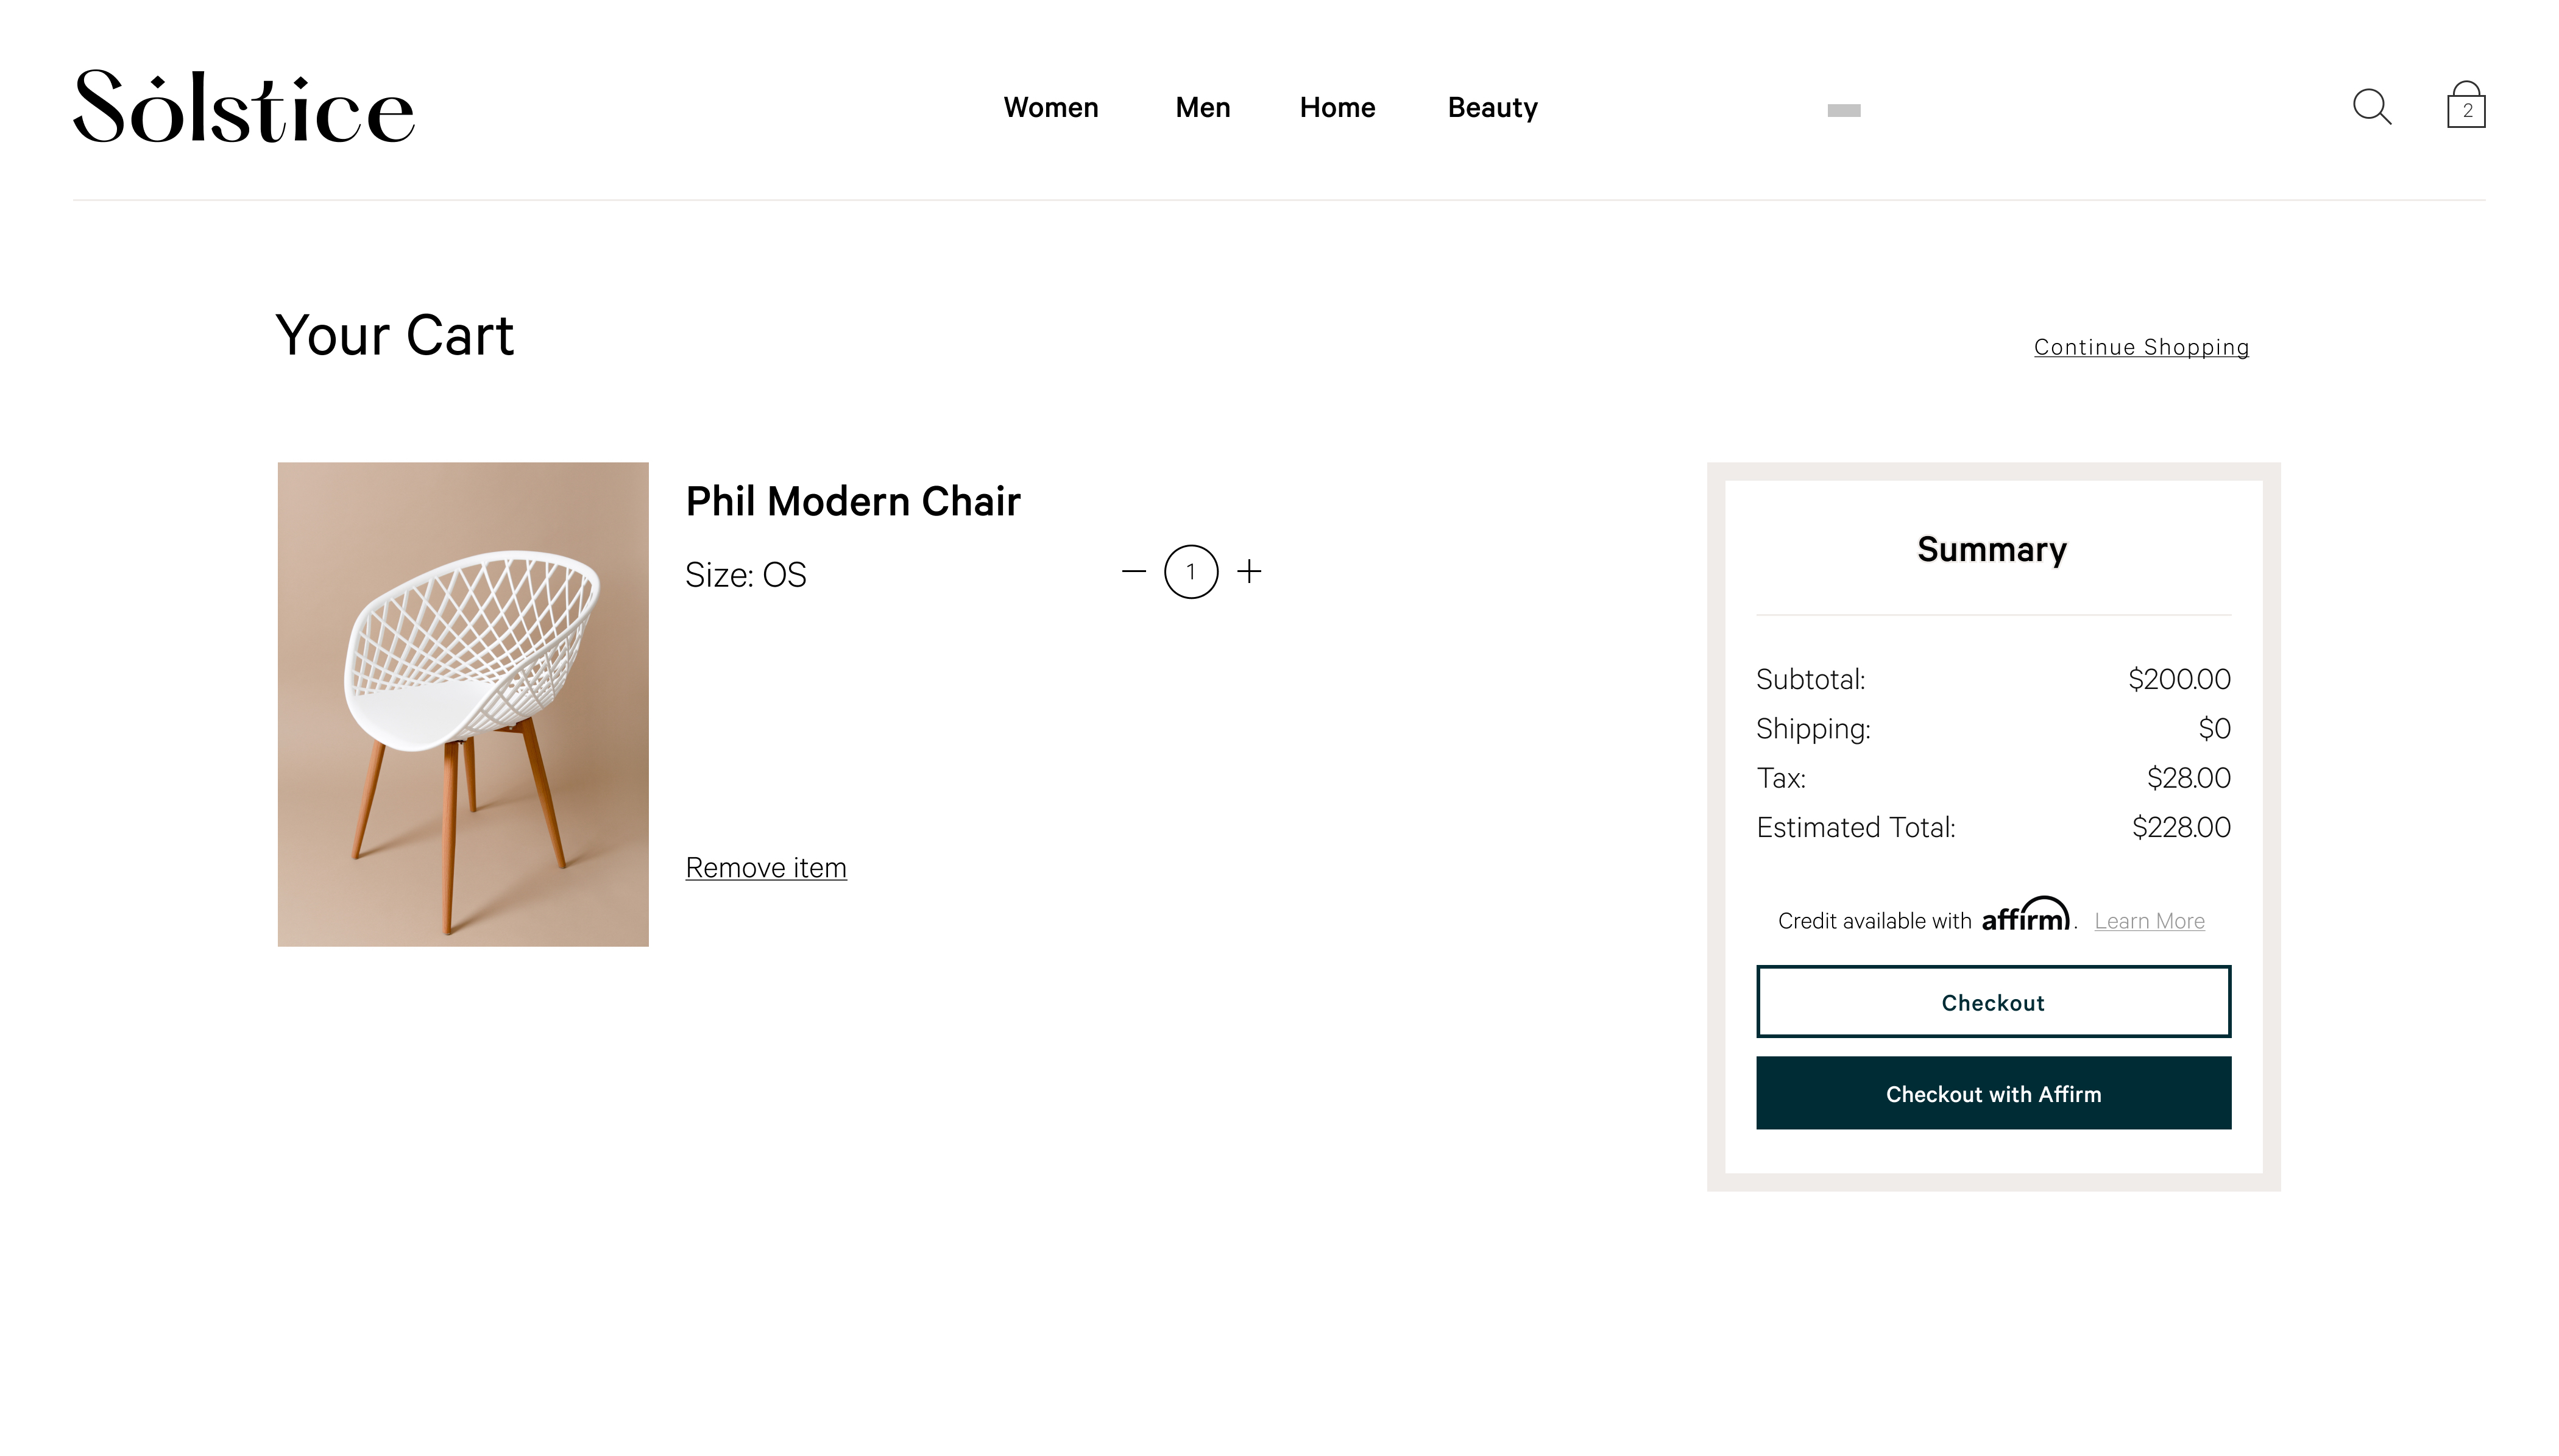
4. Add code to handle price changes
The Shopify product page (product.liquid) uses JavaScript to update the product price as the customer changes product options and variants. You can add the following code to the existing selectCallback function so to always update the monthly payment messaging:
Notes:
- Only use the Affirm embed code when using product variant
- The selectCallback function might not be in your product.liquid template if the product variants are not used or supported
<script>
  var selectCallback = function(variant, selector) {

    //Affirm Promos: Monthly Payment Messaging, dynamic pricing embed code
    //
    //NOTE: This Affirm embed code is only needed if you are using product variants.
    //'selectCallback' might not be in your product.liquid template if product variants are not used or supported.
    //If you are using product variants in your shop, use the following code to dynamically update your Monthly Payment Messaging when the customer selects a different product variant.

    $('.affirm-as-low-as').attr('data-amount',variant.price);
    affirm.ui.refresh();

  };

</script>
When using product variants in your shop, use the following code to dynamically update your Monthly Payment Messaging when the customer selects a different product variant:
<script>
  var selectCallback = function(variant, selector) {
    $('.affirm-as-low-as').attr('data-amount',variant.price);
    affirm.ui.refresh();

  };

</script>
The Shopify mini-cart and cart page (cart.liquid) use AJAX to keep pricing up to date. Therefore, there is no need to hook into the selectCallback JavaScript function.
Troubleshooting
Price variables
The variable that you use for product prices and cart totals may vary, based on your current Shopify theme and functionality.
Product page
{{item.price}}
{{variant.price}}
Learn more about product.liquidLearn more about the
product.liquidfile here.
Shopping cart
{{cart.total_price}}
Learn more about cart.liquidLearn more about the
cart.liquidfile here.
Updated 5 months ago