About Telesales
Telesales is an alternative way of initiating the Affirm checkout process for your customers. Learn more about using Affirm for telesales.
Country Availability
 USA
USA
Overview
The Telesales Checkout API is an efficient method for initiating the Affirm checkout process. This user-friendly feature enables telesales agents to being the checkout process for customers, seamlessly integrating the experience with the in-store flow.
The customer experience
Customer flow
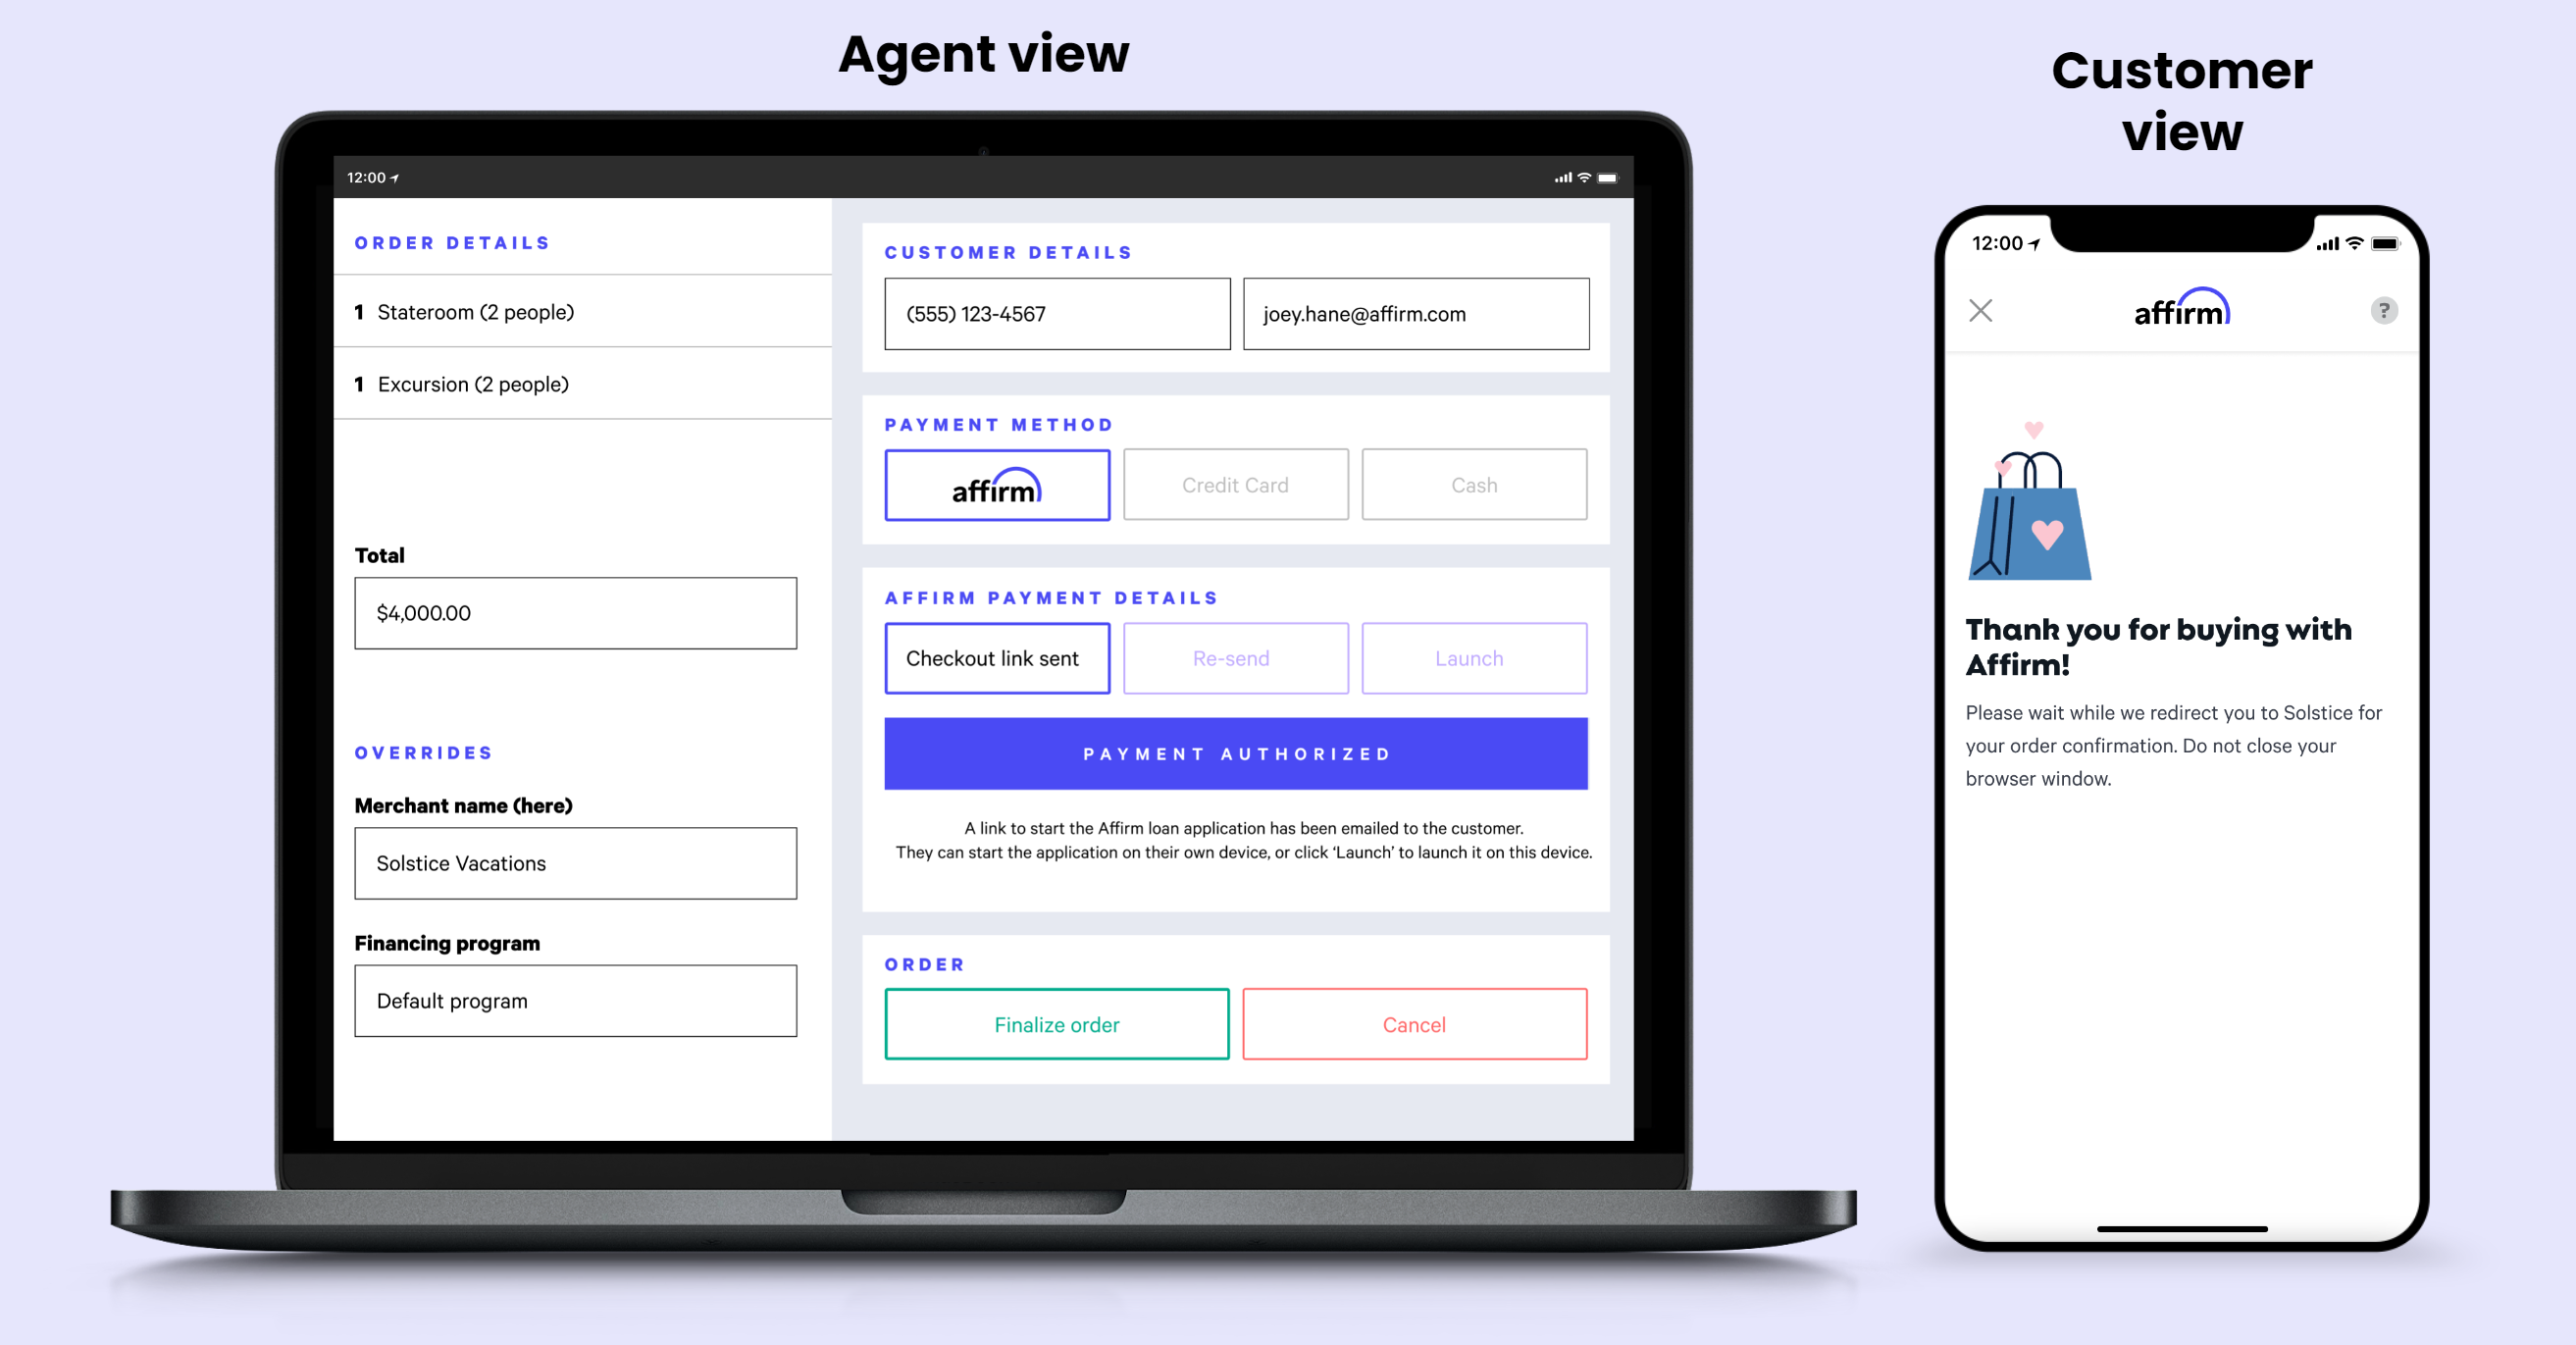
When a customer completes a checkout, it triggers a browser redirect along with a webhook request that contains the checkout_token for authorization.
Security
We prioritize privacy and security for our customers. Therefore, the Telesales API requires customers to apply using their own device. When an API request is submitted, Affirm sends a text message or email to the provided phone number or email address, containing a link to the customer’s online application.
The merchant experience
1. Add the Affirm payment option to your Telesales flow.
When customers choose to pay with Affirm over the phone, your telesales agent can select Affirm as a payment option from your frontend or from the agent dashboard.
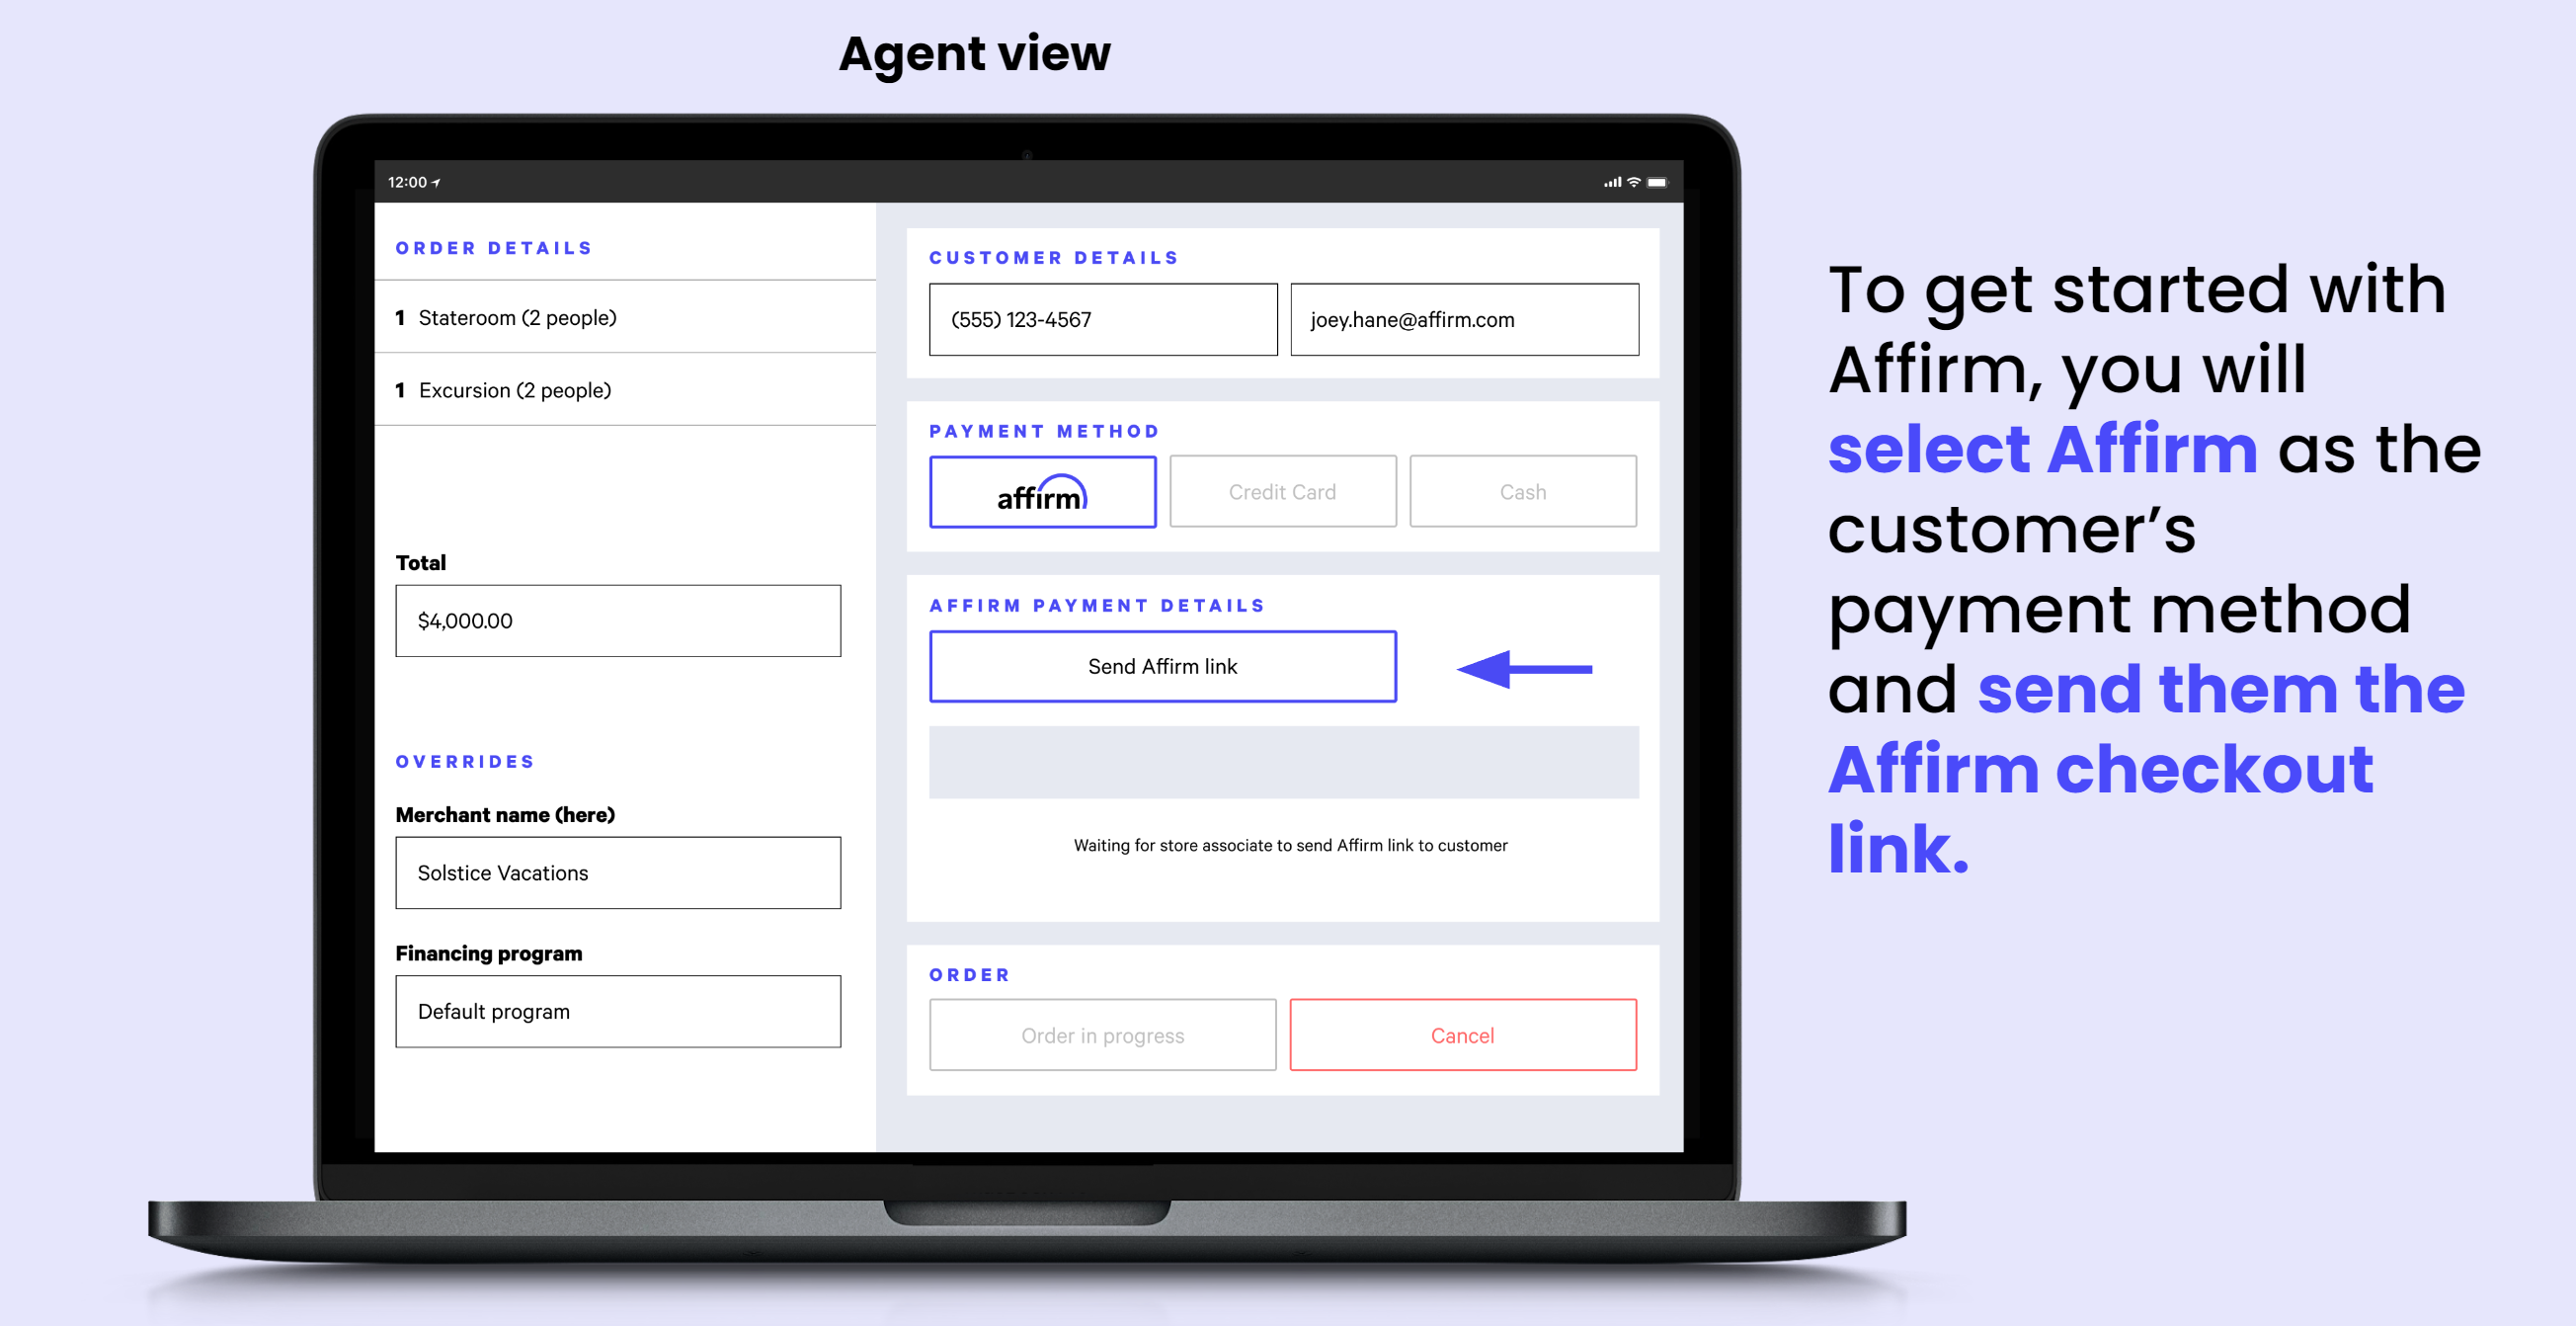
2. Call the Store API to initiate checkout.
Selecting Affirm as the payment method prompts Affirm. The sales agent then click Send Affirm link to initiate the application. This sends an email and/or text to the customer with instructions to finish their checkout with Affirm.
Note: If the customer doesn't receive the initial email, the agent can click the Resend button to send another text or email.
Example:
POST /api/v2/checkout/store HTTP/1.1
Host: sandbox.affirm.com
Content-Type: application/json

{
      "merchant": {
        "public_api_key":               "PUBLIC_API_KEY",
        "user_cancel_url":              "https://www.cancelurl.com",
        "user_confirmation_url":        "https://www.confirmationurl.com",
        "user_confirmation_url_action": "POST",
       "name":                         "Telesales Affirm demo"
      },
      "billing":{
        "name":{
          "full":                        "John Doe"
        },
        "address":{
          "line1":                       "325 Pacific Ave",
          "city":                        "San Francisco",
          "state":                       "CA",
          "zipcode":                     "94112",
          "country":                     "USA"
        },
        "phone_number":                  "4155552222",
        "email":                         "[email protected]"
      },
  "metadata": {
    "entity_name": "Vignan 1234",
    "store_location": "Denver"
  },
      "order_id":                        "your_order_identifier_ABC_123",
      "total":                           5000
  }
TestingThe Store API sends SMS text messages only in the Affirm Live environment. During Sandbox environment testing, you can use only email messages to receive the Checkout URL to complete your Affirm purchase.
In the response, you receive the redirect_url that the customer was sent and an Affirm checkout_id, which is used for authorization.
3. Receive order confirmation via webhook.
After a user receives and confirms their loan, Affirm's server is notified of the event and the agent sees a Confirmed status. The checkout_id is POSTed back to your server at the webhook URL that you provide your Technical Account Manager.
The application uses webhooks to update the agent's interface based on the customer's progress in the Affirm application.
For greater efficiency and reliability, you can provide Affirm with a webhook address for server-to-server confirmation of the
checkout_tokenafter the customer confirms their loan. While Affirm continues to POST the token to theuser_confirmation_url, using a webhook can minimize the risk of client/browser errors and expedite the payment status update in your telesales system.
In-store webhook configurationTo complete an in-store integration, you must configure a webhook URL. You can contact Affirm through your Account team or the support widget.
4. Authorize the transaction.
To collect payment information for the transaction, you must implement additional logic to authorize and capture the payment for the transaction. You can repurpose this logic by updating the API keys to the Telesales-specific keys if you implemented Affirm in your e-commerce channel.
Call Affirm’s Transactions API and pass the checkout_id to the transaction_id parameter and authorize the order. The order must be authorized securely before saving the order or updating the order's status on the agent’s dashboard.
5. Capture and manage the order.
With the persistent id received from authorization, you can initiate different transaction actions, such as capturing the order on fulfillment or issuing a refund depending on your internal processes.
Recommended topics
Updated 5 months ago