Create a Checkout
Learn how to create a Virtual Terminal checkout.
Overview
Setting Affirm Virtual Terminal requires creating a checkout and processing payments using Affirm in your order management system. Since there isn't a technical integration involved, you may originate the order in your existing order management system and then use the Virtual Terminal to process payment separately.
Follow the steps below to create a Virtual Terminal checkout, understand the customer checkout experience, and manage your charges.
1. Create checkout
The Virtual Terminal is accessible in your merchant dashboard.
1. Enter your customer's full order information into your order management system to determine the final price of the order with tax and shipping.
2. Once you finalize the order details in your system, open Affirm's Virtual Terminal and click the "+" button to create a new checkout.
3. Input the customer's contact information.
4. Input the order details (including any discounts, tax, or shipping).
5. Select a delivery method (email and/or text message).
6. Click Send Checkout at the top of the screen.
NoteBefore you send the checkout link, double check that the "Checkout total" and the details of the checkout in Virtual Terminal match your internal order system. This information should be identical to the customer's receipt to avoid any potential customer disputes.
2. Customer experience
Do not send an application to yourself or complete the Affirm application on behalf of the customer.
1. Your customer will immediately receive the email and/or SMS text message with a checkout link to their Affirm application.
2. Your customer will confirm their first and last name and email address (which will be pre-filled from the data you've already collected). They will simply input their mobile phone number, birth date, and last 4 of SSN.
3. Your customer will be sent a security PIN to their mobile phone number. They will use this PIN to sign in to their Affirm account.
4. Affirm will process the application and determine the customer's credit worthiness.
5. If the customer is approved, they will see the amount they've been approved for and be presented with their monthly payment options and loan terms.
Affirm sometimes requires additional information to consider a credit application. Additional information may include a bank checking account, government-issued ID, or income verification.
- Bank checking account: In the case of bank account verification, Affirm will prompt you for a bank name, username, and password. Affirm will securely connect your customer's checking account to verify their identity and review their ability to repay the requested loan
- Decline notice: If your customer isn't approved, Affirm will immediately notify them of the decision in the checkout flow and via a secure message.
- Down payment: In some cases, Affirm will require a down payment. When this happens, Affirm will provide your customer with the option to make a down payment with their debit card in the checkout flow. The remaining balance may be paid for with Affirm.
- Automatic payments: On the final screen of the Affirm checkout, your customer will see the option to enable AutoPay. This optional feature will allow them to automatically submit monthly payments to Affirm without needing to visit Affirm each month. They can choose to set this up during checkout or at any time when they log in to their Affirm account at www.affirm.com.
- Before clicking Confirm loan, your customer will click the checkbox to agree to the Truth in Lending Disclosure and Loan Agreement, and your refund policy.
- Finally, your customer will see a green checkmark confirming their steps are complete.
3. Manage Charges
When the customer confirms their loan terms, you will immediately receive an email notification and the charge status will update to ' Authorized'. You may check the status of your customer's loan application and manage charges by returning to the Virtual Terminal tab.
You'll also see the charge visible in your Charges tab once the checkout is past the authorization stage.
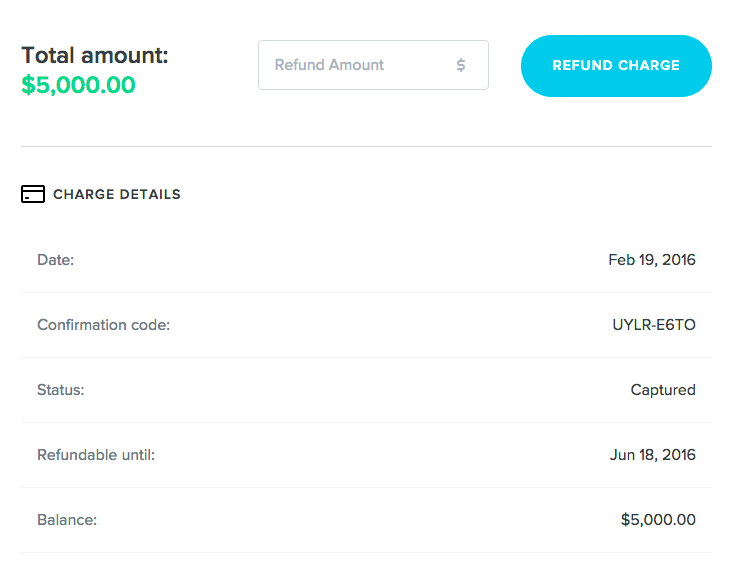
1. Click a charge row to view more details on that charge. You will have the option to 'Void' the charge in order to cancel the loan, or 'Capture' in order to receive your payment and notify the customer that their order has been processed.
2. After you capture the charge you may then mark 'Paid with Affirm' in your internal order management system and note the Affirm 8-digit 'Loan ID' (which is Affirm's unique identifier for the charge).
You will have up 120 days to process a full or partial refund through Affirm.
Updated 4 months ago