How To Use Webhooks With Affirm
Become a pro at creating webhooks by reading our step-by-step guide and learn how tools such as JSFiddle and Pipedream can help your skills reach the next level.
Merchant EligibilityWebhooks and Data Sharing Agreements (DSAs) are only available to Key and Enterprise merchants at this time. All available data and metrics can be accessed directly in the Merchant Dashboard.
A Webhook’s Purpose
By now, you have heard at least one person mention the term “webhook.” Perhaps you are familiar with them, perhaps not. To provide a brief explanation, webhooks are HTTP requests that are triggered by specific events. Here is a “real-life” example:
Let’s say you would like to order a pizza 🍕online. You place the order and wait for the items to be made. Once the items in your order are ready, a text is sent to let you know they are on their way!
In this example, a webhook is used to send a text once the order is ready. Since we do not know exactly when the order will be ready, we use a webhook to (1) record when it is ready and (2) send a text to inform you of the order’s status. Beyond this example, using webhooks to send automated notifications has become common practice and is an efficient way to provide information to the masses.
At Affirm, webhooks can be used to send you notifications about (1) when a customer uses the Affirm payment method and (2) if they were successful in completing the entire Affirm checkout process.
Practice Makes Perfect (or something like that)
There are a number of tools you can use to receive webhooks, but we suggest using a site like Pipedream (it is completely free by the way) that allows you to easily create servers and simulate an Affirm data capture. However, before we get too far ahead of ourselves, we recommend reaching out to [email protected] or your technical account manager to review your existing data-sharing agreement or to sign-up for one.
Using Pipedream
Luckily, Pipedream is easy to use and free to sign-up for, if you do not already have an account. In addition to Pipedream, we also recommend using a code playground or “sandbox” such as JSFiddle (also a free service) to test your code as needed.
Follow along below for a demonstration on how to receive a webhook event using Pipedream👇
- Sign-in or sign-up for Pipedream.
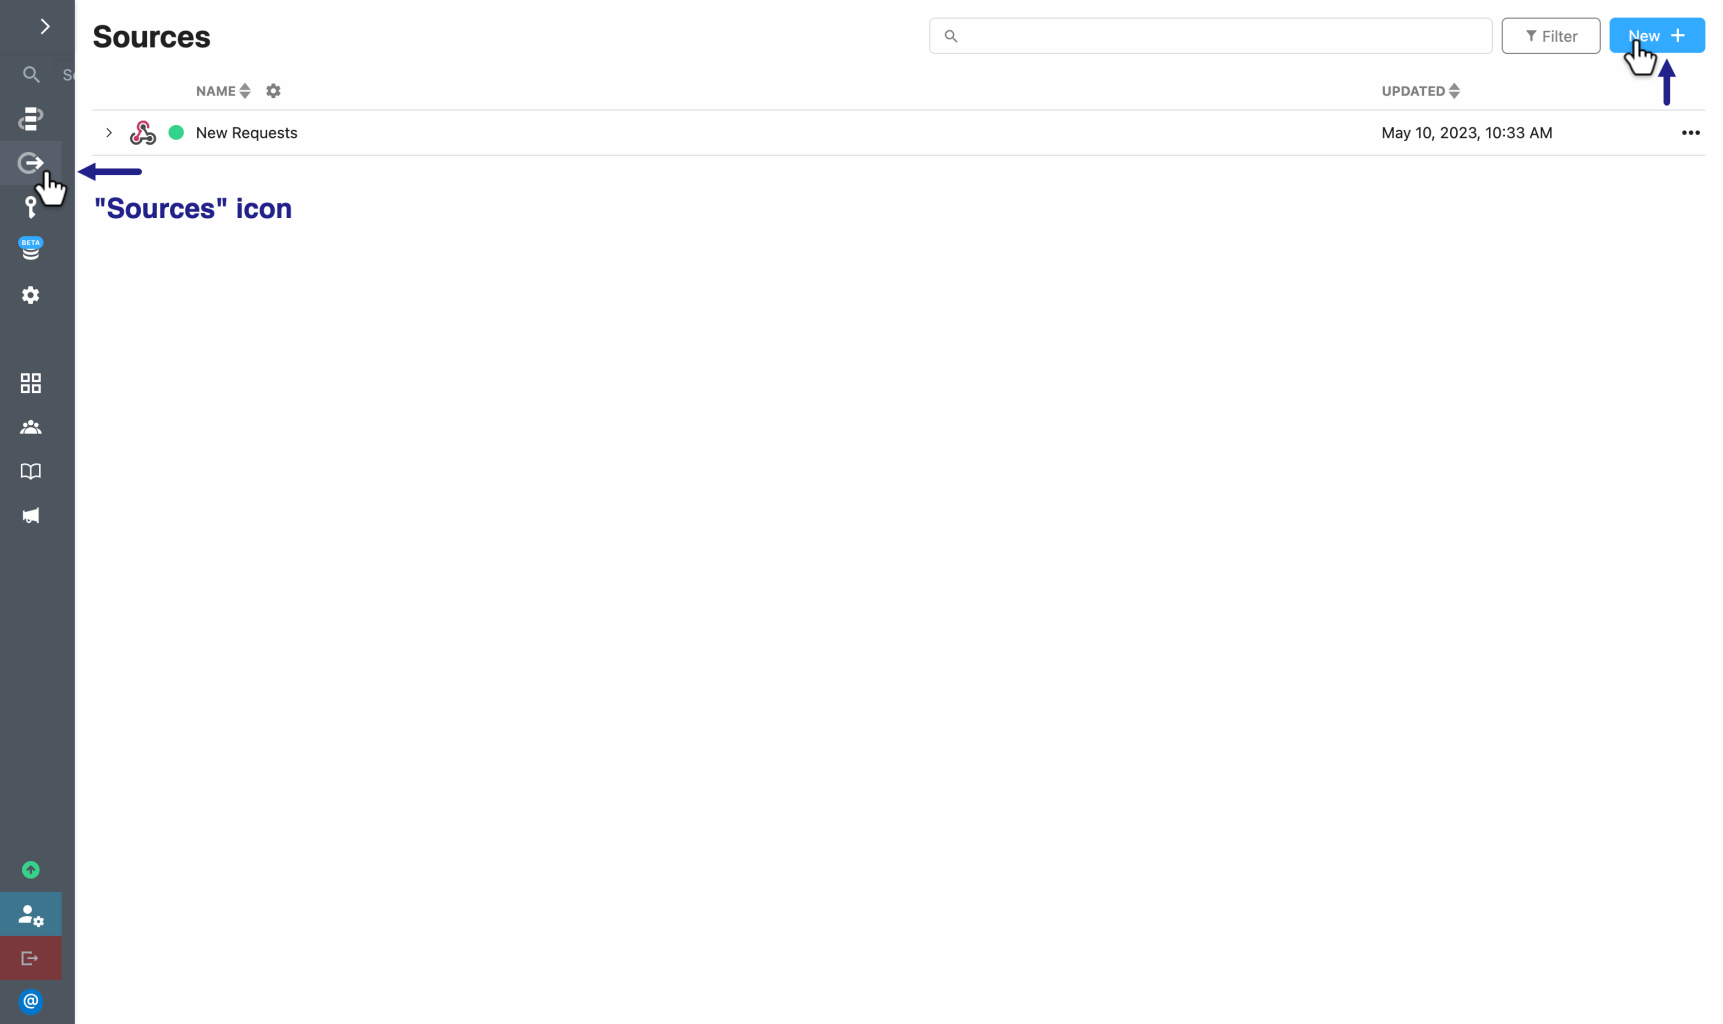
- Once you have gained access to your account, you will notice a navigation bar on the left-side of your screen. Select the “Sources” link, followed by clicking the blue “New +” button located in the top-right corner to create a new “Source.”
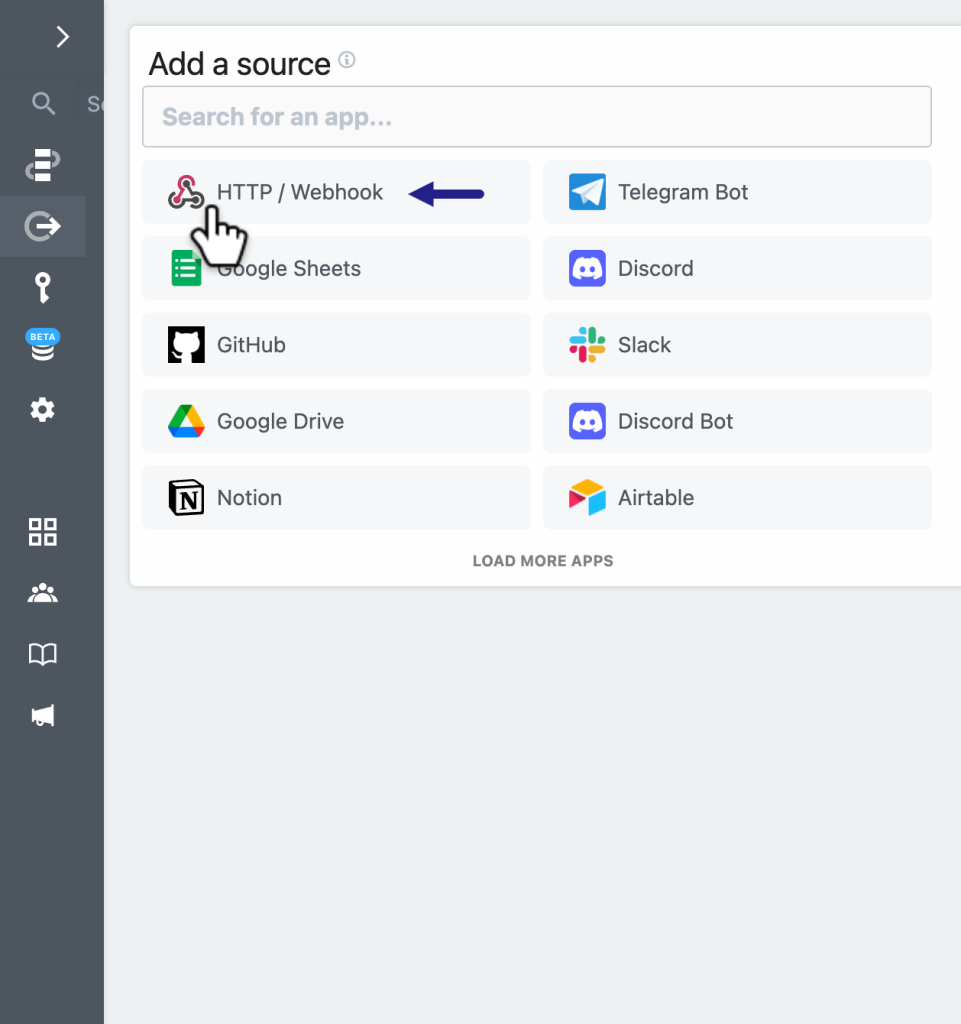
- Next, you will choose a “Source” and for this example, we are selecting “HTTP/Webhook.”
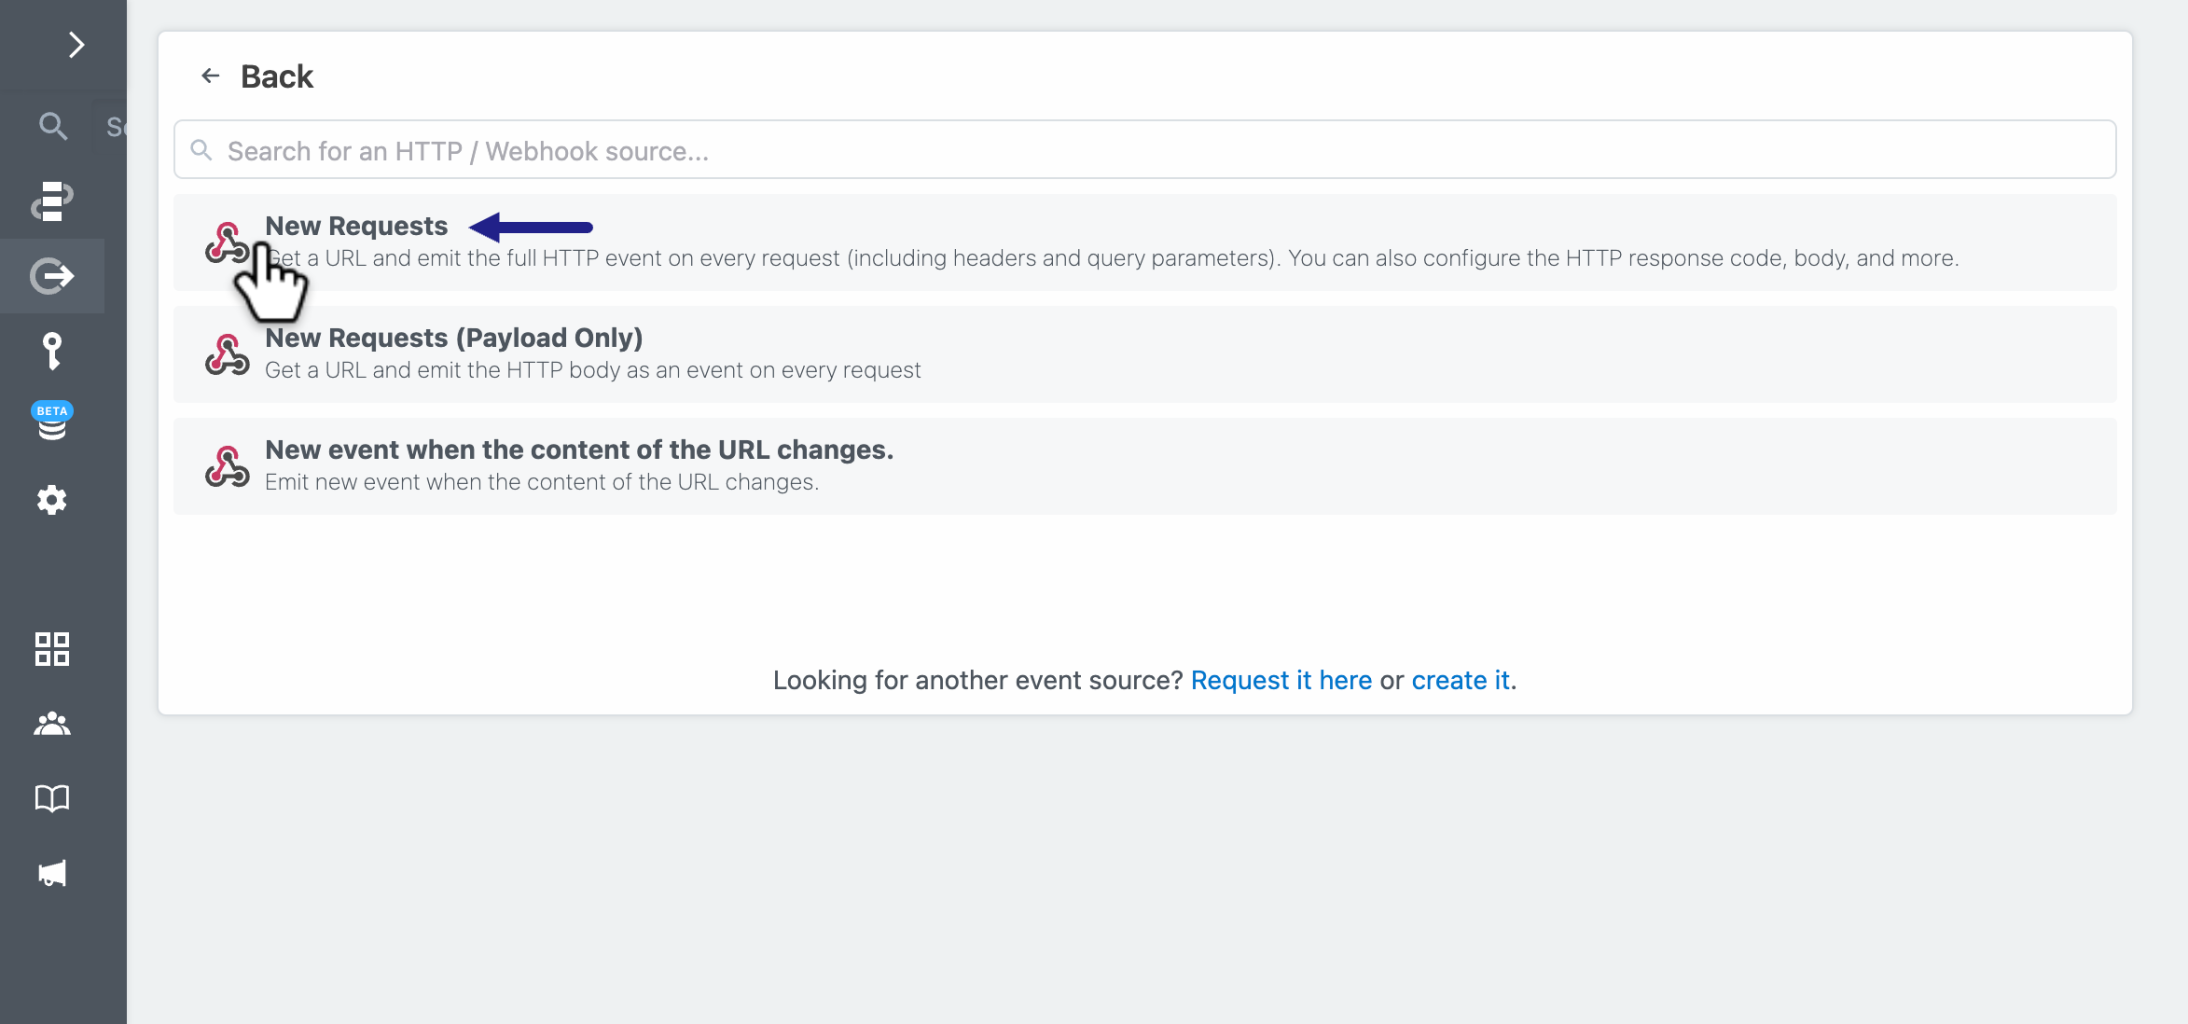
- The following screen will prompt you to choose from three options: “New Requests,” “New Requests (Payload Only)," or “New event when the content of the URL changes”. You will select the “New Requests” option.
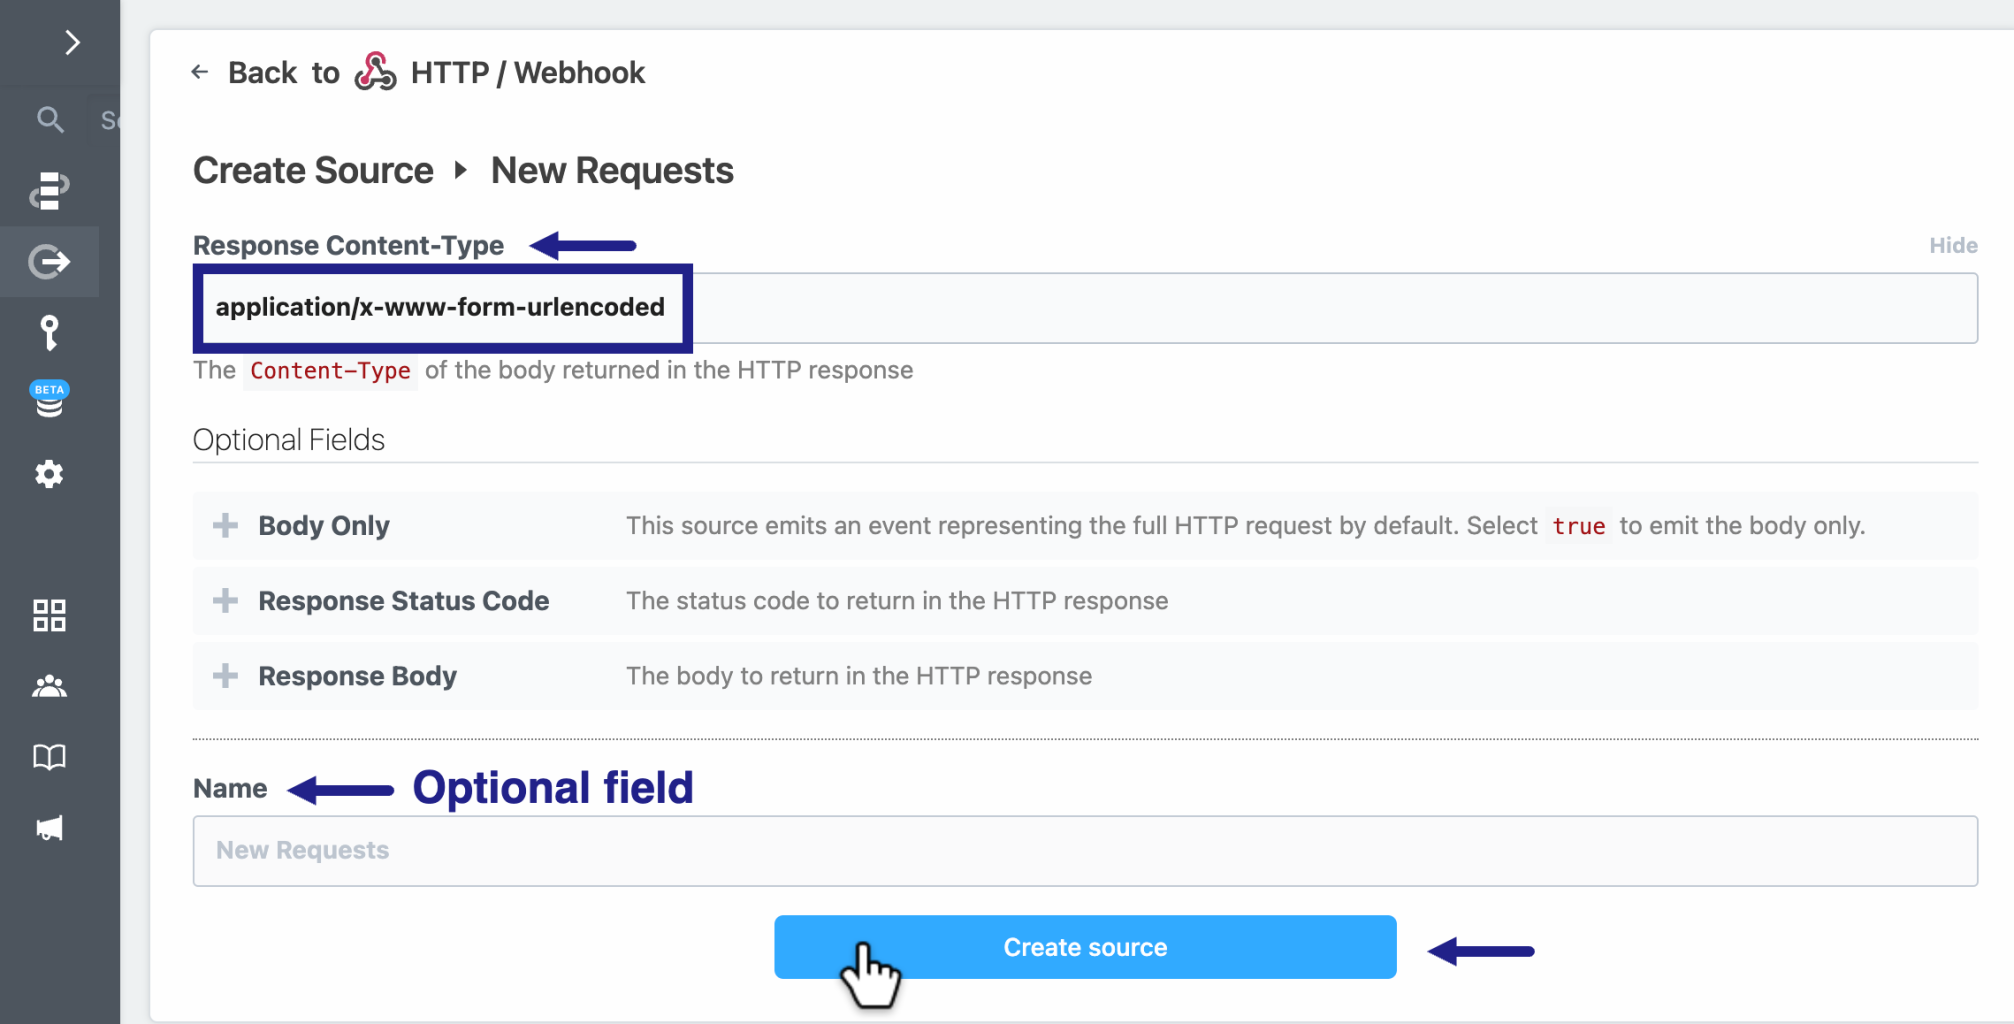
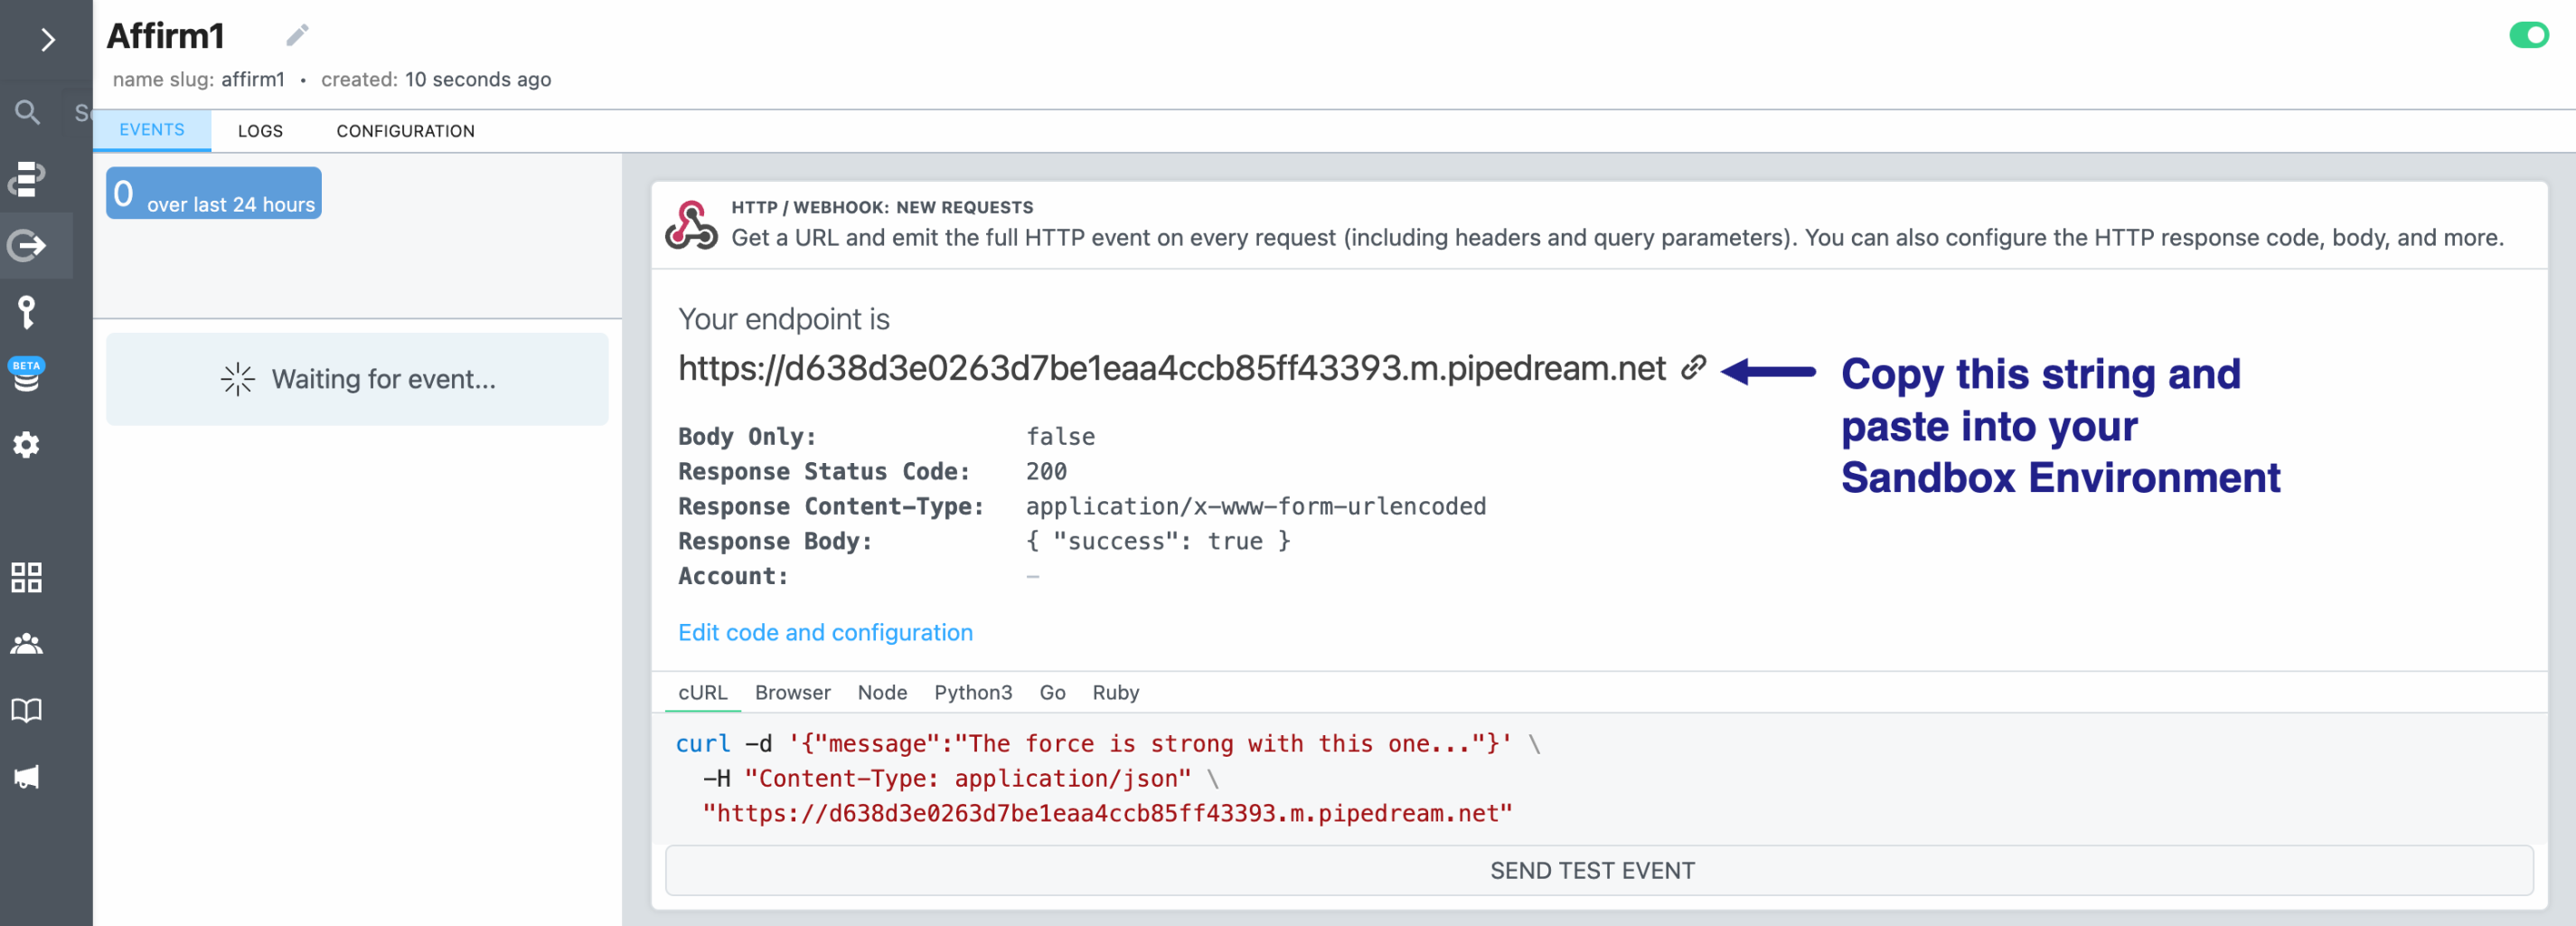
- After selecting “New Requests,” the next step is to specify the details of your request. This page contains 5 different fields, to which we will only make changes to “Response Content-Type” (response content-type is where you specify the “content type” you would like returned to the user, which generally defaults to text/HTML) and type “application/x-www-form-urlencoded” in that specified field. Once you have provided the necessary information, click on the blue “Create Source” button.
(Optional: Feel free to utilize the “Name” field and customize your webhook.)
(Hooray🎉You’ve now created a “Source” in Pipedream.)
- Now that a “Source” has been created, a new “Endpoint” has been generated as well. So, you will copy the “Endpoint” provided for your new “Source” and share it with[email protected] or your technical account manager to set it up for your sandbox account.
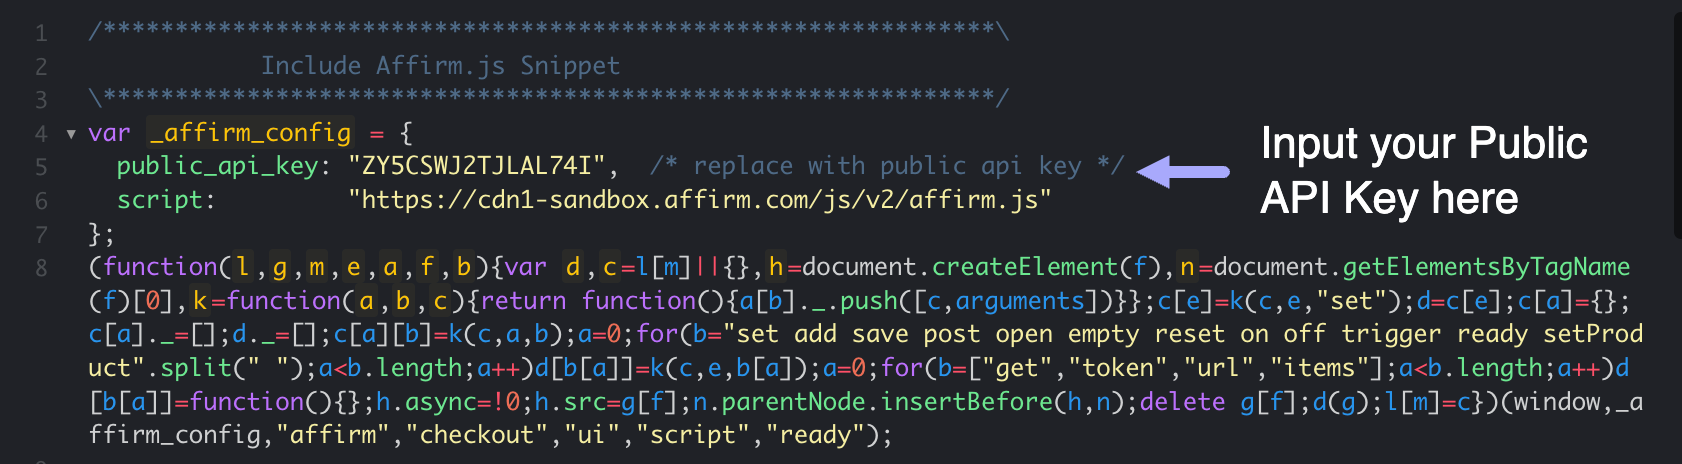
- Once set up on our end, you will retrieve your Public API Keyhere. The next steps can be completed in your development site, JSFiddle, or a similar tool of your choosing by using the following AffirmJS and HTML/CSS code snippets:
- Embed Affirm.js enter your Public API Key in the “public_api_key” line.)
- Configure the Checkout Object
Here is an example of what a Checkout function could look like:
affirm.checkout({

  "merchant": {

    "user_cancel_url"              : "https://examplemerchant.com/checkout/payment",

		//Put your confirmation URL here:
    "user_confirmation_url": "https://examplemerchant.com/confirm_affirm_charge",

    "user_confirmation_url_action" : "POST"
  },

  //shipping contact
  "shipping": {
    "name": {
      "first" : "Joe",
      "last" : "Doe"
      // "full" : "Joe Doe"
    },
    "address": {
      "line1"  : "633 Folsom St",
      "line2"  : "Floor 7",
      "city"   : "San Francisco",
      "state"  : "CA",
      "zipcode": "94107"
    },
    "email"          : "[email protected]",
    "phone_number"   : "4155555555"
  },

  // cart
  "items": [{
    "display_name"   : "Acme SLR-NG",
    "sku"            : "ACME-SLR-NG-01",
    "unit_price"     : 1500,
    "qty"            : 1,
    "item_image_url" : "https://examplemerchant.com/static/item.png",
    "item_url"       : "https://examplemerchant.com/acme-slr-ng-01.htm",
  }],

  // pricing / charge amount
  "currency"        : "USD",
  "discounts": {
    "savemoney123": {
      "discount_amount" : 500
    }
  },
  "tax_amount"      : 199,
  "shipping_amount" : 399,
  "total"           : 27500
});-
Create a Form Submission Handler for the Checkout Function:
$("#submit-form").click(function(){ affirm.checkout.post(); }); -
HTML Snippet:
<div class="container">
              <h3>Checkout Page - Select Payment Method</h3>
              <p class="affirm-as-low-as" data-amount="300000"></p>
              <form>
              <input type="radio" value="Affirm" checked="checked"> <img id="payment_method-affirm" src="https://cdn-assets.affirm.com/images/black_logo-white_bg.svg" height="24px">
              <h5>How does Affirm work?</h5>
              <span>
              Just enter your basic information and get a real-time credit decision. You will complete your payment on the Affirm website. If you're approved and confirm your loan, your purchase will be on its way as soon as it's ready.
              </span>
              </form>
              <input class="btn btn-primary" type="button" value="Affirm Checkout" id="submit-form" />
</div>-
CSS Snippet:
.container{ padding-top:30px; }
form {margin:20px 0;}
#payment_method-affirm{ margin:0 0 10px 10px;}
- At the completion of Step 7, your JSFiddle screen should resemble the following:
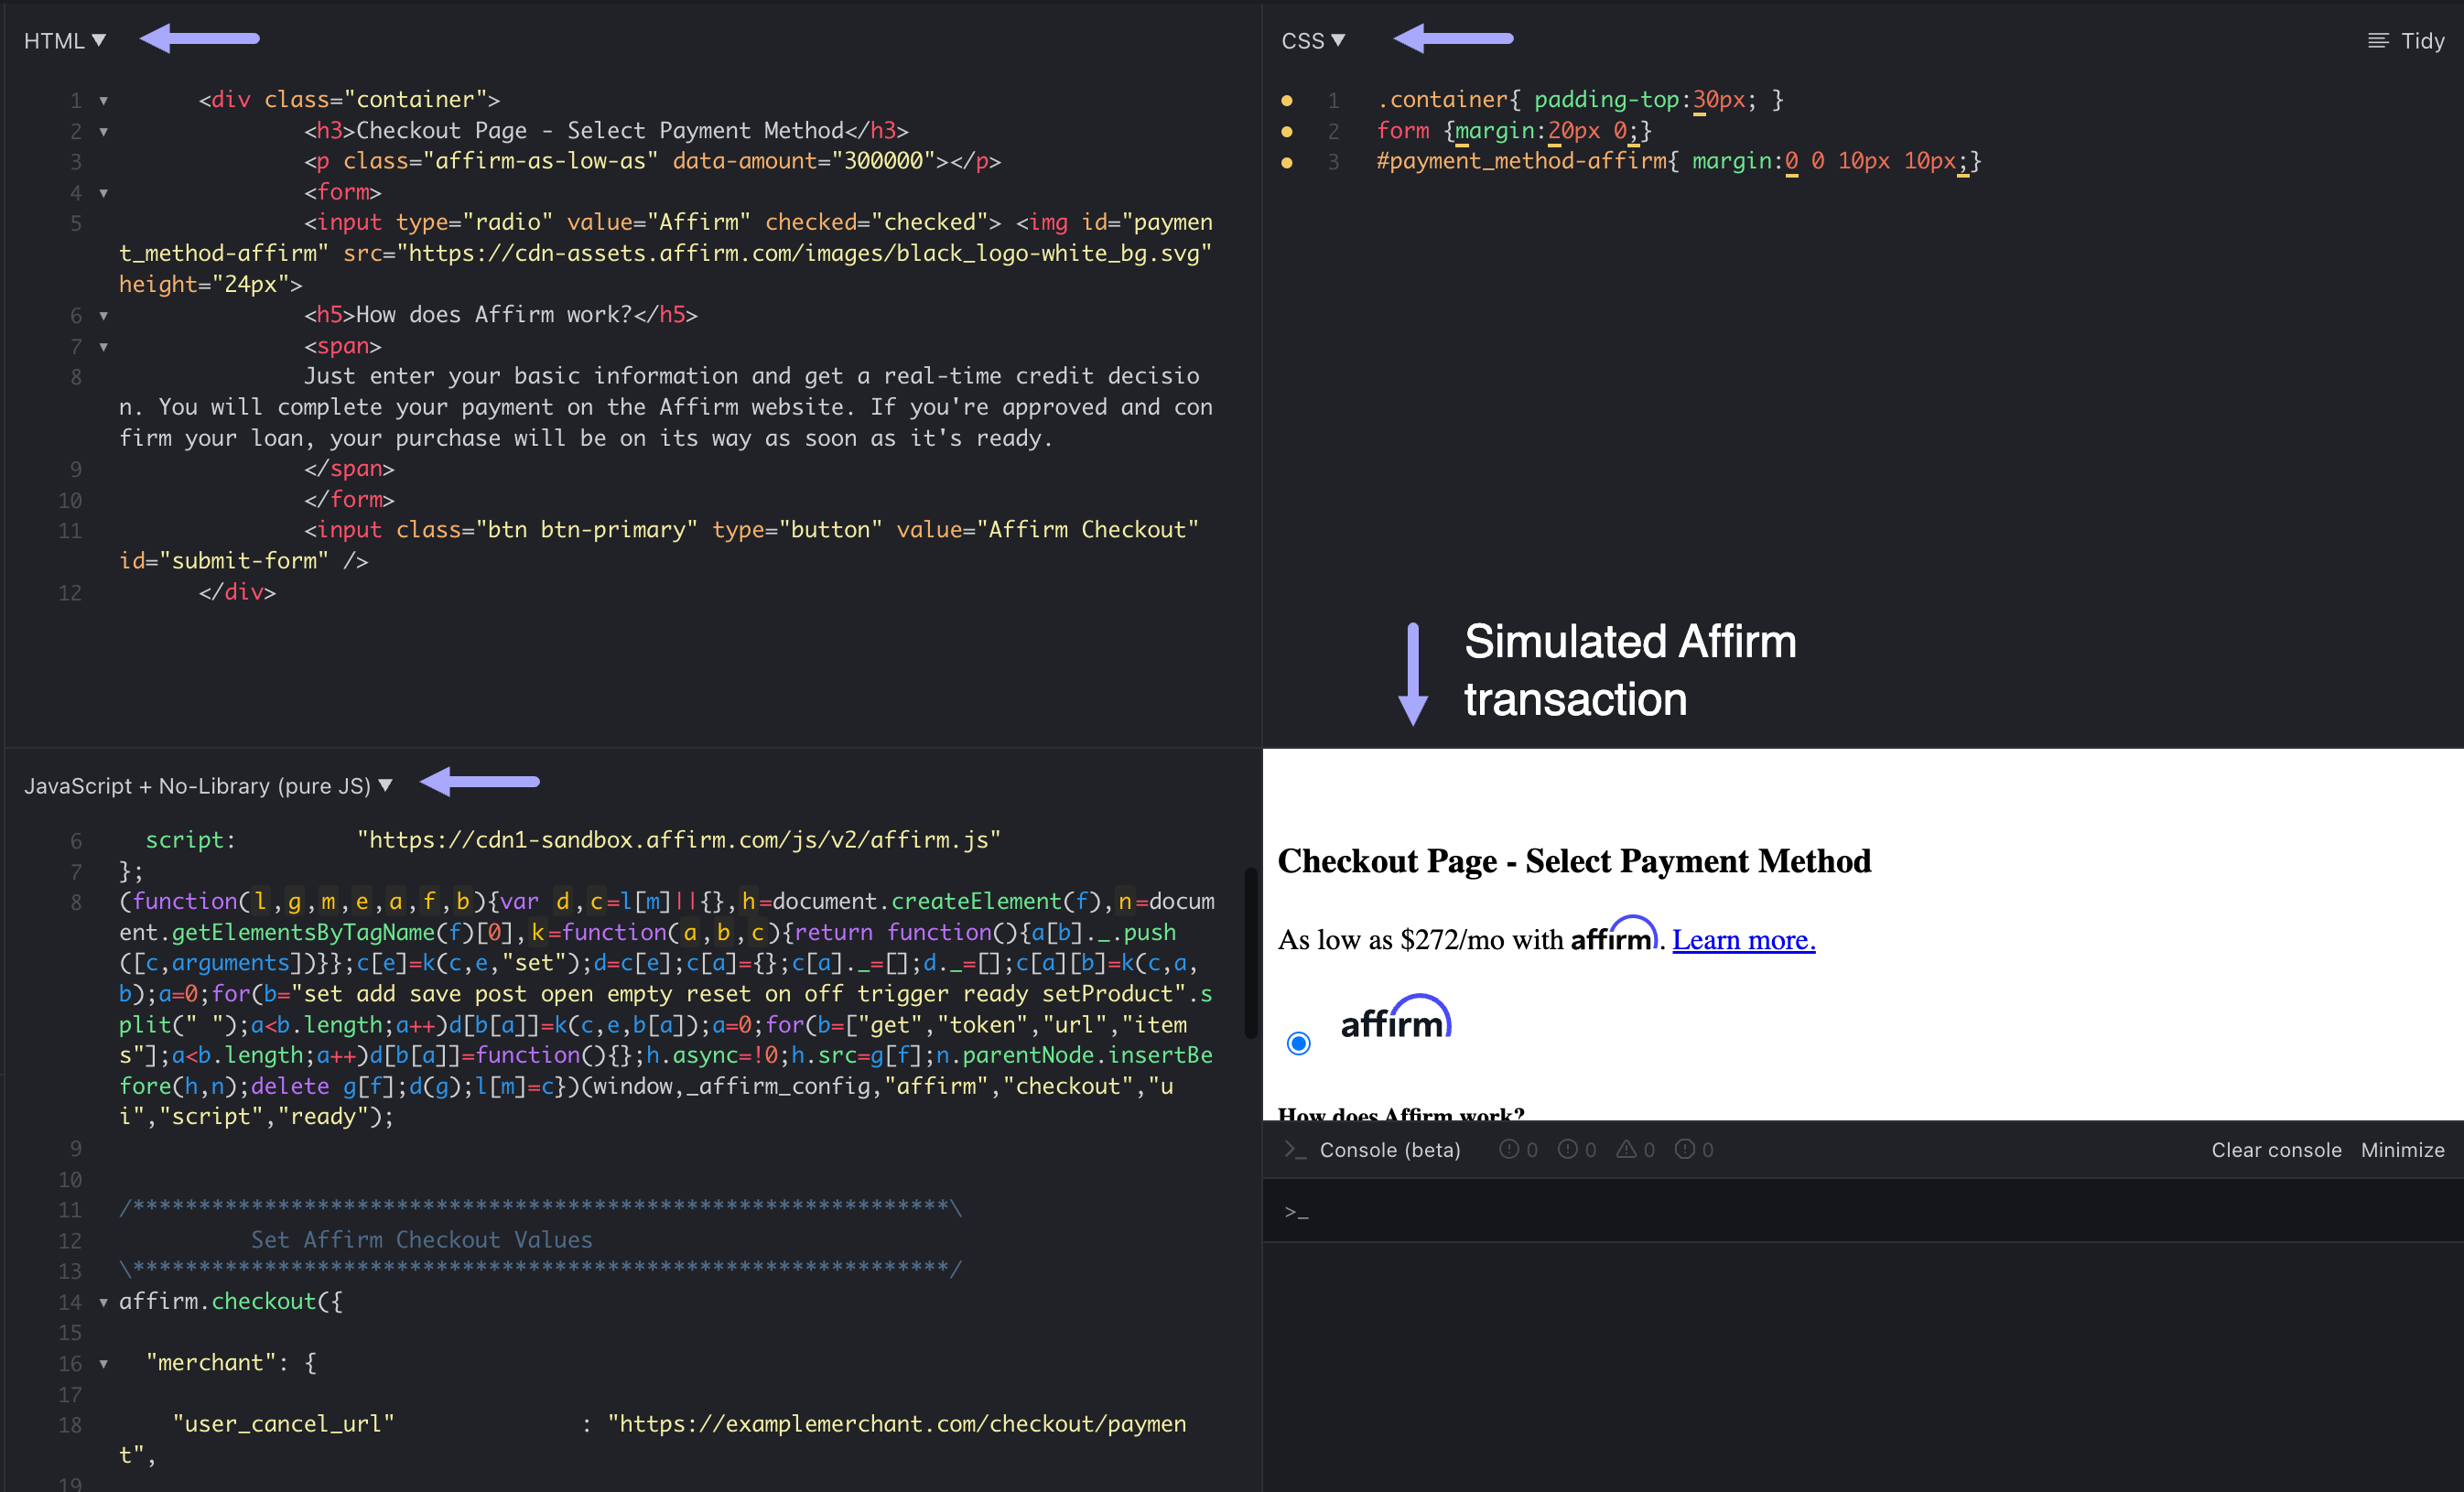
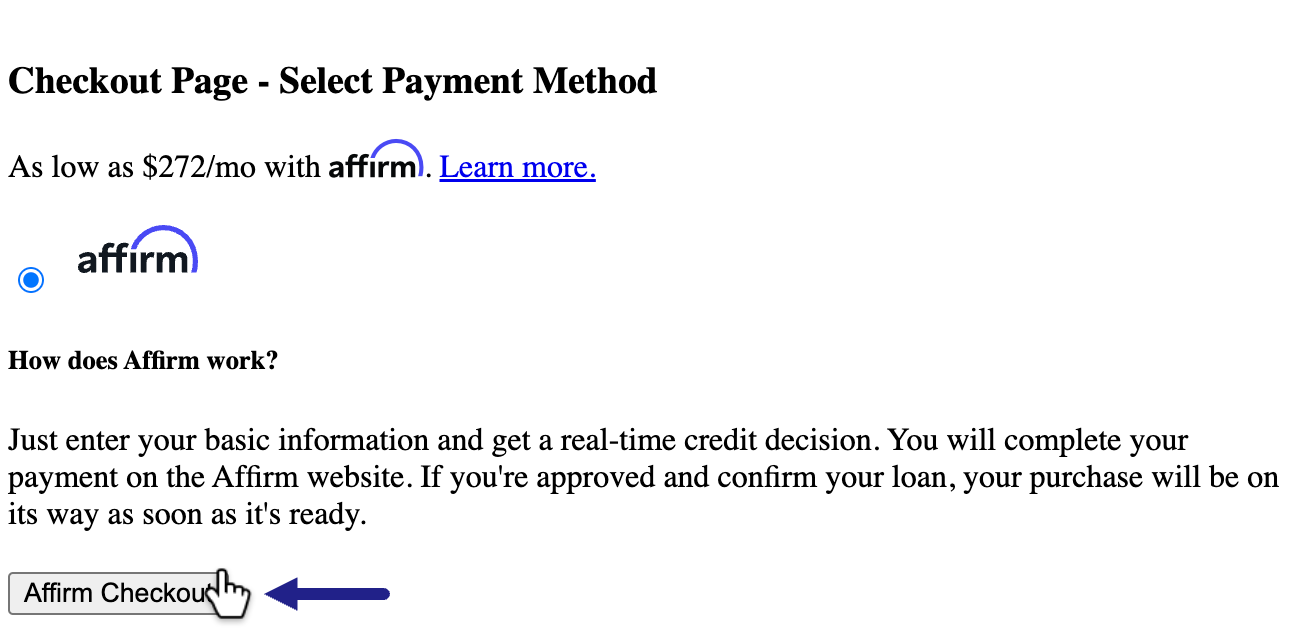
Upon completing the configuration, navigate to the Checkout Page window in the bottom right corner and click the “Affirm Checkout” button.
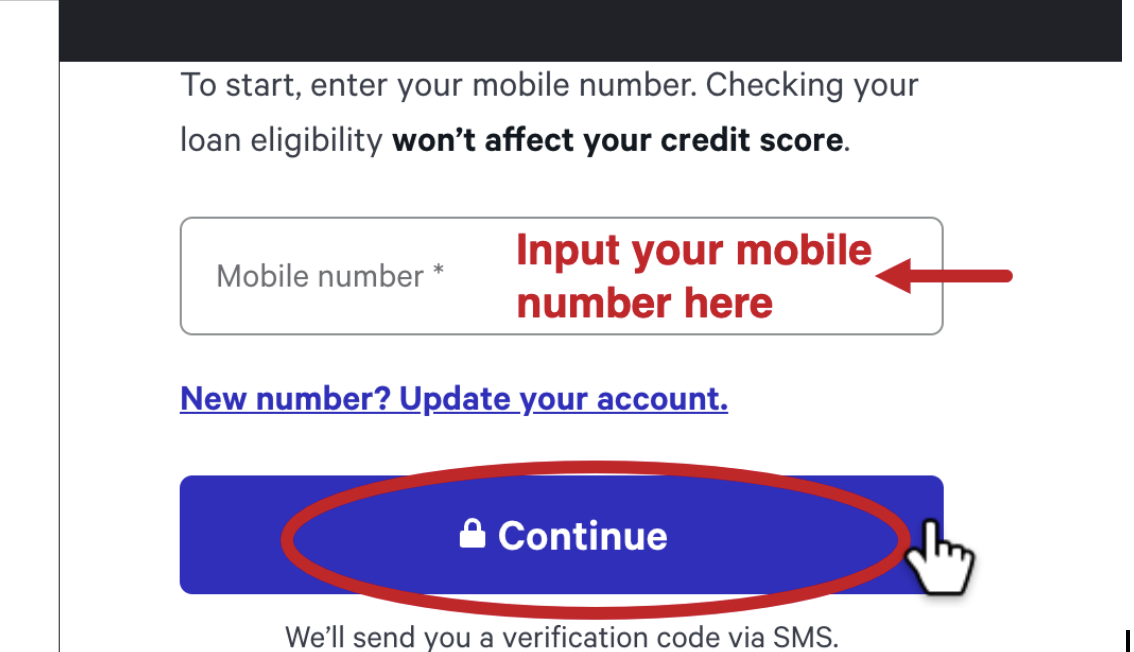
The next screen will prompt you to enter your mobile number, then select the “Continue” button.
Another pop-up window will appear and ask for you to input the verification code which is 1234 for sandbox requests.
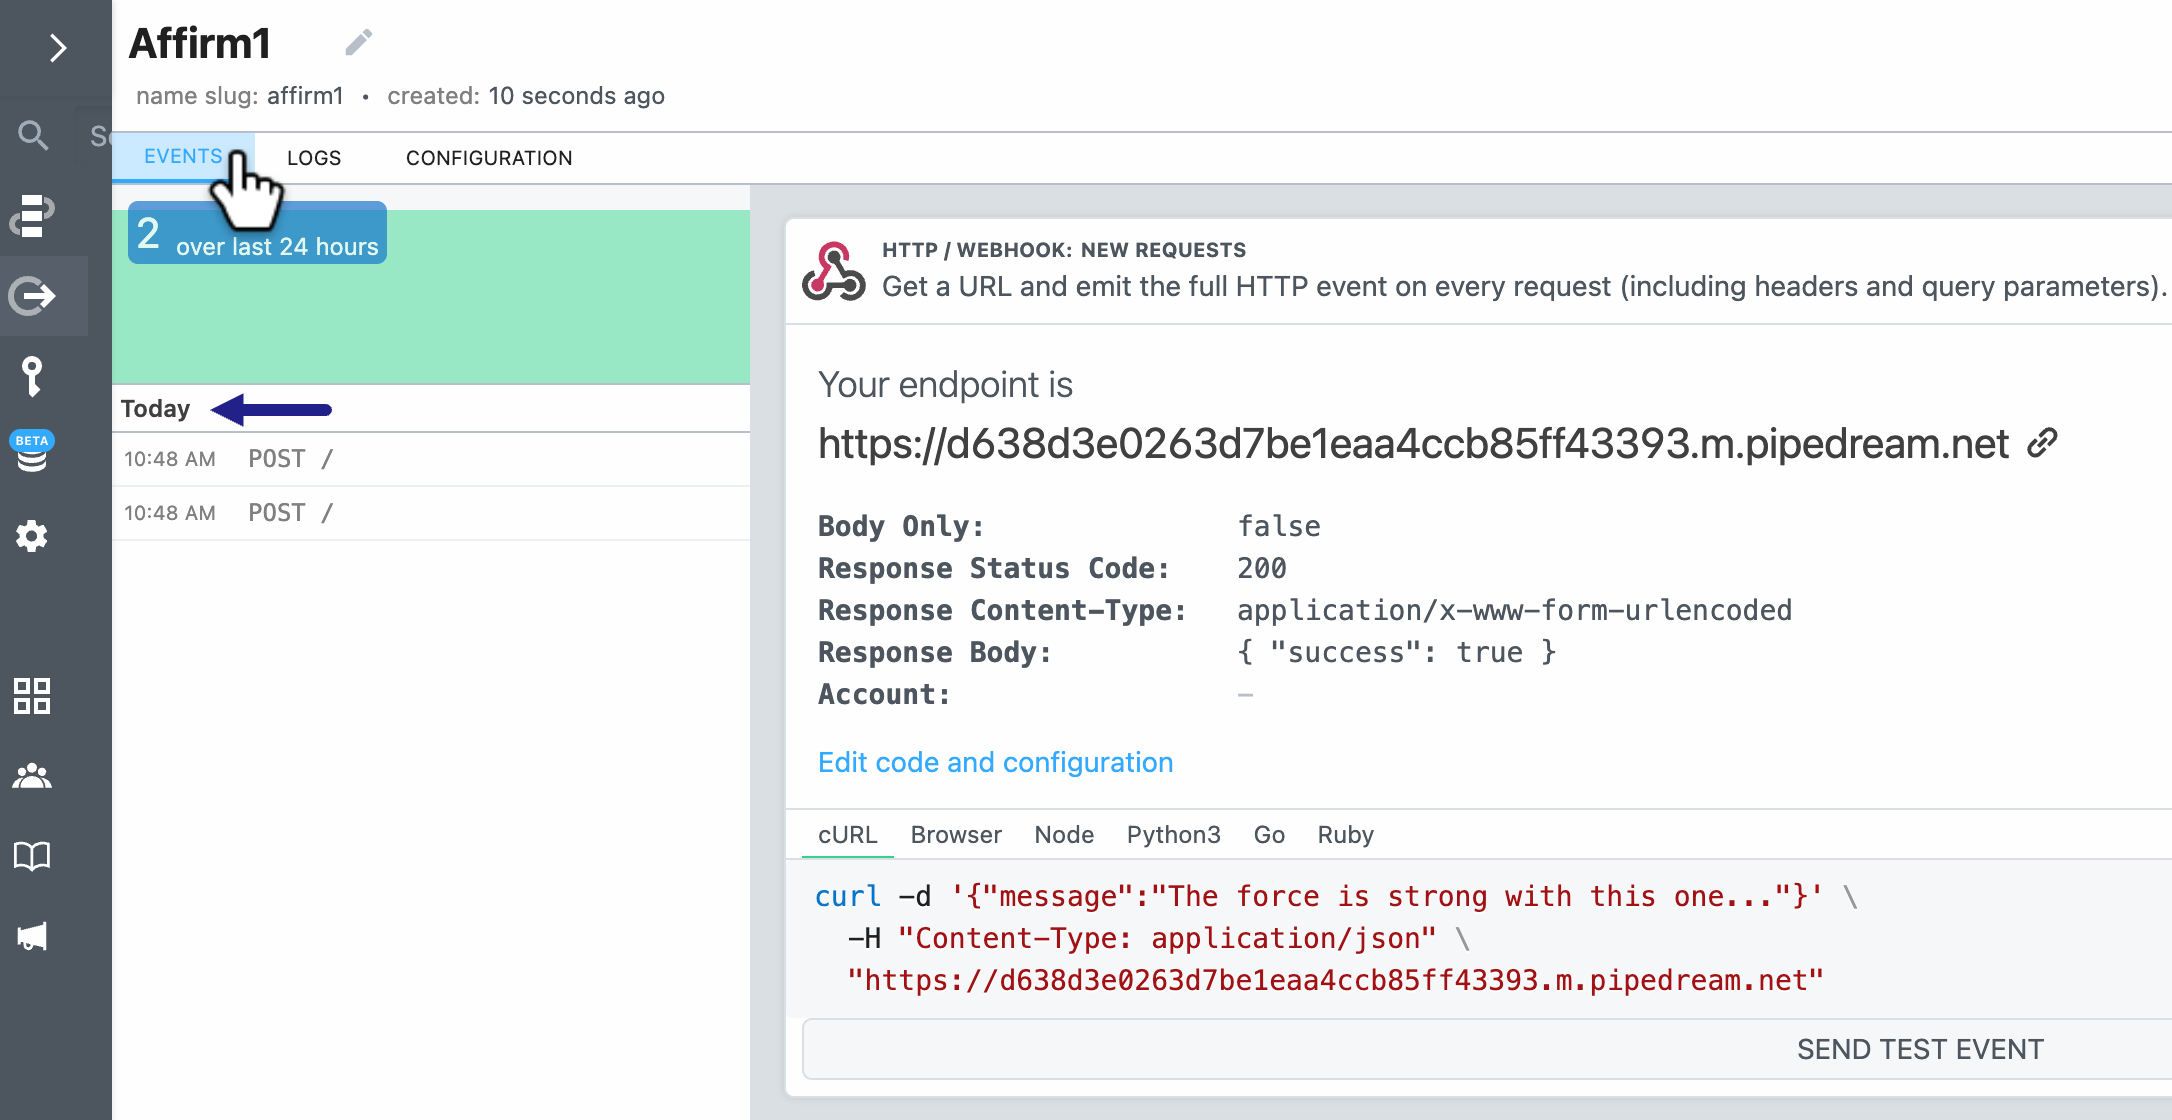
After inputting the verification code, a webhook will be sent. You should be able to see that an event has occurred on Pipedream, which will appear on the left hand side of the screen:
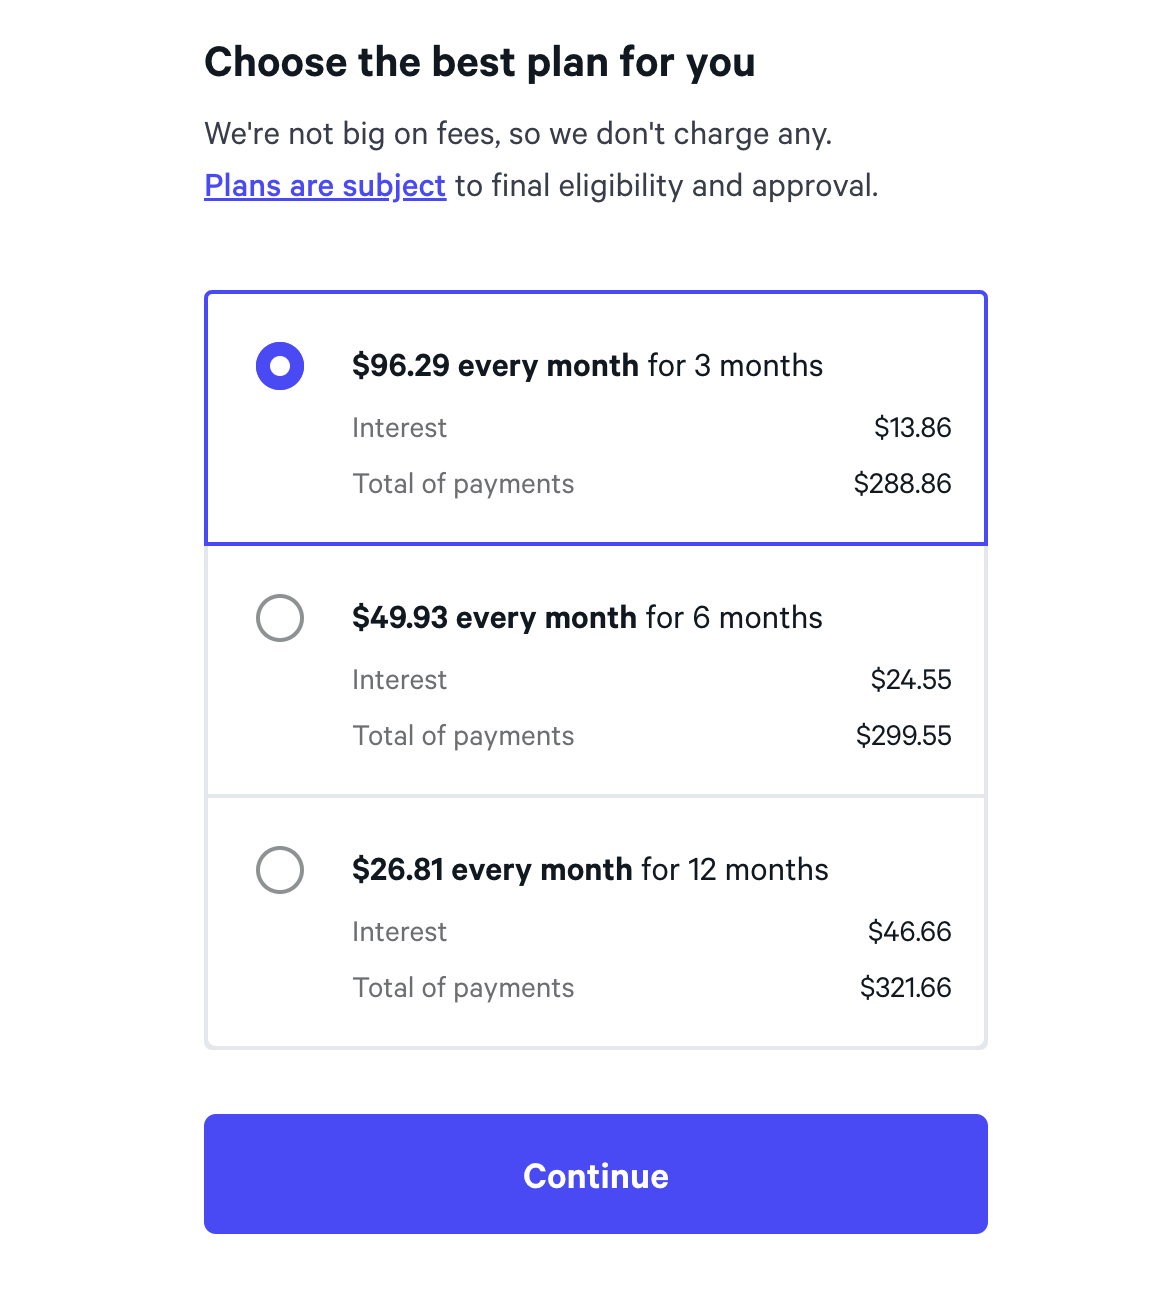
- On the next screen titled, “Choose the best plan for you,” which populates the options for payment terms, select any of the payment options followed by clicking "Continue” to complete this step.
- In our final step you will be prompted to “Review your payment plan” and review the “Truth in Lending Disclosure” and “Loan Agreement.” Once you have read through the disclosures and agreed to the terms, you will check the box, followed by clicking “Confirm” to complete the purchase.
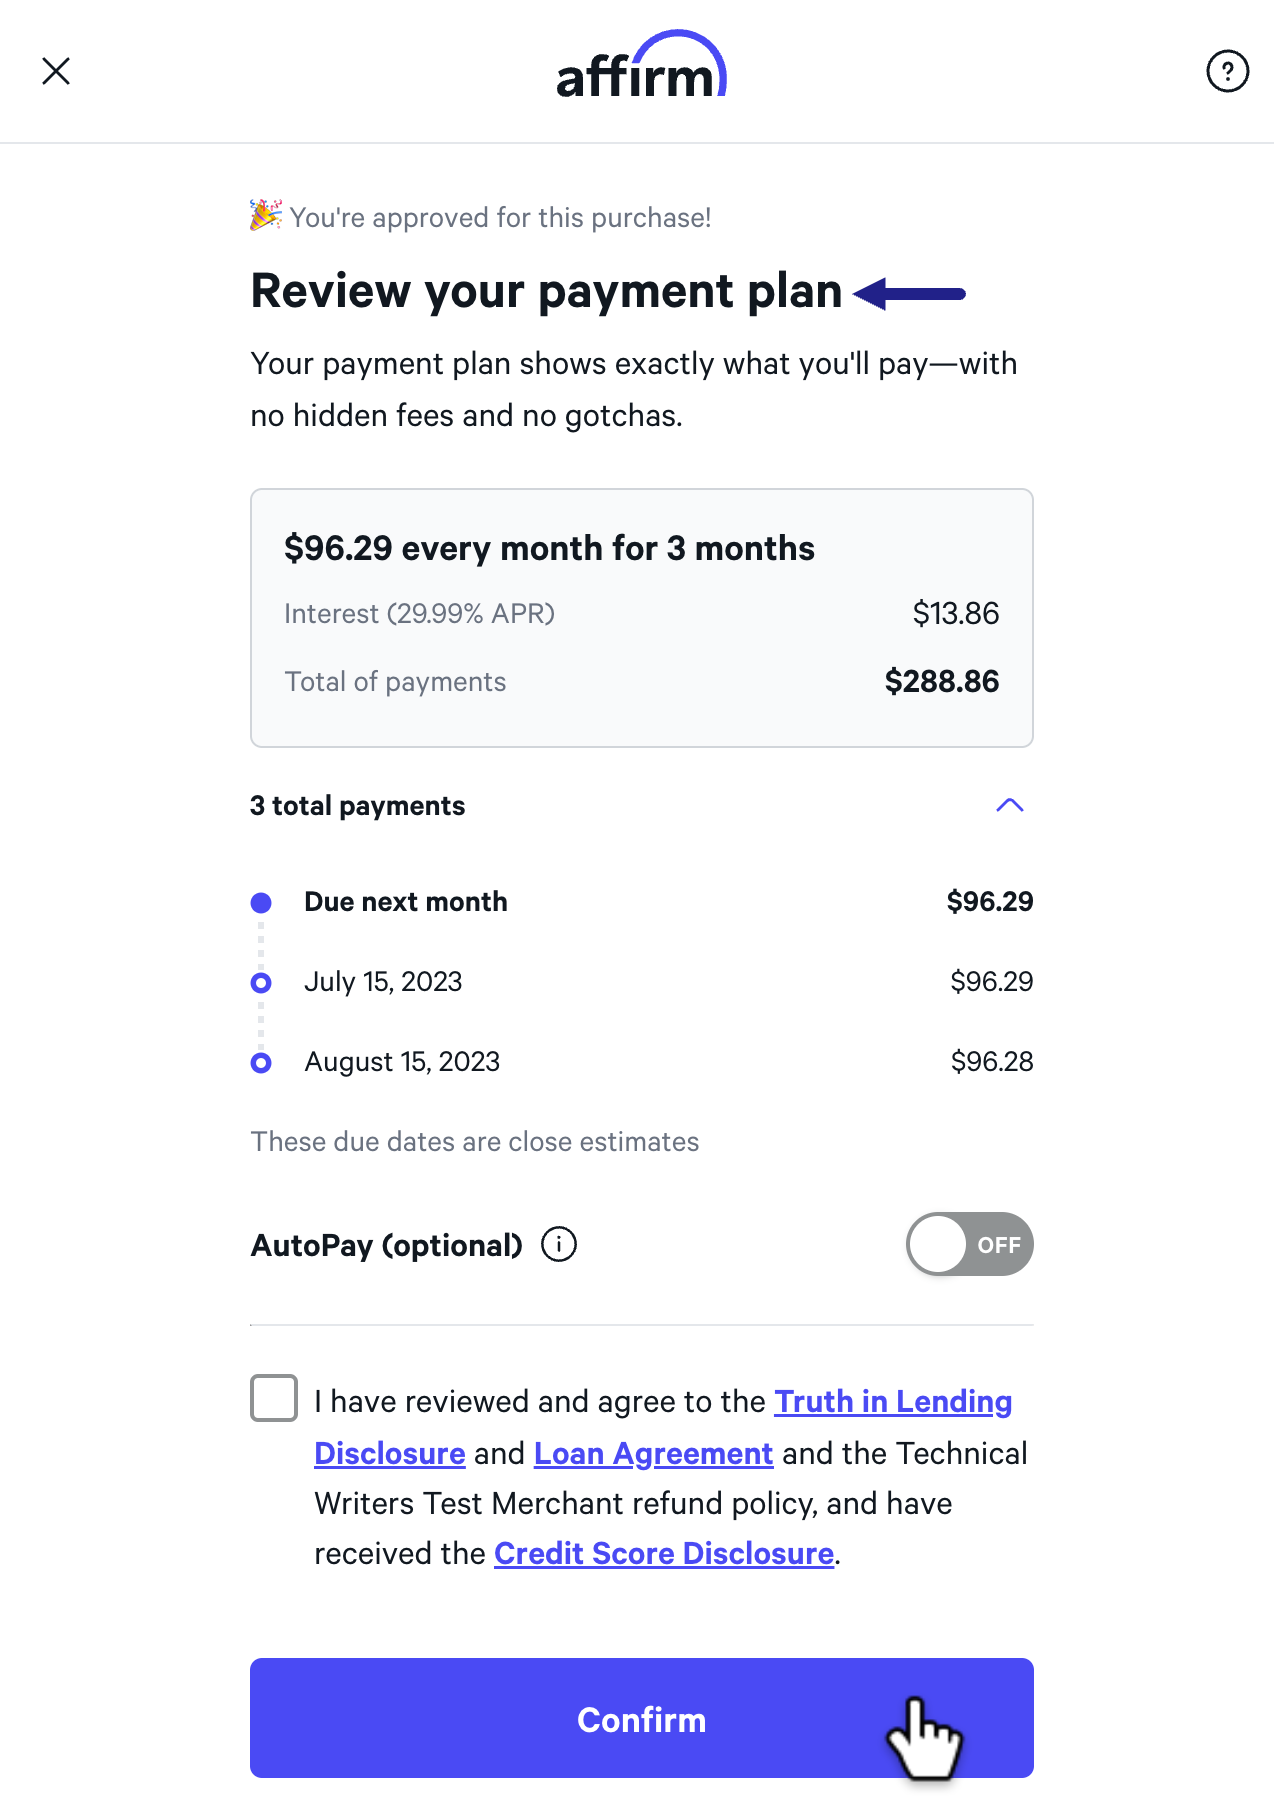
(After selecting “Confirm” another webhook will be sent, so in total the Affirm checkout process will send 2 webhooks.)
WooHoo🎉 You have now completed the Affirm checkout process and sent a webhook! If you would like additional information on webhooks or anything developer related, feel free to visit Affirm’s Developer Docs to get more acquainted.
Subscribe to updates via RSSSubscribe to the Affirm Changelog via RSS to stay up to date on new features, blog posts, API updates, and more!