About Affirm Lite
Learn about Affirm Lite and how it delivers a streamlined pop-up checkout experience that helps boost conversions. This lightweight solution keeps customers on your site and supports features like autofill, fallback, and optional pre-styled buttons.
Country Availability
 USA
USA
Affirm Lite 1.0 → Affirm Landing Page UpdateIf you are looking for the original "Affirm Lite," the product has been renamed to "Affirm Landing Page." This product will continue to function exactly as before, and no changes are required for existing integrations. Review the Affirm Landing Page documentation.
Overview
Affirm Lite is a simplified integration solution that enables you to offer Affirm’s pay-over-time option through a pop-up checkout window directly on your checkout page. By embedding a lightweight code snippet and configuring basic HTML attributes, you can enable customers to complete their purchases without leaving the site, driving higher conversions and minimizing cart abandonment. Affirm Lite also provides fallback options to ensure transaction completion and supports both custom and pre-styled checkout buttons.
The Customer Experience
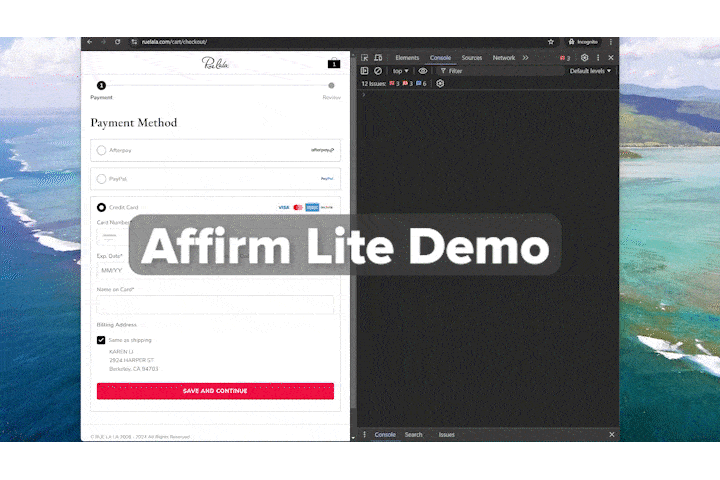
Customers who select Affirm at checkout experience a seamless pop-up interface directly on your store's page. Once they complete the Affirm flow, we generate a Virtual Card with their approved loan amount. The Virtual Card details can either autofill into the site’s payment fields or be manually copied and pasted by the customer, depending on the site configuration and browser security settings (e.g., iframes are not supported for autofill).
If autofill is not possible, the customer is redirected to the Affirm Landing Page as a fallback, where they can complete the purchase and manually input Virtual Card details back into your site’s payment fields.
The Merchant Experience
Merchants only need to take a few quick steps to integrate Affirm Lite:
- Embed Affirm.js on your site.
- Add the Affirm checkout button.
- Enable autofill.
- Process the Virtual Card: When your customers checkout, you can process their transactions using your existing payment gateway integration.
If autofill fails, Affirm Lite also supports a fallback redirect to the Affirm Landing Page and offers pre-styled button options for faster deployment.
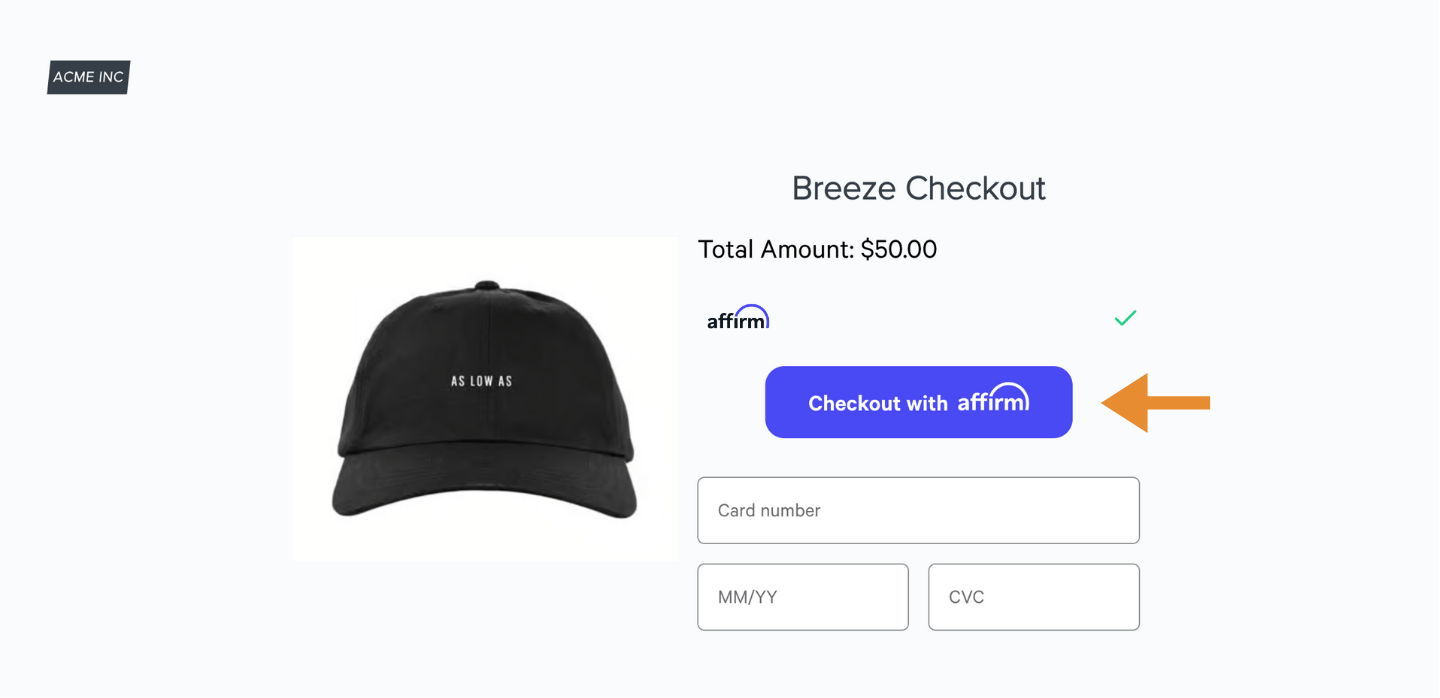
Affirm Lite Pre-styled Button